19 Aesthetics of the Male Breast
Summary
Pectoral augmentation with a silicone implant is an excellent way to get patients the chest they want. This chapter reviews the anatomy and the technical details of a procedure that any aesthetic surgeon who performs routine breast augmentation on women should be quite comfortable performing on men. Additional information is given about BodyBanking fat grafting to enhance a more natural contour and about pectopexy for patients who may require a chest lift.
19.1 Introduction
Men’s chest reshaping with implants was first described in 1965 for reconstruction of chest wall deformities related to pectus excavatum. 1 The use of pectoral implants in chest wall deformities such as pectus excavatum, 2 , 3 , 4 Poland syndrome, 5 and pectoralis major rupture have constituted the majority of literature to date. 6 Early procedures involved subcutaneous implant placement through a presternal incision and were plagued with complications related to implant exposure and seroma formation. The recent use of subpectoral pocket dissection through an axillary incision has significantly improved outcomes. 7 , 8
The first-generation pectoral implants were constructed using a papier-mâché moulage as a model to create a customized silicone form. 2 , 3 In the early 1990s, prefabricated pectoral implants for male patients became available. 7 , 8 These implants contained a cohesive silicone gel within a textured seven-layer capsule. The design was rectangular in shape with rounded borders and a lateral axillary extension.
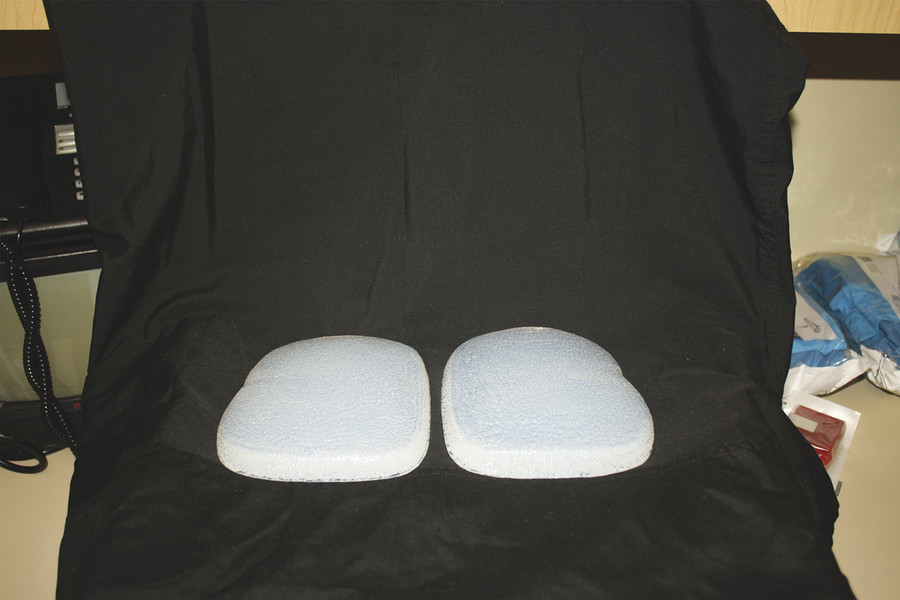
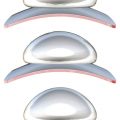
A better understanding of male chest aesthetic anatomy, improved implant design, and refinements in surgical technique have enabled pectoral implants to evolve from a primarily reconstructive procedure into a powerful tool for cosmetic male chest enhancement 9 , 10 , 11 , 12 (Adams B, personal communication). Various sizes, shapes, and projections are now available for use (Fig. 19‑1).
19.2 Physical Evaluation
19.2.1 The Ideal Candidate
The ideal candidate for male chest implants has the following characteristics:
Realistic expectations and goals.
Compliant with instruction.
Lean; very little body fat.
Symmetric chest anatomy.
Good skin quality.
Attractive preoperative shape (“pretty in, pretty out”).
Despite all of these desired features, pectoral implant placement can be very helpful in other situations where the circumstances are less ideal. For instance, implants may be used in concert with other modalities such as liposuction or BodyBanking (developed by the senior author) with fat grafting to the superomedial area of the chest, which can improve the contour in older patients who would benefit from a composite implant/fat strategy for better upper pole volume with a more natural appearance. Also, an eccentric “Easter-egg” periareolar skin excision, or pectopexy, can help in older patients to lift the lower poles. Finally, employing technology such as BodyTite (Inmode, Lake Forest, CA), utilizing radiofrequency energy, may help to tighten the lower chest skin in patients who refuse a periareolar incision.
19.2.2 Implant Goals
The goals of an implant are as follows:
A natural-appearing result.
Central cleavage.
Undetectable implant borders or “step-offs.”
Aesthetic ally congruent with the other muscle groups.
Chest wall harmony.
19.2.3 Physical Exam
The preoperative physical exam includes the following steps:
The quality of skin and subcutaneous tissue is examined for laxity and fatty deposits.
The pectoralis muscle is evaluated at rest and in flexed position while standing. Clavicular, sternal, and costal attachments are defined.
The width is measured from sternum to anterior axillary line along the lower pole.
The height is measured from the clavicle to the lower border in the midclavicular line.
The shoulders, rib cage, sternum, scapula, and spine are evaluated for skeletal abnormalities such as scoliosis, pectus excavatum/carnitum, or Poland syndrome.
Any asymmetry is noted and pointed out to the patient at the time of examination.
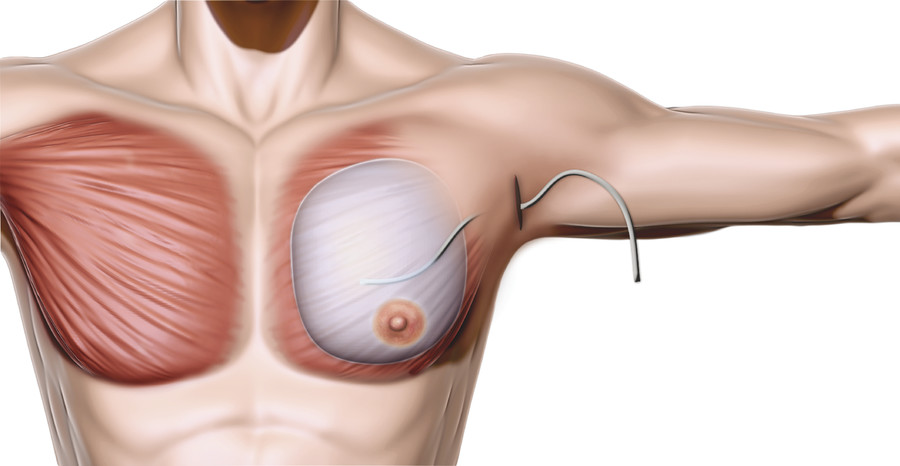
19.3 Anatomy
The aesthetics of the male chest are largely defined by the shape and development of the pectoralis major muscles. A muscular male chest exhibits superior fullness with a transition to a firm inferior chest at the level of the inframammary fold (IMF) and medially over the central sternum. The lateral edge of the pectoralis muscle extends upward from the linea semilunaris to the anterior axillary line.
The pectoralis major is divided into clavicular and sternocostal heads. The clavicular head originates from the anterior border of the medial half of the clavicle, while the sternocostal head originates from the anterior surface of the sternum, the superior six costal cartilages, and the aponeurosis of the anterior rectus sheath and external oblique muscle. The fibers converge to insert on the anteromedial proximal humerus along the lateral lip of the bicipital groove. The pectoral branch of the thoracoacromial artery and perforating vessels from the internal mammary artery provide blood supply to the pectoralis major.
The lower two-thirds of the pectoralis major muscle are innervated by the medial pectoral nerve, which is closely associated with the lateral thoracic vessels. The medial pectoral nerve is at risk for injury during lateral subpectoral dissection, as it passes through or around the pectoralis minor muscle to enter the pectoralis major along the inferolateral border. The lateral pectoral nerve travels more superiorly with the thoracoacromial vessels and innervates the upper third of the pectoralis major muscle. This nerve may also be damaged during more superior subpectoral dissection.
The pectoralis minor is a thin triangular muscle beneath the pectoralis major. It arises from the superolateral surfaces of ribs 3 through 5 and inserts onto the medial border of the coracoid process of the scapula. Arterial supply is derived from the pectoral branch of the thoracoacromial artery, and the medial pectoral nerve provides innervation. The muscle is covered anteriorly by the clavipectoral fascia and divides the axillary lymph nodes according to their position relative to the muscle: level 1, lateral; level 2, deep; and level 3, medial.
The axillary region is directly below the shoulder joint and contains the axillary artery and vein, brachial plexus, and lymph nodes. The anterior boundary consists of the lower border of the lateral pectoralis major, which forms the anterior axillary fold, and is separated from the overlying subcutaneous tissue by the clavipectoral fascia. The posterior boundary is formed by the latissimus dorsi and teres major muscles, which form the posterior axillary fold.
19.4 Solid Silicone Implant
19.4.1 Preoperative Markings
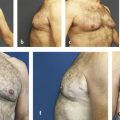
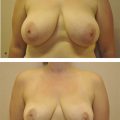
The markings are performed with the patient standing fully upright and the surgeon sitting. The chest anatomy is precisely delineated, with particular attention to any asymmetry present. Abducting the patient’s arm and then raising it over his head helps to define the lateral pectoral border clearly and define the axillary skin crease for incision marking. Repeated flexing of the pectoralis muscle with the arm down also assists in delineation of borders for precise markings. In addition to noting any anatomic differences between sides and incorporating them into the operative plan, asymmetries should be pointed out to the patient and clearly documented. Preoperative photographs are especially helpful to illustrate the asymmetry for the patient. While the implant size, shape, and pocket position should be adjusted to correct asymmetry as well as possible, preoperative identification is paramount to achieving aesthetic success and for managing patient expectations.
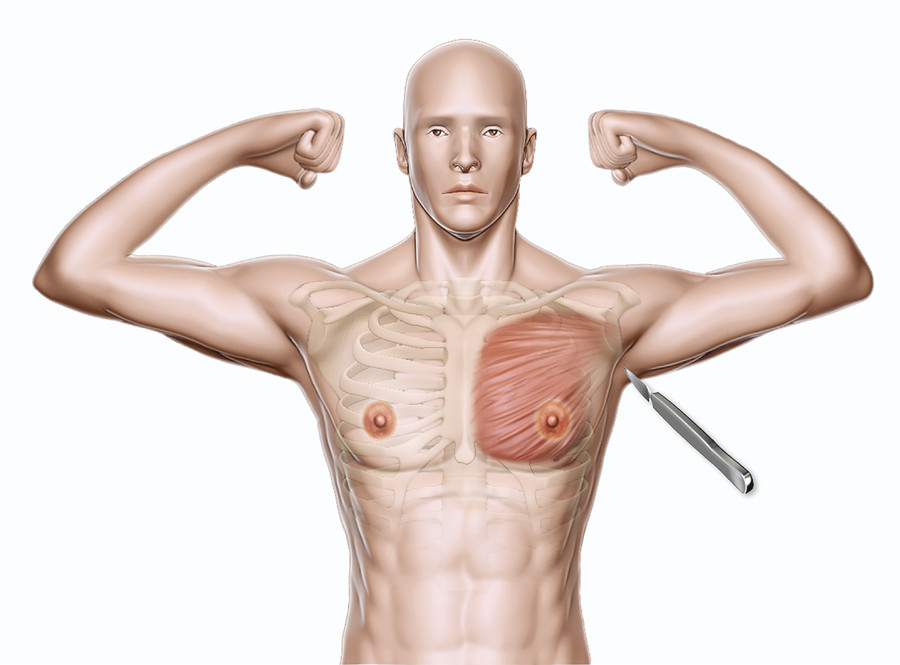
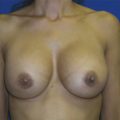
With the arm abducted 90°, the access incision is marked along a natural crease in the hair-bearing area of the axilla. Typically this incision is 3 to 4 cm long to allow insertion of a gently folded implant. Returning the arms to the patient’s sides, the infrapectoral fold (IPF) is marked out. The patient is then instructed to flex his pectoral muscles to delineate the medial orgin of the pectoralis major on the sternum to determine how far medially to make the implant pocket. At this point, areas for BodyBanking augmentation are also delineated (Fig. 19‑2).
The inferior edge of the implant pocket is marked so that it lies under the inferior aspect of the areola. Accordingly, the areas of release to create the implant pocket are marked out. It is important to ensure that the implant is not too large laterally, as it may rub against the arm and cause discomfort. Any areas of BodyBanking fat grafting medially would be marked out now. BodyBanking with grafted fat will allow more volume centrally, creating desired enhanced cleavage for a superior result. It also may be used superiorly to blend the implant to the clavicle to prevent a superior implant step-off with subclavicular hollowing—the unnatural stigmata of a rookie pectoral augmentation.
After all areas of interest have been marked and highlighted, the surgeon should stand up and step a few feet back to assess the overall symmetry. While it is important to be exacting in delineation of anatomic boundaries, minor unilateral variation is typically present, and it is paramount that each side of the chest matches the other. Precise markings translate to operative success and help to avoid patient dissatisfaction postoperatively.
19.4.2 Positioning
The patient is placed is a supine position on the operating table. Sequential compression boots are applied to the legs, antibiotic prophylaxis is given, and general anesthesia is administered. The arms are abducted to 90° and secured to arm boards. The antiseptic surgical prep is widely applied from the neck to the umbilicus, extending down to the table bilaterally; the axilla is prepped last. The operative field is then draped in a sterile fashion with exposure of the entire chest, bilateral axilla, and epigastric area. Antimicrobial drape (Ioban, 3M, St. Paul, MN) may be additionally placed over the surgical field to secure drapes in place and minimize risk of contamination.
19.4.3 Steps for Augmentation with Pectoral Implant
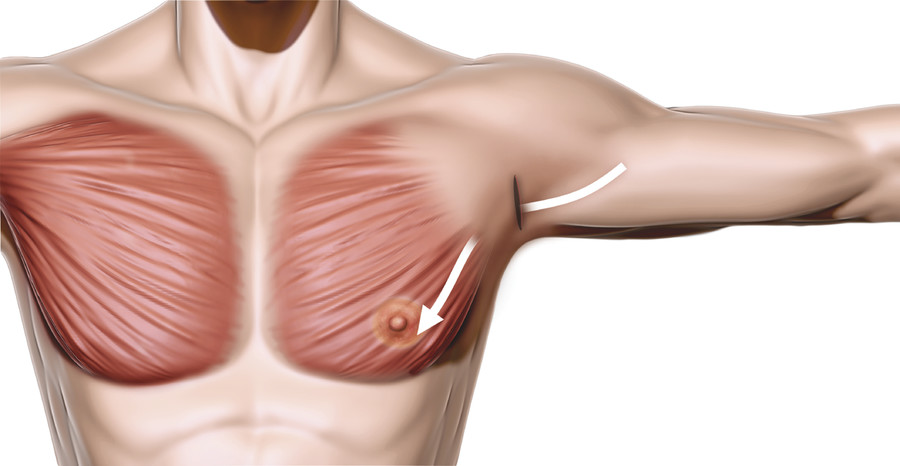
To minimize intravenous and inhalational anesthesia requirements and improve hemostasis, the axillary incision, lateral chest subcutaneous tissue, and pectoralis muscle are injected with 2% lidocaine with 1:100,000 epinephrine. After a wait of 5 to 7 minutes for the vasoconstrictive effect, the axillary incision is made (Fig. 19‑3). Using a combination of dissecting scissors and cautery, a relatively superficial subcutaneous tunnel is developed toward the lateral border of the pectoralis major muscle. Meticulous hemostasis is maintained, and care must be taken to avoid deeper axillary contents.
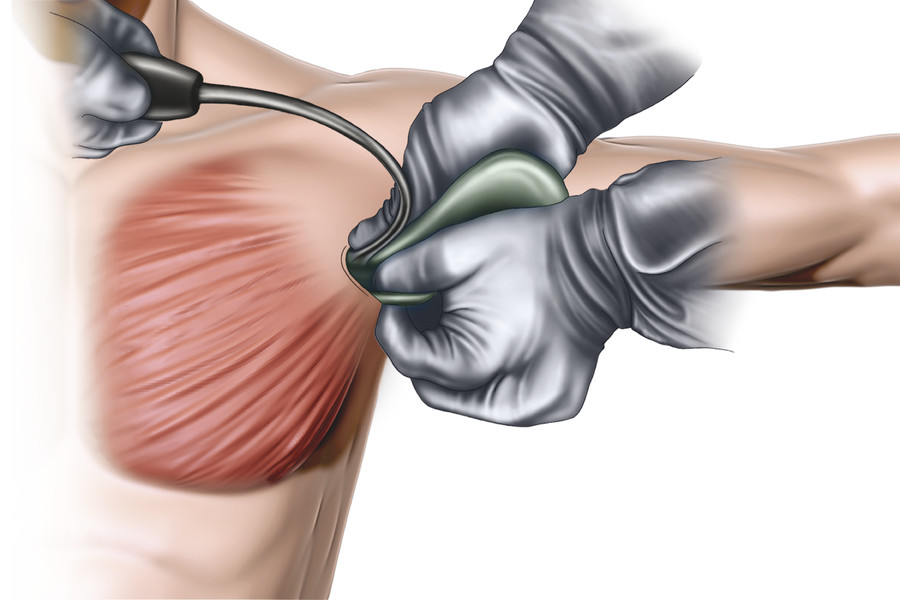
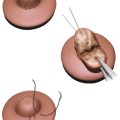
After the lateral border of the pectoralis major is defined, blunt finger dissection is performed under the edge of the pectoralis major to develop an intermuscular plane between the pectoralis major and minor (Fig. 19‑4). A lighted retractor is inserted, and hemostasis is again checked. Using an Agris-Dingman dissector, blunt intermuscular dissection is performed to open the potential space under the pectoralis major. The intermuscular plane is relatively bloodless.

An endoscope is then used to visualize the medial and inferior insertions of the pectoralis muscle. These insertions are selectively released with cautery under direct endoscopic visualization to obtain the appropriate pocket size required for the implant. Once the surgeon is satisfied with endoscopic release, an Agris-Dingman is reinserted to confirm that the pocket dissection matches the preoperatively marked area for placement. The lighted retractor and endoscope are then used again to confirm hemostasis, and the pocket is irrigated with triple-antibiotic solution.
At this point, surgical gloves are changed for a “no-touch” technique. The implant is opened and bathed in triple-antibiotic solution. Both implants are custom trimmed at this time. An 8-mm corner is trimmed in the superolateral corner of the implant for orientation. Clean, unused implant retractors are inserted into the axillary incision under the pectoralis major muscle, and the implant is gently folded and inserted in proper orientation with care taken to avoid fracturing of the implant. Following insertion, the Agris-Dingman is inserted to check for folds in the implant, which are corrected as needed, without causing further dissection that would result in undue bleeding late in the game (Fig. 19‑5).
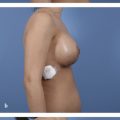
Once the procedure has been completed on the contralateral side, the patient is sat upright on the operating table to confirm appropriate and symmetric implant orientation, projection, and height. When the surgeon is satisfied with the appearance of the chest wall, bilateral 10-mm drains may be placed directly superficial to the implant if there is any question about hemostasis. (Note that the lead author rarely uses drains for pectoral augmentation at this point, feeling that long-term use of drains may cause endogenous atrophy of important periaxillary lymphatic drainage systems, resulting in a rebound seroma once the drain is removed.) It is important to avoid any drain contact with the chest wall skin during placement to minimize the risk of contamination (Fig. 19‑6).
The lighted retractor is again used to check for hemostasis within the axillary tunnel. The lateral pectoral border is reapproximated with the chest wall with interrupted 2–0 Vicryl (Ethicon, Bridgewater, MA) sutures to prevent lateral implant displacement. The deep subcutaneous layer is closed with interrupted 2–0 Vicryl, and a running subcutaneous 3–0 Monocryl (Ethicon) is used for skin closure. If a drain is used, it should be secured with 3–0 nylon and connected to a closed suction bulb.
Any BodyBanking fat grafting can be performed with a long curved 2-mm cannula via a 2-mm incision in the axillary area (away from the primary pectoralis incision). To prevent passive fat egression, entry nick incisions may be made 4 cm inferior to the medial area to be grafted. All of these nick incisions should be closed with 5–0 plain gut suture.
Related posts:
 18 Evaluation and Surgical Management of Gynecomastia
 3 Implant Options
 11 Internal Bra Technique in the Breast with Poor Soft Tissue Support
 12 Reduction Mammaplasty
 14 Management of Acute Complications of Aesthetic Breast Surgery Part II—Malpositions and Rippling
 22 Nipple Areolar Procedures and Aesthetics
Stay updated, free articles. Join our Telegram channel

Full access? Get Clinical Tree


