Introduction
A facelift is an important tool in the armamentarium of the cosmetic surgeon. There are some that attempt to overfill the face to minimize sagging, while others surgically lift sagging skin ignoring skin texture and facial topography. The former approach results in unaesthetic swollen faces, foreign to their original owners, while the latter leads to tight aged skin overlying a bony skeleton, protesting their unnatural tightness over the still aged-looking face. Both overfilling and tightening techniques alone defeat the purpose of what a natural aesthetic face should look like. A face and neck lift are, more and more, recognized as an adjunct to facial rejuvenation rather than the last resort or the “cure all” treatment.
It should be emphasized that dermatologic surgeons are uniquely skilled at achieving excellent results for facelift patients. Aside from surgical lifting, we are experts in treating and improving the quality of the skin and the resulting scars, which are all essential for good and natural outcomes.
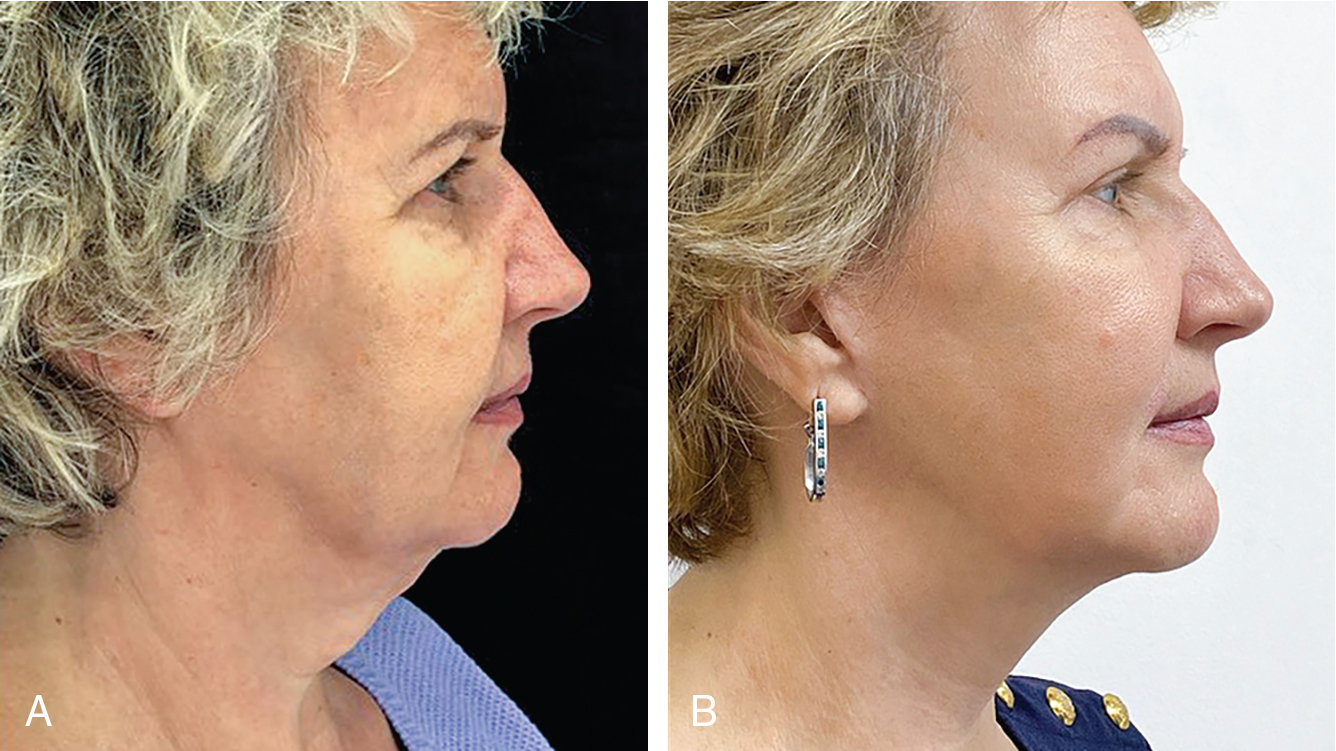
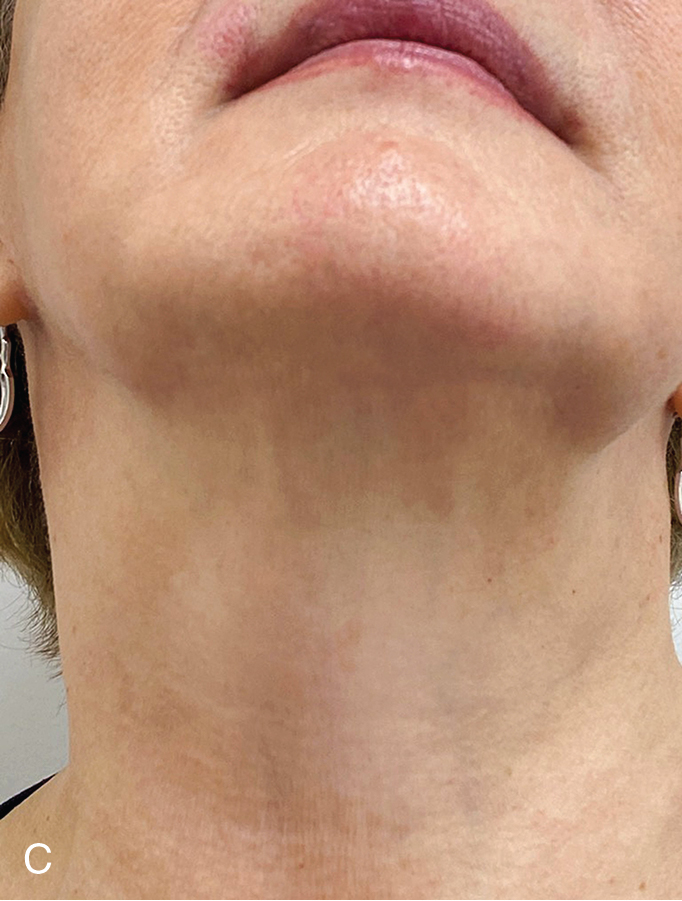
During an evaluation, when a patient is bothered by their skin laxity and poor muscle turgor, a facelift would be the most effective modality to rejuvenate the face and neck. The authors of this chapter often combine this procedure with fat grafting and laser resurfacing that, like a house, help renovate all the visible signs of dilapidated aging.
When proper technique is employed, the results usually hold for over 10 years. This technique requires a thorough understanding of the anatomy and aging processes. Here we will describe, in simple detail, our approach to face and neck lifting that has served us for many years with happy patients and natural, long-lasting results.
Recently, new noninvasive technologies have had a resurrection from acupuncture to facial lifting massage and facial muscle workout videos with the aim and claim of helping to tighten the face. Manufacturers of medical devices have paid attention to this chatter and have perfected these ideas into a science using ultrasound heat like Ultherapy, radiofrequency (RF) or a combination of RF heat with muscle activation to tighten the skin and build muscle, all with the aim of noninvasive lifting of the face and neck. The limitations of these techniques included, most importantly, the inability to allow heat to penetrate safely to the level of the SMAS. A more recent technology, using Monopolar RF and Muscle stimulation, is the first of its kind that safely allows us to begin to address this issue. While not a match to surgery, this new technology is able to achieve temporary facial lifting through tightening of the SMAS in a safe manner.
As this chapter is centered on the surgical technique of face and neck lifting, the detailed discussion of other nonsurgical modalities, while important, are beyond the scope of this section. Still, they deserve to be mentioned and should be considered as they could help postpone the inevitable surgical face and neck lifting procedure and/or serve as adjuvant therapies to prolong facelift results.
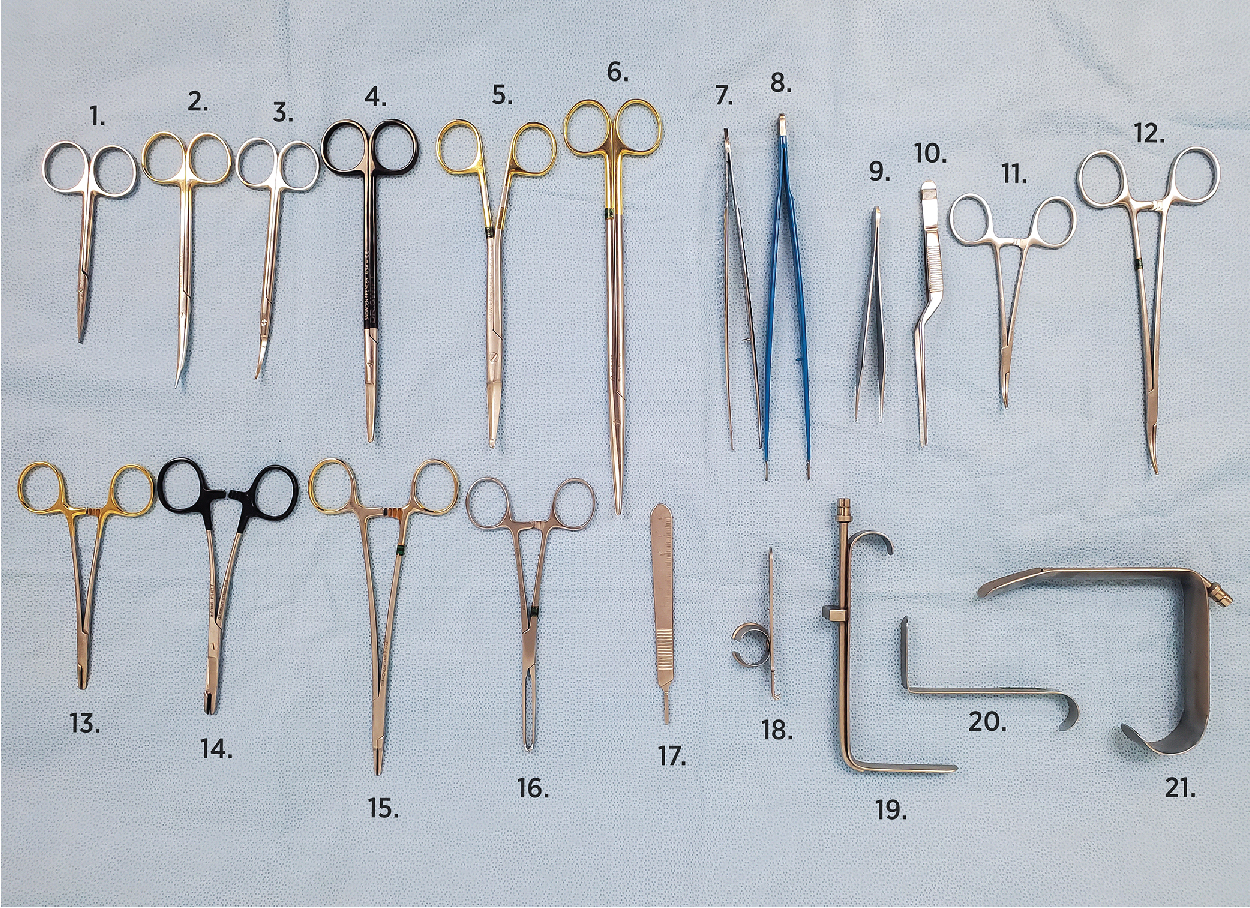
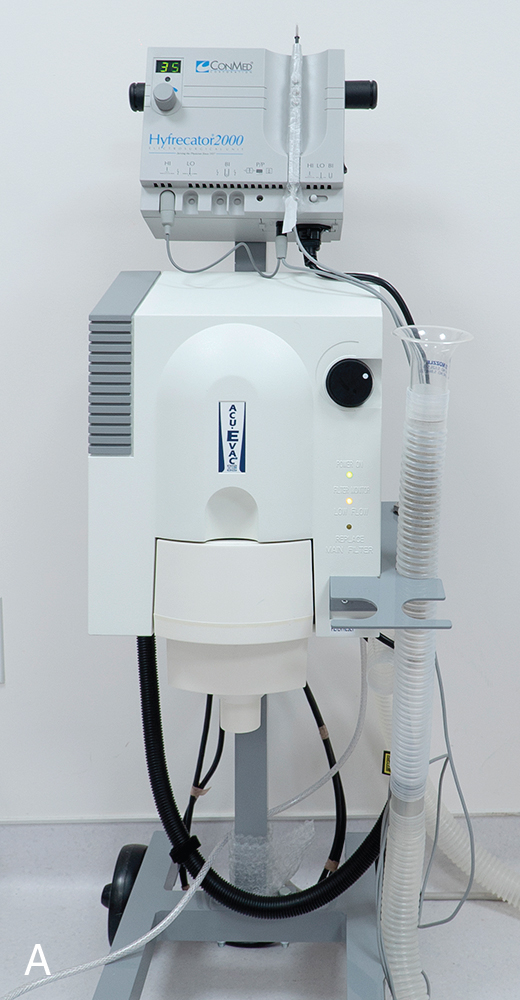
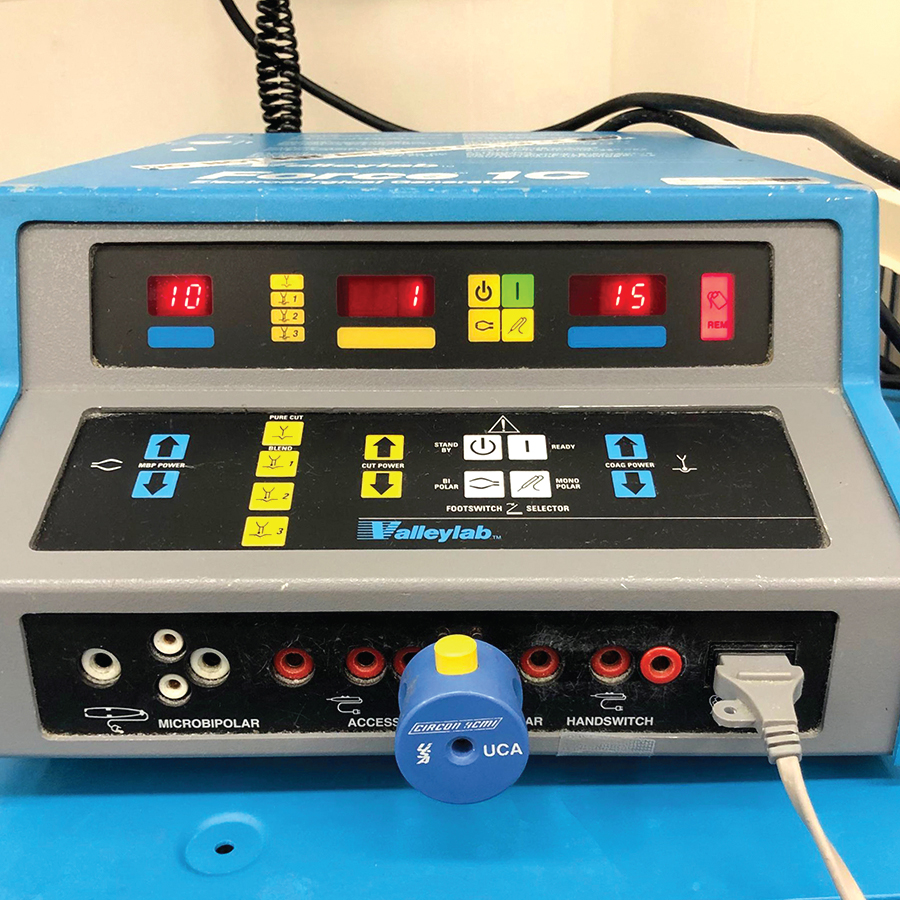
Instruments
Instruments and cautery devices used for face and neck lift procedures are illustrated in Figs. 7.1 and 7.2 .
Evaluation and photography
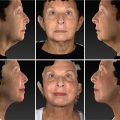
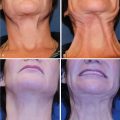
See Chapter 2 for proper preoperative photography techniques. Photographic documentation is a critical initial step in the evaluation process.
Proper, reproducible photographs and consistent lighting are key, as the patients often take their own photos and are very critical of any imperfections, asymmetries, or unreached expectations. Try to under-promise and over-deliver.
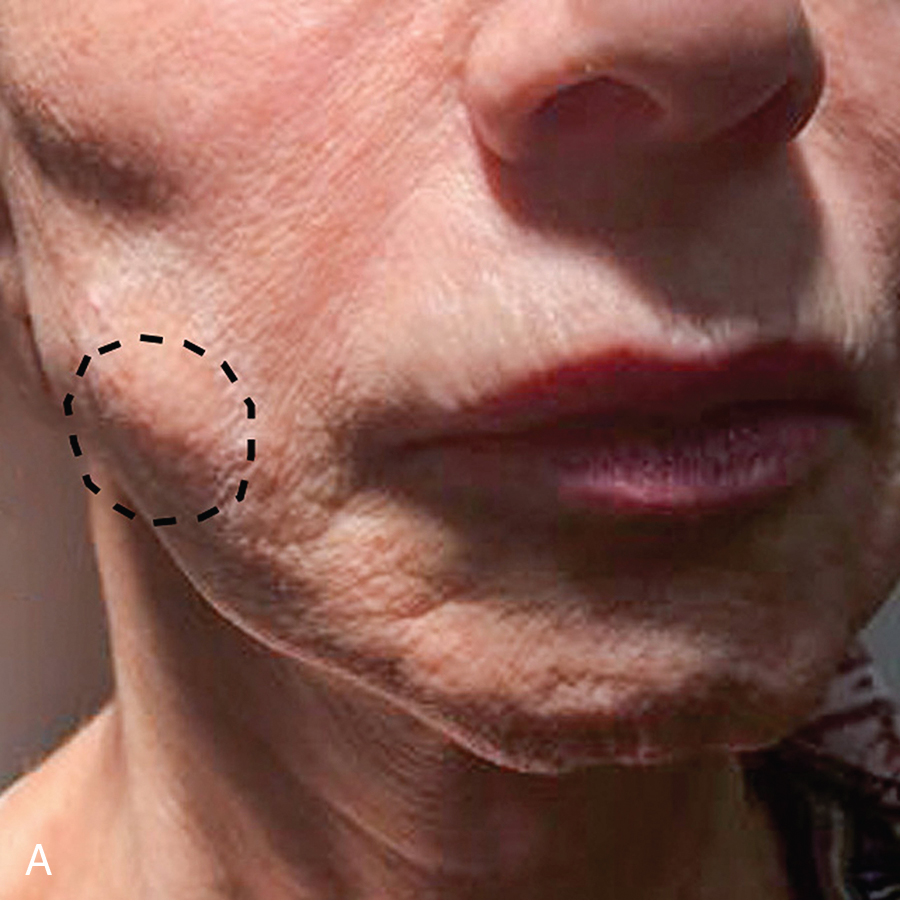
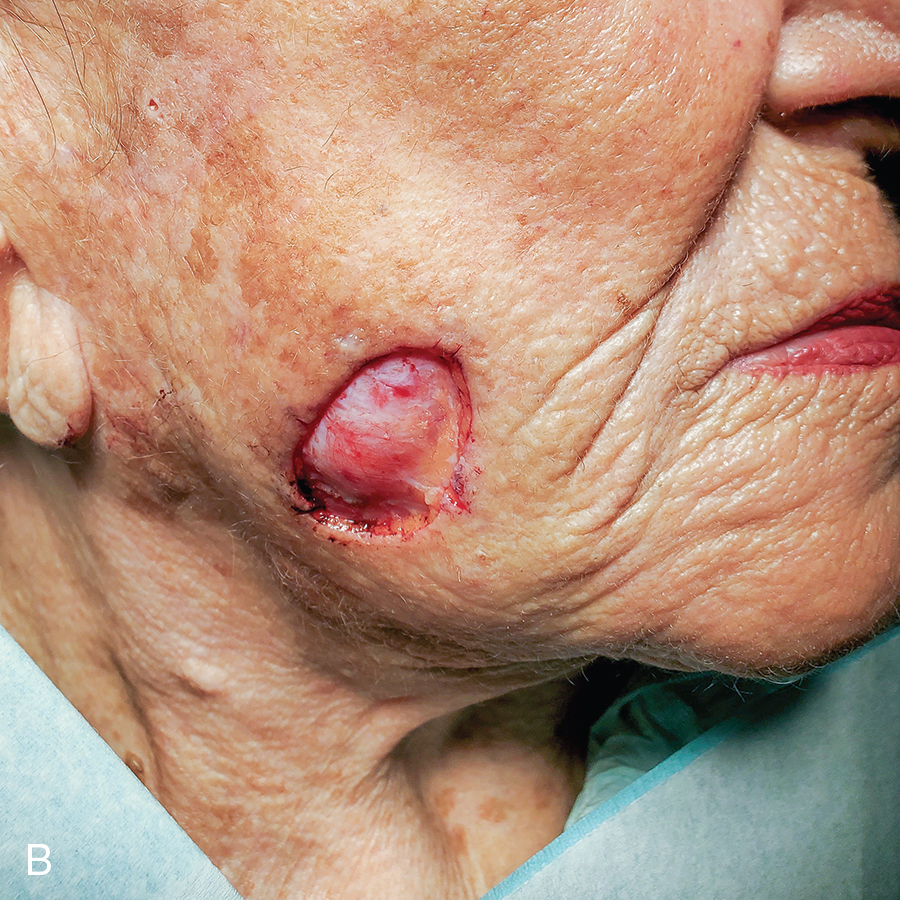
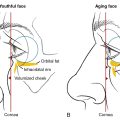
The patient should be examined in a sitting position. One needs to evaluate the degree of pre-existing asymmetry, jowling, submental lipodystrophy, jaw drooping, mandibular resorption/hypoplasia, or micrognathia (in case chin augmentation may be necessary), hyoid bone position, and neck skin laxity, platysmal bands and/or submental fat deposits as well as ptotic submandibular salivary gland or buccal fat pads. Pseudo-herniation of the buccal fat pad may be mistaken for jowl fat. Salivary glands may be mistaken for subplatysmal fat pads. In similar fashion, a subplatysmal fat pad ought to be differentiated from submental fat pad. ( Fig. 7.3 A–C,  and ).
Similar to the snap test when evaluating lower eyelid tensile strength, one needs to examine the platysma and neck skin laxity by noting the degree of elevation achieved by the patient upon contracting the platysma. If the neck is severely ptotic and has the appearance of a turkey wattle, then a neck and facelift should be recommended and non-surgical lifting procedures would be out of question. Contracting the platysma may also reveal platysmal bands hidden under the submental fat that would become unsightly if submental liposuction alone is undertaken.
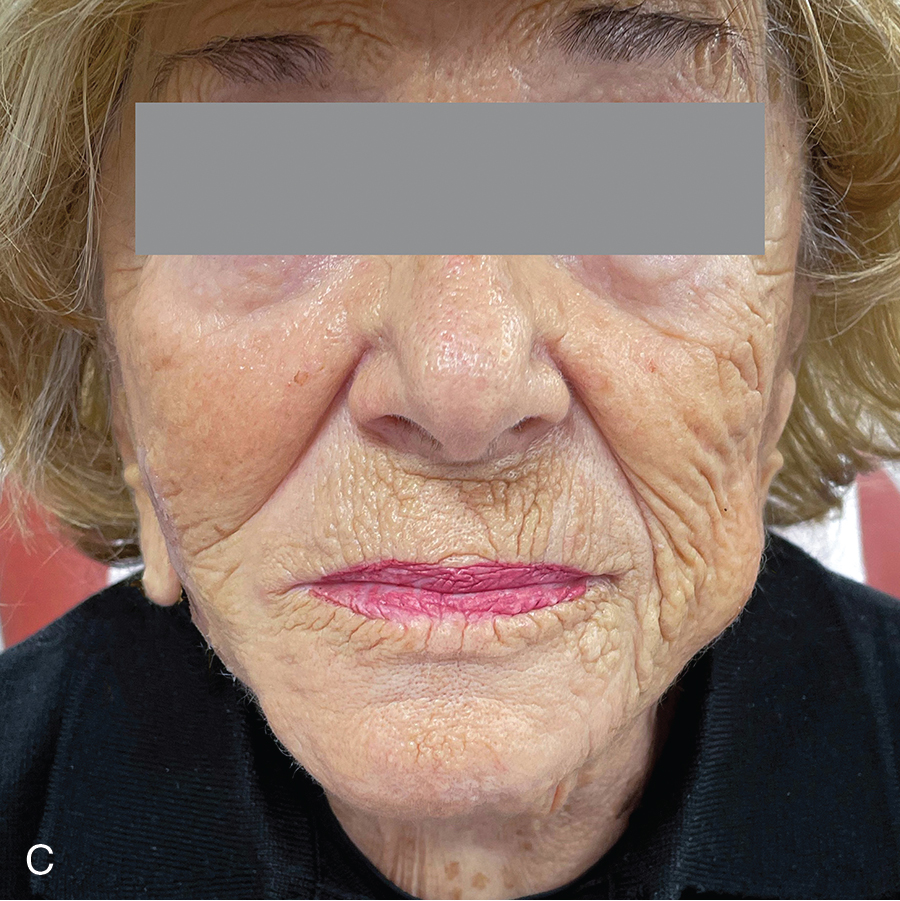
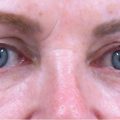
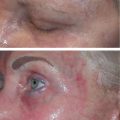
Earlobe shape and whether the ear lobes are attached or free, scars, pigmentary changes, sun damage, and facial capillaries all need to be noted and discussed with the patient. Any lower eyelid edema, festoons (see Chapter 10 ), and facial volume loss must be pointed out. All of these imperfections must be noted and discussed preoperatively. For pre-operative evaluation and markings of the face and neck, see  .
.
Patients and their loved ones often examine themselves more methodically in the postoperative phase. They often note imperfections which were previously present but not appreciated and may contribute these to the operation. Therefore, it is paramount that good clinical photographs are captured. Furthermore, these images should be reviewed with the patient in detail prior to the operation. Any facial asymmetry or imperfections such as facial pores or capillaries needs to be pointed out during this visit.
Blood tests
Complete Blood Count, Complete Metabolic Panel, prothrombin time/international normalized ratio, partial thromboplastin time, electrocardiogram and human immunodeficiency virus (HIV), Hepatitis C panel, are typically checked prior to the procedure. Serum Beta HCG is also checked in all women of childbearing age. A medical clearance from the patient’s primary physician is also important, particularly when the procedure is performed under intravenous (IV) sedation.
Sometimes, despite receiving clearance, the patient may be at risk for an MI. Author EL experienced an event during a blepharoplasty and facelift procedure as he was beginning the facelift after just having completed the blepharoplasty procedure and thus had to stop. The patient was referred for a stress test and angiogram which revealed multiple blocked coronary arteries. Patient subsequently had stents placed and later returned to Dr. Levit and successfully completed her rhytidectomy.
Be vigilant and do not be afraid to reschedule the procedure or stop midway if you feel the patient might be hemodynamically unstable or at risk.
Patients instructions pre and post
See Chapter 2 for Dr. Gladstone’s pre- and postoperative instructions.
Marking the patient (see )
First, degrease the skin with acetone or ethanol if possible. This will ensure that the markings are still visible after the patient is wiped and prepped in a sterile fashion. With the patient holding the mirror and sitting upright, the incision areas are outlined using a surgical marking pen.
It is important to pull the skin anteriorly when making the preauricular markings because this will simulate post-closure skin tension, preventing the resulting scar from migrating anteriorly postoperatively.
If fat injections are planned, those areas are also marked at this time. When beginning, it’s helpful to use different color marking pens to mark the extent of anticipated undermining as well as the angle of the jaw, the jowl fat pads, and submental fat pads. One of the most important aspects in marking is identifying the shape of the earlobes (attached vs. free) and the proper angle where to re-attach those earlobes after the facelift is complete (see  ). We often find a pulled, or “pixie,” earlobe or an unnaturally angled earlobe to the face (see complication Chapter 12 ). The earlobe should be attached at 15 degrees from the angle of the jaw line or 30 degrees from a line parallel to a line connecting the glabella and chin (see ). If corset platysmaplasty is planned, author EL, likes to mark over the skin the location and extent of the platysmal bands to be excised and plicated. An ideal cervicomental angle is less than 120 degrees (90 to 120 degrees). Finally, the danger zones are measured and marked on the patient (see Chapter 1 , surface anatomy danger zones
  ).
).
The markings often need to be redrawn and reinforced after anesthesia is infiltrated, as the anesthesia fluid often erases or causes the pen markings to become faded. The markings will also persist longer if the skin is degreased with acetone before marking the patient. We also noticed that chlorhexidine surgical skin disinfectant is more likely to remove surgical markings than betadine.
Anesthesia and perioperative medications
The authors find that light IV sedation is more conducive to faster healing as long as meticulous attention to cautery is followed. IV sedation allows for tighter blood pressure control and reduced patient discomfort, which results in less bleeding and a faster procedure. Although one can perform this procedure using tumescent anesthesia, and author EL has performed many that way, the extra fluid utilized for anesthesia, may provide extensive tension on the skin flap from the subsequent tissue swelling. Furthermore, the tissue swelling may interfere with proper SMAS recruitment and make plication, imbrication or SMASectomy more difficult.
Anesthesia technique
Once the patient is under IV sedation, the marked incisions are anesthetized with 0.5% lidocaine with 1:200,000 epinephrine. The local anesthesia is injected using a 1 inch 20-gauge needle attached to a 10 cc syringe in the subcutaneous plane in a fanning technique. If the patient is not undergoing IV sedation, then the incisions are anesthetized using 30-gauge needles attached to a 3 cc syringe infiltrating 1% lidocaine with 1:100,000 epinephrine. Following this, the tumescent infiltration cannula is introduced through an 11 blade slit placed at the preauricular and postauricular areas within the area of intended skin excision. A 22 (G) 50mm cannula is typically used to deliver the Klein tumescent anesthesia to the entire face and neck. Each side of the face and the neck area are anesthetized immediately before that side/area is operated on, to account for the duration of local anesthetic in that area ( ).
If the patient is NPO (nothing by mouth) due to the use of IV sedation, they receive 1 g IV cefazolin during the surgery (when allergic to penicillin we use clindamycin 600 to 900 mg IV once). This is followed by 300 mg of cefdinir BID for 7 days (if the patient is allergic to penicillin, then substitute it with doxycycline 100 mg PO BID for 7 days). If there is a history of herpes simplex virus infection the patient is prophylaxed with Valtrex 500 mg BID for 1 week starting the day before the surgery. They should be instructed that it is okay to miss the morning dose if they undergo IV sedation. Occasionally, we use prednisone to reduce swelling given as a single 1 mg/kg IM dose or 1 mg/kg orally daily for 3 days following the surgery.
When performing under local anesthesia, oral valium at 5 to 10 mg single dose is given to be readministered based on the patient’s response and comfort level every 6 hours.
Surgical technique
The hair is pulled back and tied with small rubber bands to expose the marked skin incision sites and avoid the hair from getting into the operating field. The face and hair are then sterilized using Betadine or Hibiclens soap and the surgical field is draped with sterile towels or paper drapes.
Hibiclens (chlorhexidine) can cause serious eye and hearing damage. If Hibiclens is used, one can rinse the area next to the eyes with sterile saline to reduce the risk of keratitis. Placing a sterile cotton ball in the ears also serves to protect the ear canal from Hibiclens toxicity. More importantly, it will help prevent blood entering the ear canal, contributing to conductive hearing loss or foreign body sensation.
Neck lift (see  )
)
We start with the incision in the submental crease (  ). At first, we perform a stab incision using a 15 blade 3 mm below the crease. An elliptical excision is then marked inferior to this marking. The dimensions of this ellipse is typically 25mm (W) x 3-5mm (H).
When a ptotic submandibular gland must be addressed, the author EL finds it helpful to extend the incision below the ptotic gland for better access and visualization of the muscles supporting the gland (mylohyoid muscle) and bordering it (anterior and posterior bellies of the digastric muscle). This approach helps him tighten them by plication in order to achieve a more reliable and lasting result. The drawback is a longer scar that is less effectively hidden under the chin. Special care must be taken to make this longer scar less perceptible ( Fig. 7.4 A–C).
Using a liposuction cannula, the area is undermined and suctioned to the level of the thyroid cartilage, or if more extensive undermining is needed then to the level of the cricoid cartilage (see ).
Author EL has occasionally gone below the cricoid cartilage in order to redrape the entire skin of the neck but it’s usually in this area that he encountered a higher risk of vascular injury and intraoperative bleeding.
To prevent any potential harm to the great auricular nerve (GAN) as it runs superficially above the mid portion of the sternocleidomastoid muscle, the undermining is extended laterally to the lateral neck, while remaining above the cervical fascia. The GAN is a branch of the cervical plexus responsible for sensory innervation of the earlobe and lateral cheek. GAN follows a more superficial course over the upper half of the sternocleidomastoid muscle (CSCM) and Erb’s point, and upwards and towards the earlobe where it divides to anterior and posterior branches. Dissecting superficially over the SCM and carefully here is the key to preventing sensory loss to the lower two thirds of the pinna (see fig 1.6 for sensory innervation). Also, see figure 7.5 A for profile view of facial anatomy relevant for face and neck lift. The danger zone for the GAN injury can be marked 6.5 cm below the external auditory canal and is known as McKinney’s point. The GAN is the most commonly injured nerve in a facelift (see ).
Once the suctioning is complete one extends the submental incision to the predrawn length. At this point, one can either cut out the entire predrawn ellipse or leave that to the end of the facelifting. Using a blunt short and then long undermining scissors, skin adhesions are freed allowing the cutaneous neck flap to be lifted from its underlying platysma muscle. The platysmal bands are identified and may be handled using either plication, excision or high-powered cauterization. Considering the vascularity of the region, and the frequent occurrence of bleeding when dissecting the platysma muscle, the author PL opts for cauterizing the platysmal bands with high-power energy. This is achieved using Elman blunt cautery (see Fig. 7.2 ), with coagulation settings ranging from 40 to 60 HPF (high power field). This approach not only helps to tighten the bands but also flatten any thickened or hypertrophied areas. This latter technique helps to avoid bleeding and prevents a counter pull (the medial corset platysmaplasty pull counters the lateral and superior lower facelift pull). The author EL prefers the corset platysmaplasty through careful excision of the hypertrophic platysmal bands and their imbrication and feels it can provide a longer-lasting result-especially when more extensive platysmal banding is present.
When it comes to plicating (folding over itself without excision) or imbricating (excising redundant tissue and suturing the edges together) the platysmal bands, a 3-0 Vicryl, 3-0 Polydioxanone (PDS), or Maxon suture is employed in an interrupted fashion.
Vicryl’s advantage is better knot security and softness; its disadvantage: dissolves sooner than PDS. PDS and Maxon advantage is- longer hold duration but it’s disadvantage is that it can be felt as a sharp spike when palpating the neck and its knot security is weaker than with a Vicryl suture (see Fig. 7.23 E & F for the SMAS sutures knots bulge visible on the cheek through the skin flap when using PDS sutures).
If severe platysma bands are present, one can use a running suture over the interrupted ones. A 3-0 Vicryl or 3-0 Ethilon is used to run the suture down from the submental incision where the initial knot is tied and run it to the base of the neck (down to the cricoid cartilage), taking small bites and approximating the excised gaps in the platysma muscle (imbricating it), while pulling the muscle edges together as one goes along. Repeating the process by going up and down a few times causes the bunched and everted platysma muscle edges to invert. The procedure is repeated until the desired level of muscle tightness and contour is achieved.
The degree of the cervico-mandibular angle and distance depends on the posterior displacement distance of the hyoid bone from the chin. This aspect should be evaluated preoperatively by discussing it with the patient, utilizing a mirror, and reviewing the patient’s photographs from their youth. In cases where greater anterior displacement is desired, such as in micrognathia, the option of a chin implant can be considered. The implant can be inserted through the existing submental incision.
When suturing the thin platysma muscle, one should take small bites each time to avoid undue tension and possibly ripping through the tenuous platysma muscle.
The skin of the neck is left unsutured until the end of the surgery (allowing drainage, and reducing tension during surgery on the stitched skin).
Once the neck is completed attention is moved up to the face.
Facelift (  ).
).
The first incision
We begin with the right side, the side that was first anesthetized (  ). Using a curved stevens scissors, the earlobe incision is made ( Fig. 7.6 ) and then the freed earlobe has its edges sutured in a V-Y advancement flap using 5-0 Ethilon interrupted sutures (
  ). By implementing this technique, the earlobe is safeguarded against downward pulling and instead is tucked inward.

When we make the incision on the right side we begin superiorly above the ear at the temple and go down. When we perform the incision on the left we begin with performing the ear lobe V to Y advancement then after suturing the earlobe we continue the skin incision from the earlobe upward toward the temple then move to make the incisions behind the earlobe above the posterior ear crease and onto the occipital scalp. This process is done for the convenience of a right-handed surgeon as it is most natural to cut toward the surgeon.
The preauricular incision
Using a #15 or 15 C blade, the incision is made through the superficial fat and is carried down from the temple area, within the hairline, to and around the earlobe and is continued behind the earlobe into the hairline ( Fig. 7.7 A–C,  ). The postauricular incision is made superior to the postauricular fold.

Related posts:

Stay updated, free articles. Join our Telegram channel

Full access? Get Clinical Tree


