Chapter 30 Combining abdominal contouring with hernia repair
• The optimal preoperative management that will improve outcomes and prevent complications is outlined.
• The technique of preoperative markings is described.
• The objectives of an excellent abdominoplasty are outlined.
• The technique of abdominal flap elevation is described.
• The methods of musculoaponeurotic abdominal wall repair are described.
• Postoperative management and treatment of complications are described.
Preoperative Preparation
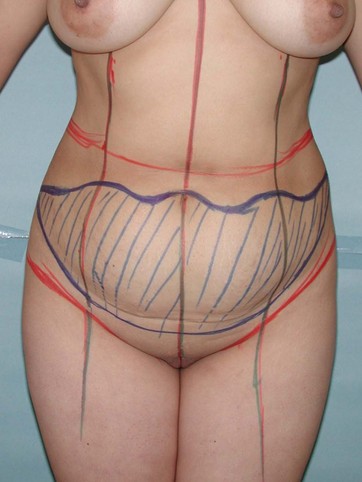
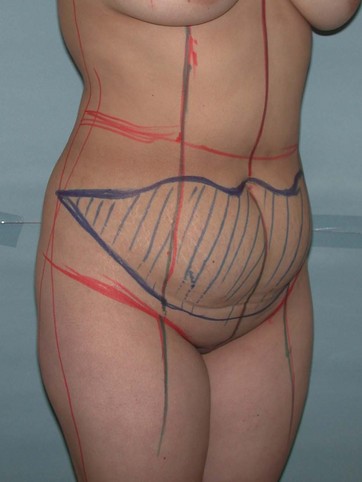
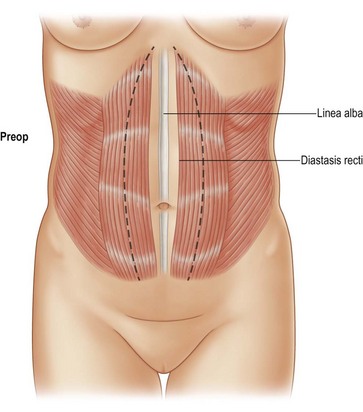
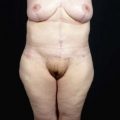
Prior to surgery the patient’s abdominal flaps are marked typically in a U-M pattern while they are standing (Figs 30.1 and 30.2). When the patient is lying down, all the reference points are lost and we cannot be precise in the degree of symmetry of the incisions. See references 1 and 2 for details of marking.1,2 These markings can be progressed to a grid type of pattern.3
Surgical Technique
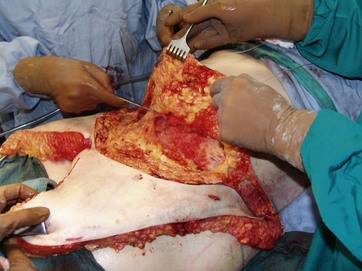
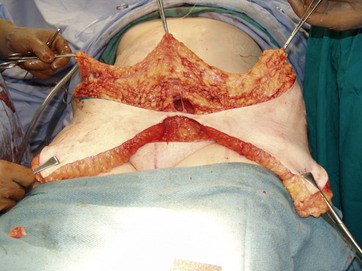
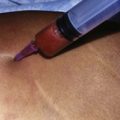
When the dissection approaches the navel, this is cored out after a heart-shaped incision is made. Early coring out of the navel will prevent its accidental transection during flap elevation, especially on very thick flaps. Dissection extends up to the costal margins and the xiphoid area. After a trial of advancement of the flap and changing the operative table to about 45°, the previously marked M component is re-assessed by matching it against the lower incision line. Any discrepancies are adjusted at this point. Trimming of the flap is made initially by incision perpendicular to the skin and then very quickly the knife is turned up to 45° in order to remove as much as possible of the deep fat layer of the upper flap (Figs 30.3 and 30.4).
This deep fat layer is between the Scarpa’s fascia (deep) and Camper’s fascia (superficial). In the middle and upper abdominal skin (to be advanced inferiorly) these two layers are well defined and easy to recognize. This is an excellent way to thin out the advanced flap. Scarpa’s fascia is left attached to the abdominal myofascial layer. In previous publications it has been noted that this maneuver decreases postoperative seroma formation.4
Abdominal Wall Weakness and/or Hernia Repair
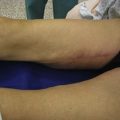
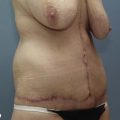
This is done after the skin flap is elevated. A well-executed musculoaponeurotic repair will provide a significant improvement of the abdominal contour (Figs 30.5 and 30.6). There are different variations of repair according to the anatomical problem. If the problem is generalized weakness of the abdomen without any definite bulging or there is a large rectus diastasis, this is repaired after the myofascial release previously described.2
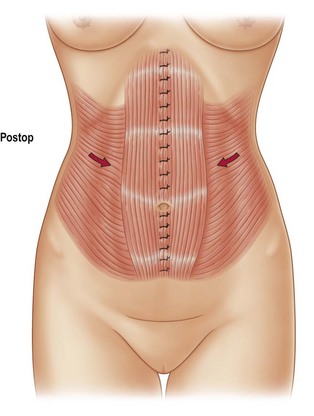
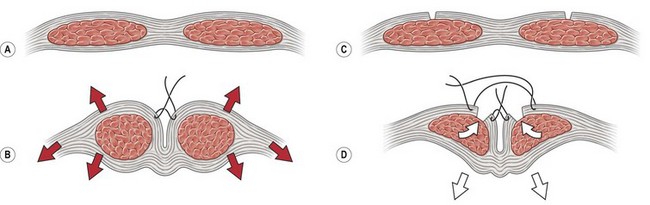
An elliptical shaped marking from xiphoid to pubis on the anterior rectus sheath is done with the widest portion around the waistline, which usually is above the navel. The navel is usually located at the level of the iliac crest. This ellipse varies from 6 to 18 cm in its largest width, with an average of 10.5 cm. The myofascial release is done initially by making 1 cm incisions every 3 to 4 cm on the anterior rectus sheath using a cold knife. The hemostat is introduced and the fascia elevated and in between the blades of the open hemostat incisions are made with electrocautery. During this process, the areas of the tendinous insertions are avoided. I do not recommend making a direct incision into the fascia with the electrocautery device as the muscle tends to contract and jump, which will potentially make the incision deeper, with bleeding in the muscle. After the myofascial incision is completed, the repair is done by application of inverted figure-of-eight 2-0 nylon sutures applied to the lateral edge of the rectus sheath incision (at the border at the myofascial incision). The suture bites should include muscle layer. The muscle will work as a pledget to the fascia and prevent its disruption. Two key sutures are applied initially, one above the navel and one below the navel. This will set an easy closure because immediately you will see a drop of the muscle below the level of the rectus repair line (Figs 30.7 and 30.8). Since this will significantly bury the navel it is important to tag the navel with 3-0 nylon sutures to retrieve it later. The rest of the myofascial repair is completed from xiphoid to pubis.
< div class='tao-gold-member'>

Stay updated, free articles. Join our Telegram channel

Full access? Get Clinical Tree


