28 The Wise Pattern Mastopexy Augmentation
Summary
The Wise pattern augmentation mastopexy technique is used in the following cases:
• Grade 2 or 3 ptosis, vertical and horizontal skin excess.
• The lower breast area is relatively full.
• The nipple–areola complex (NAC) requires a long transposition.
Patients who benefit from this technique have flattening of the superior pole, and most of the breast parenchyma is below the inframammary fold. In these cases, simply tightening the skin over the supporting breast is not adequate, and a breast implant is necessary. Goals and expectations of the patient are discussed in detail during consultation, and a thorough personal and family history is performed. Physical examination focuses on their current breast size, degree of ptosis, and any breast asymmetries. The patient is marked in the upright standing position and brought to the operating room. The incision is made through the mastopexy resection pattern and a subpectoral pocket is created. The trial gel implant is placed, and temporary tailor tacking of the skin is performed. The formal implant is then placed using the Keller funnel no touch technique, and the pocket is closed. The NAC is left in situ, and the intervening skin is deepithelialized. A superior pedicle is created, and appropriate vertical and horizontal amount of tissue is removed and recorded. The lower areola to inframammary fold distance is chosen on average at 7 cm. Vertical pillar sutures are placed, and the wounds are closed in layers. No drains are used, and the patient is discharged home the same day.
Key Teaching Points
The Wise pattern augmentation mastopexy is used for grade 2 or 3 ptosis.
It addresses vertical and horizontal laxity.
Suitable for patients with flattening of the superior pole and breast parenchyma below the inframammary fold.
The implant is placed in the partial subpectoral pocket.
No touch technique is used with the Keller funnel for insertion of the implants.
Temporary tailor tacking of the skin is performed with skin staples.
Superior pedicle is created.
The vertical pillars are sutured together.
Surgical Plan
Preoperative markings to designate the new nipple position and circumference of the areola. Displacement of the breast medially and laterally before drawing a vertical line from the lower portion of the new areola to a point 1 cm above the inframammary fold.
Vertical incision within the mastopexy resection pattern down to the pectoralis fascia.
Pectoralis major muscle released inferiorly, and a submuscular pocket created for the implants.
Sizers placed and the breasts stapled closed. The patient is sat up and symmetry is confirmed. The sizers are removed. The formal implants are placed with a Keller funnel using the no touch technique.
The pockets are closed. The skin is tailor tacked and the patient is sat up again to verify the mastopexy marks.
The nipples are traced with a cookie cutter. The marks are incised and the intervening skin deepithelialized. A superior pedicle is created. A small wedge of tissue is removed from the vertical limb to improve the contour. The skin is again closed with staples. A 7-cm inframammary fold–areolar distance is used, and an appropriate elliptical excision pattern designed, to maintain the ideal inframammary fold–areolar distance.
The lower skin ellipse is removed with great care not to enter the implant pocket.
With the shape and size confirmed with the patient sitting up, vertical pillar parenchymal sutures are placed. The skin is closed in layers, interrupted deep dermis sutures, and a running subcuticular suture.
28.1 Markings
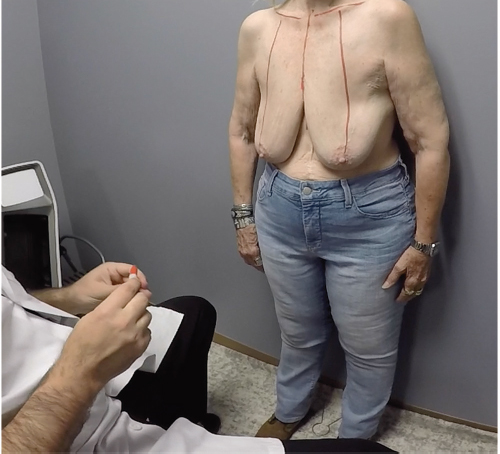
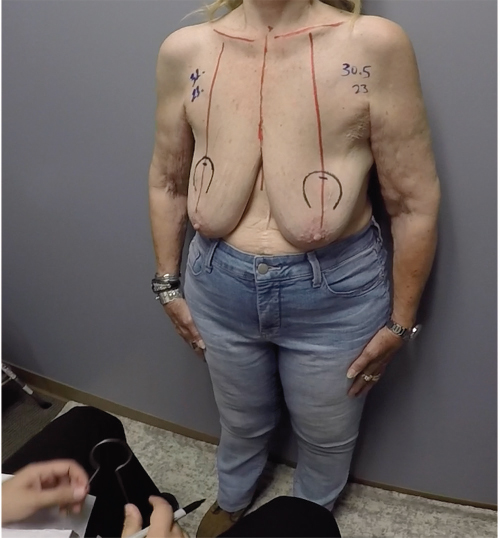
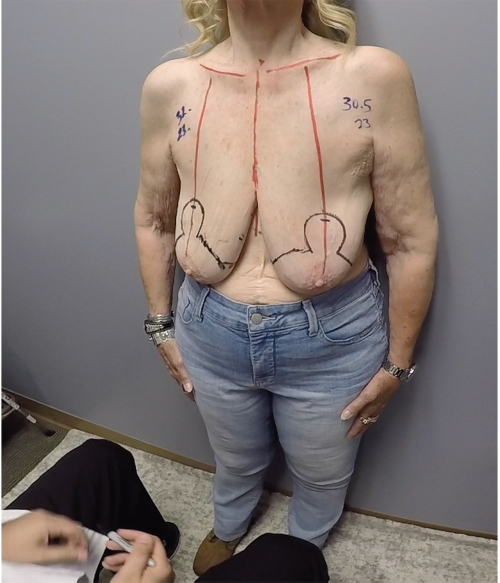
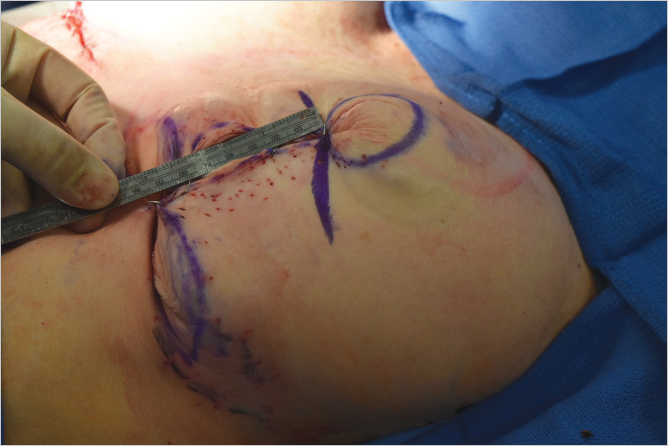
Preoperative markings are similar to those for reduction mammoplasty. Because an implant will be used, less skin is marked for excision. Additional skin is excised after the implant has been placed. The patient is marked in the upright standing position, and the following markings are made: midline, from sternal notch to xiphoid, inframammary fold, and breast meridian (▶Fig. 28.1). The new nipple location is marked by transposition of the inframammary fold to the front of the breast, at the level of the meridian. The top of the areolar opening is marked 1 to 2 cm above the new nipple position. With the use of a keyhole breast reduction marker (42 mm), the areola opening is marked (▶Fig. 28.2). The breast is displaced, first laterally and then medially. Vertical lines are drawn from the lower portion of the new areola to a point 1 cm above the inframammary fold (▶Fig. 28.3). Measurements are made bilaterally, from sternal notch to nipple, and from midline to ensure symmetry. Finalized markings are shown (▶Fig. 28.4).

28.2 Technique
The Wise pattern mastopexy augmentation with a smooth round silicone implant, partial subpectoral placement, and dual-plane creation.
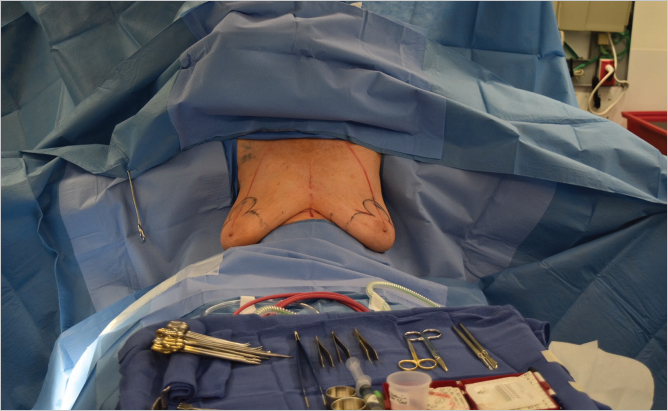
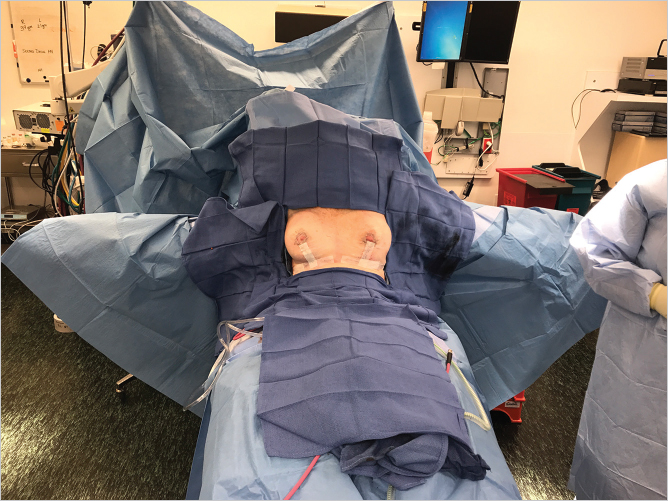
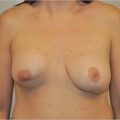
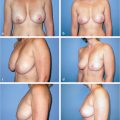
The patient is brought to the operating room and placed in the supine position on the operating table with the arms extended up to 90 degrees and well secured to the arm boards. Both shoulders should be at the same height. The patient is sat up to evaluate the preoperative status (▶Fig. 28.5).
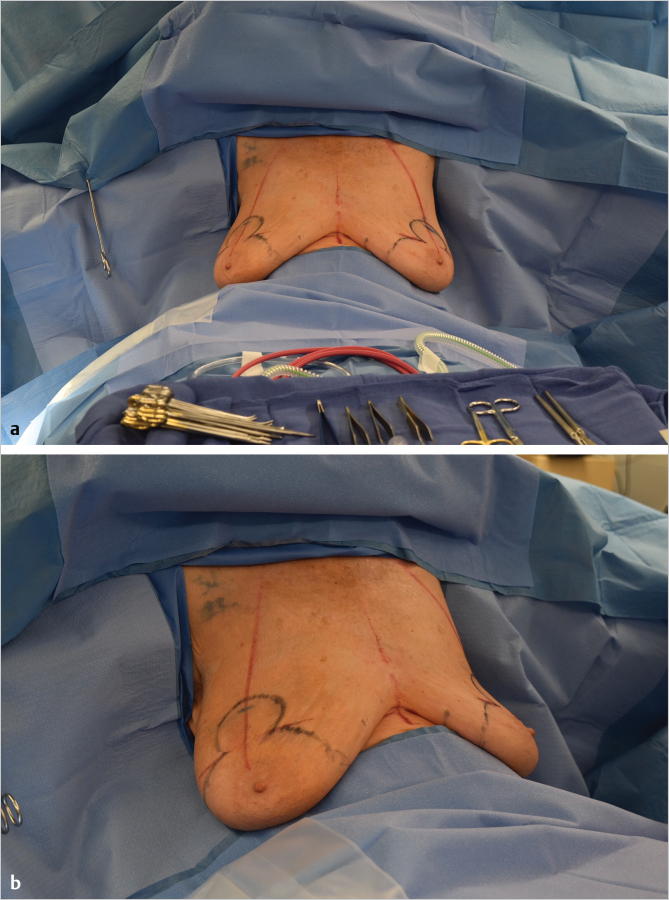
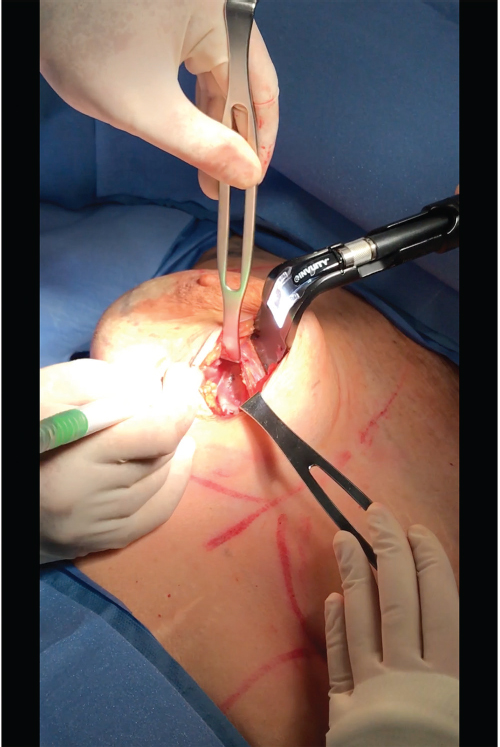
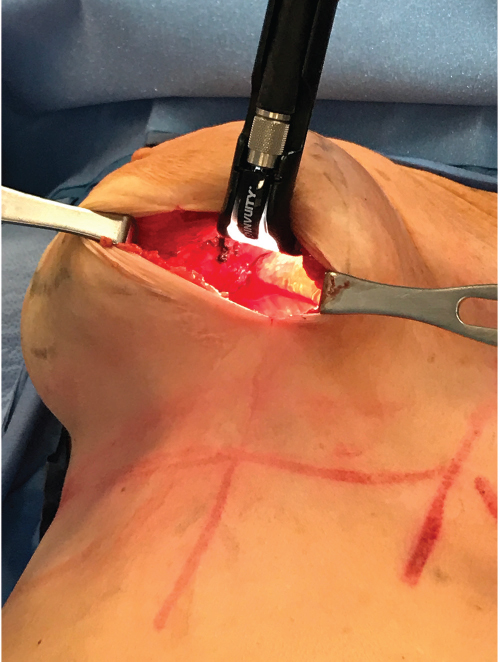
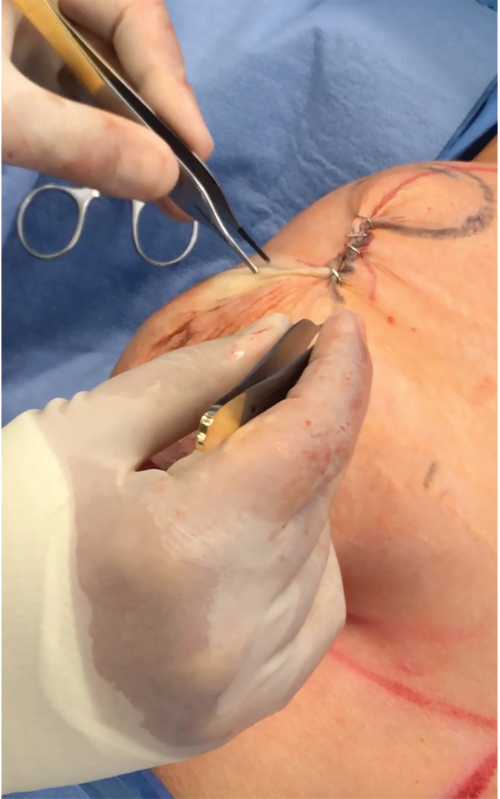
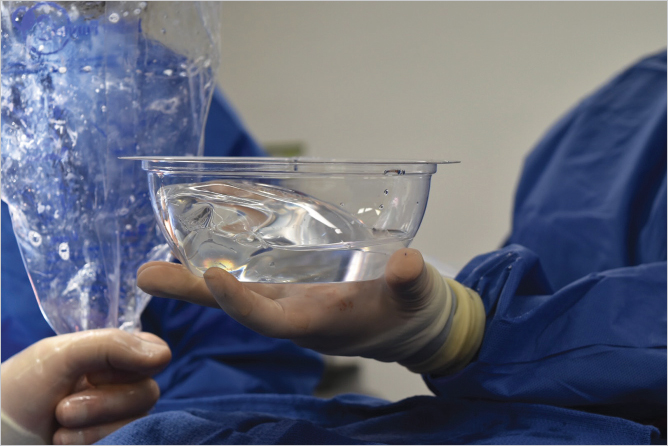
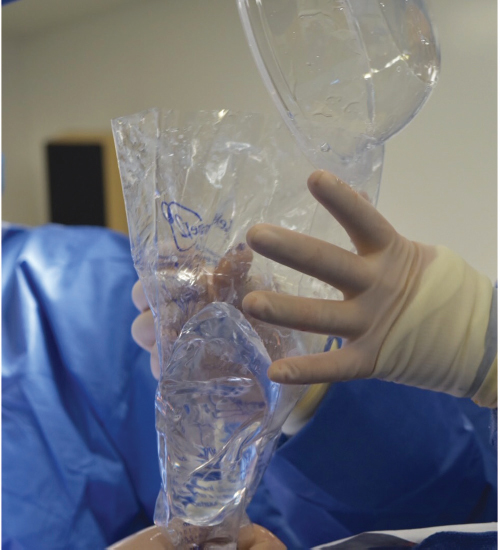
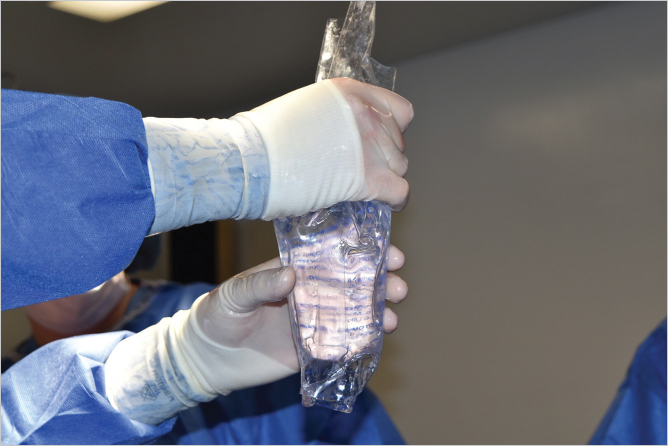
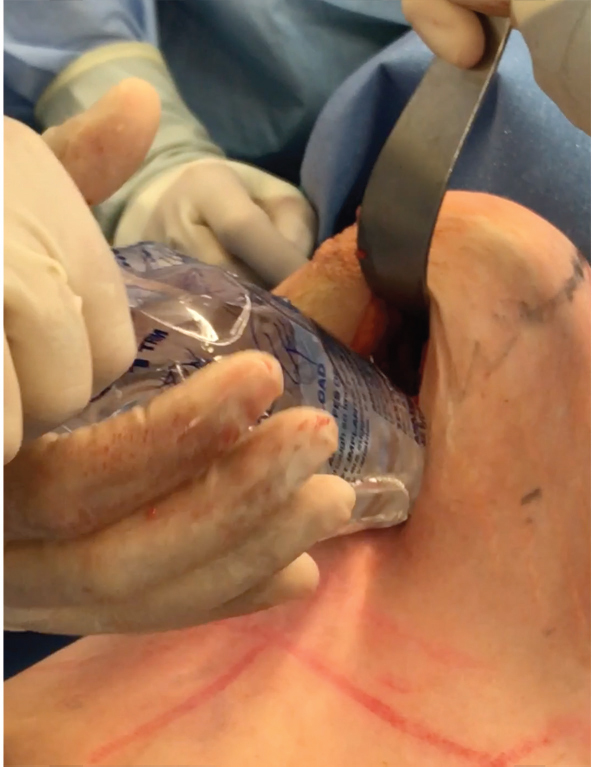
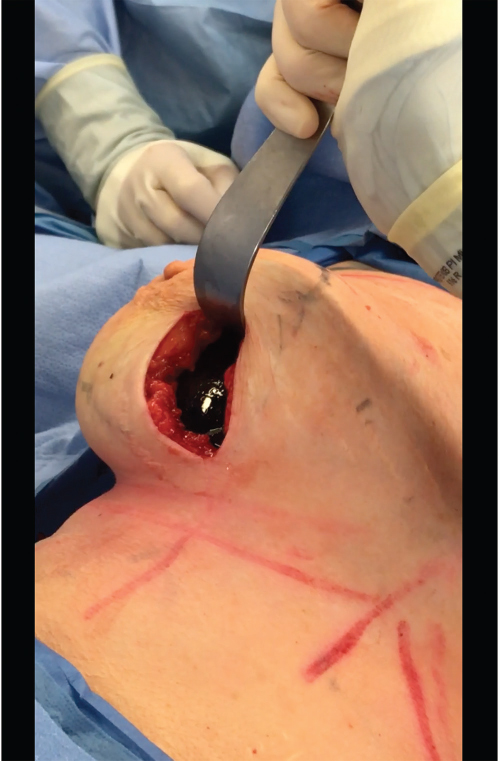
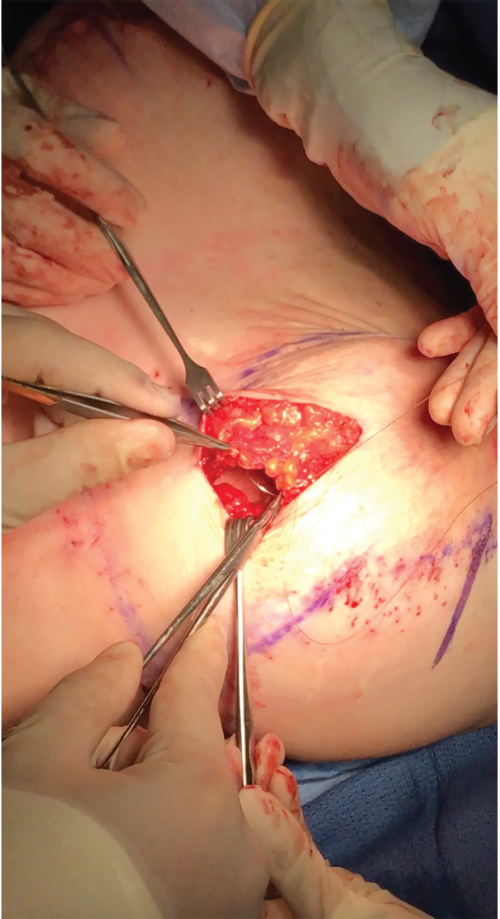
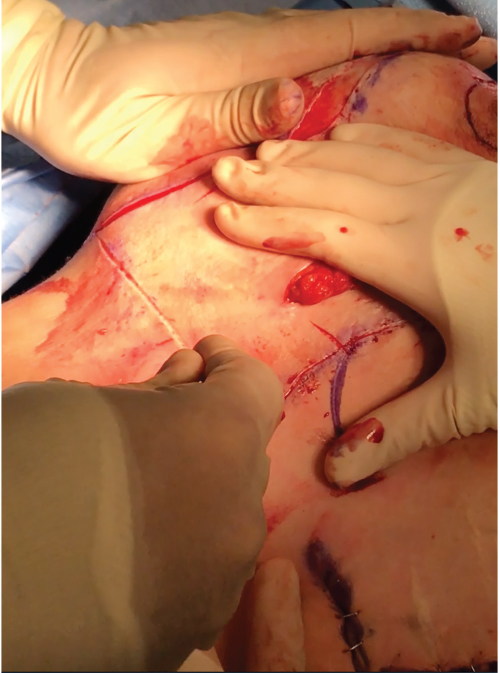
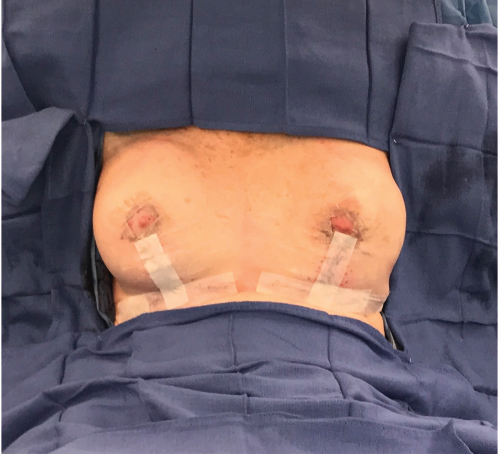
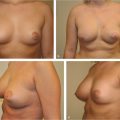
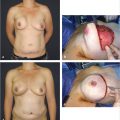
Local anesthesia containing a mix of lidocaine and Marcaine with epinephrine is injected into the marked pattern, and as a breast local anesthetic block. A vertical incision is made sharply within the mastopexy resection pattern, dividing the breast tissue, and carried down with cautery to the pectoralis fascia. The pectoralis muscle is grasped and divided till the areolar space under the muscle is identified. A lighted retractor is then placed below the pectoralis major muscle and strong upward traction is placed so as to separate the pectoralis major from the pectoralis minor muscle (▶Fig. 28.6). Pocket dissection is performed with the monopolar electrocautery and there is no use of blunt dissection. Submuscular dissection proceeds from medial to lateral in a clockwise fashion for the left breast and in an anticlockwise fashion for the right breast, until the pocket is of appropriate size (▶Fig. 28.7). Care is taken to avoid any contact with the ribs so as to decrease postoperative pain. The medial origin of the pectoralis major muscle is disinserted, so as to achieve adequate expansion of the lower pole. Meticulous hemostasis is achieved. Tester gel implants are placed and the breasts are temporarily stapled closed (▶Fig. 28.8). A 7-cm inframammary fold–areola distance is used, and an appropriate elliptical mastopexy pattern is designed (▶Fig. 28.9). The patient is placed in the upright seated position and symmetry is confirmed. If there are areas for additional dissection, these are marked. The tester implants are removed, and the pockets are irrigated with triple antibiotic solution. The formal implants are then placed in a sterile manner using the no touch technique. The implant is transferred to the Keller funnel avoiding any contact with the operating table or the surgeon’s gloves (▶Fig. 28.10, ▶Fig. 28.11 , ▶Fig. 28.12). A Deaver retractor is used by the assistant to facilitate placement of the implant (▶Fig. 28.13, ▶Fig. 28.14). The pockets are closed with 3–0 Vicryl (▶Fig. 28.15). The skin is then tailor tacked, and the patient is placed in the upright position again to verify the mastopexy marks. The nipples are traced with a 42-mm cookie cutter (▶Fig. 28.16). The areola is left in situ (▶Fig. 28.17). The marks are incised sharply (▶Fig. 28.18) and the intervening skin deepithelialized. An incision is made with the cautery around the periphery of the vertical limbs. The inferior portion of the areola pedicle is released with cautery, thus creating a superior pedicle, to allow for superior motion and inset without tension. A small wedge of tissue is removed from the vertical limb to improve the contour. The elliptical mastopexy pattern is removed full thickness with great care not to enter the implant pocket, and the resected amounts are recorded. With the shape and size confirmed with the patient sitting up, vertical pillar breast sutures are placed, on average a total of three interrupted sutures (2–0 Vicryl). The skin is closed in layers with interrupted 3–0 Monocryl for the deep dermis and a running subcuticular 3–0 Monocryl more superficially. The patient is placed again in an upright seated position for final appreciation. (▶Fig. 28.19). The before (▶Fig. 28.20) and after on-table result (▶Fig. 28.21) are shown for comparison.


Clinical Pearls
Hemostasis: Meticulous hemostasis should be achieved to avoid postoperative hematoma and an inflammatory response that may lead to capsular contracture.
Pectoralis muscle: The most medial fibers of the pectoralis major muscle should be released to avoid a constricted lower pole.
Implant placement: The no touch technique is used at all times, to avoid implant contamination.
Dissection: Dissection should be accurate to accommodate the implant and overdissection should be avoided at all times, especially lateral overdissection.
Ribs: Contact with the ribs should be avoided, so as to decrease postoperative pain.
Skin resection: Conservative skin resection is performed, to prevent postoperative wound issues.
Vertical limb: Attention to bilateral vertical limb length is of importance to achieve symmetry.
Related posts:
 25 Decision Making in Mastopexy Augmentation
 26 Periareolar Mastopexy Augmentation
 29 Prevention and Management of Complications in Mastopexy Augmentation
 27 Vertical Mastopexy Augmentation
 16 Subfascial Inframammary Breast Augmentation
 54 Prevention and Management of Complications in DIEP Flap Reconstruction
Stay updated, free articles. Join our Telegram channel

Full access? Get Clinical Tree


