15 Subpectoral Breast Augmentation (Inframammary Approach)
Summary
This chapter reviews the subject of subpectoral breast augmentation through an inframammary approach. The pros and cons of this approach are identified and discussed; the operative technique is provided in detail. Relevant clinical cases are provided to illustrate the procedure and its outcomes.
Key Teaching Points
Provides additional soft tissue cover over the implant in thin patients.
Reduces potential rippling.
May reduce capsular contracture.
Increases animation deformity.
More painful than subfascial augmentation.
Causes attenuation of the overlying pectoral muscle.
Can limit cleavage formation in wide-spaced breasts.
15.1 Introduction
Subpectoral implant placement currently remains the commonest approach to breast augmentation. It is usually accompanied by an inframammary incision. This is largely due to the ease with which the subpectoral plane can be accessed through an inframammary incision, although both transaxillary and periareolar approaches have been used very successfully. Recent data have suggested that both the latter approaches may be associated with slightly higher risks of bacterial contamination from axillary apocrine glands or nipple duct secretion, resulting in slightly higher rates of capsular contracture. The inframammary approach has the added benefit of providing easier access to an established implant pocket when performing breast revision or implant exchange in the future.
15.2 Advantages of Subpectoral Augmentation
Ease of subpectoral dissection.
Camouflage effect of the pectoral muscle over the implant in thin patients.
Improved breast aesthetics in thin patients.
Reduced implant visibility with less rippling.
Potentially lower capsular contracture rates.
15.3 Disadvantages of Subpectoral Augmentation
Greater postoperative pain.
The need for inferomedial muscle division.
Reduction of pectoral muscle thickness with time.
Decreased power of the pectoralis major muscle.
Animation deformity.
Potentially increased risk of double bubble deformity in high-risk patients.
15.4 Patient Selection
Very thin patients.
Patients with minimal breast tissue volume.
Patients with low physical demands.
Patients concerned about capsular contracture.
Secondary revision patients suffering from rippling or capsular contracture.
Implant exchange patients with severely attenuated breast tissue.
15.5 Operative Technique
15.5.1 Operative Markings and Incision Placement
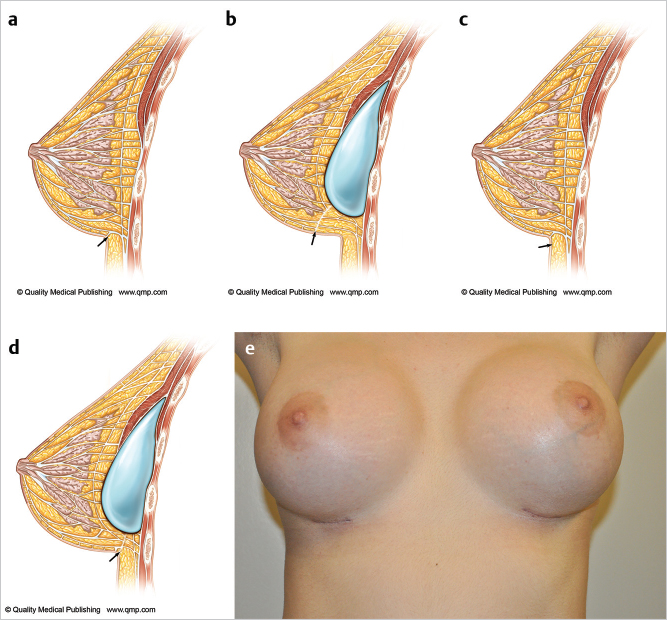
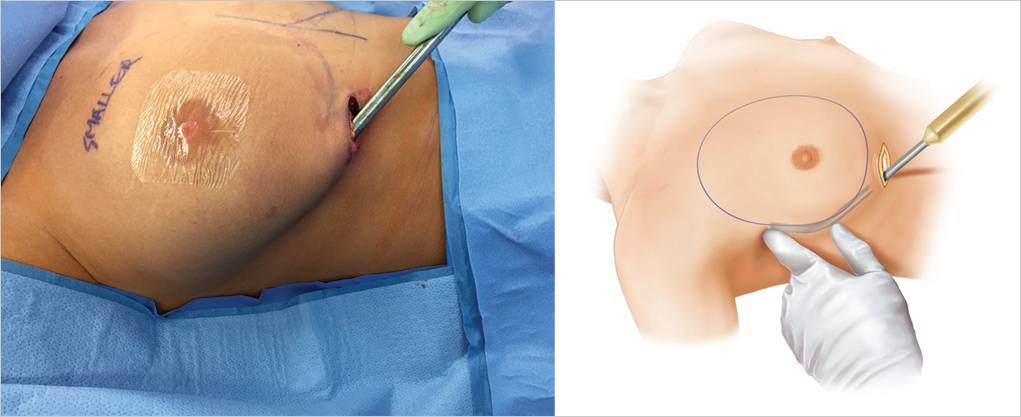
All marking should be performed with the patient in the erect position allowing the breast to drape naturally on the chest wall. Traditionally, it has been taught that the incision should be placed at the inframammary crease. The problem with this approach is that as the implant is inserted, it recruits chest wall and abdominal skin up onto the breast resulting in migration of a crease incision up onto the lower pole of the breast mound. This results in increased visibility of the incision. It is the author’s preference to place the incision approximately 1 cm below the inframammary crease which then allows the incision to be drawn up into the crease of the augmented breast resulting in a less visible incision. This is illustrated in ▶Fig. 15.1.
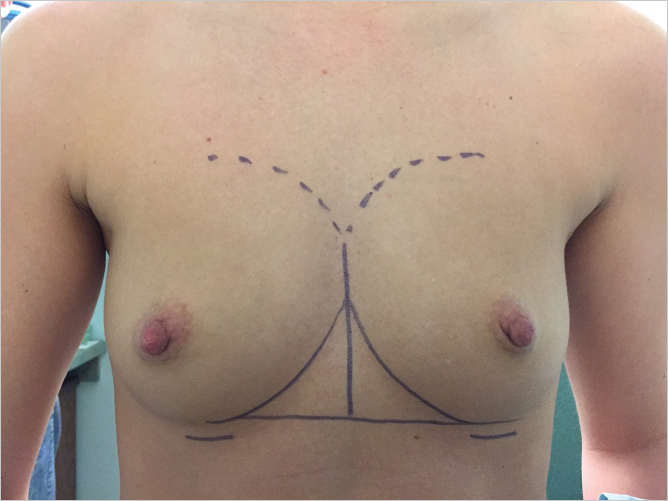
The midline should be marked together with the position of the original inframammary creases, which can be joined with a horizontal line to assist with achieving symmetry. The upper extent of the dissection can be marked so as to prevent overdissection of the upper pole (▶Fig. 15.2).
15.5.2 Positioning
When inframammary augmentation is planned, patient positioning is an important consideration. The patient must be positioned symmetrically on the operating table. The anesthesiologist and nursing staff should be told in advance that the patient will need to be flexed into a full sitting position on the operating table. The anesthesiologist will need to prepare the patient to sit up by securing her arms to the arm boards so that they will not slip off downward when she is in a sitting position. Airway control will be critical when sitting the patient up; an endotracheal tube or laryngeal mask are both effective. The operating table should be able to flex to allow the patient to be placed in a full sitting position for accurate implant placement assessment. Some surgeons favor positioning the patient with the arms tucked into their sides. This does allow less tension on the pectoral muscles but does not allow the surgeon to assess the impact of pectoral muscle traction on the overlying breast in relation to the implant in patients at risk for developing double bubble deformity. For this reason, I prefer the arms abducted (▶Fig. 15.3).
Surgical Plan
Cover nipples with occlusive dressing.
Inframammary incision is placed 1 cm below the breast crease.
Cephalad dissection through Scarpa’s fascia to the inferolateral border of pectoralis major.
Divide the inferomedial origin of pectoralis major from 6 to 4 o’clock and 6 to 8 o’clock position on right and left sides, respectively.
Develop the subpectoral pocket under direct vision using fiberoptic lighted retraction.
Gentle blunt subpectoral dissection to further define the pocket.
Trial placement of temporary sizer.
Pocket lavage with antibiotics.
Glove change.
Subpectoral implant insertion using a Keller funnel.
Three-layer closure.
15.5.3 Operative Procedure
Skin Incision
Technical Pearl
Prior to skin incision, the nipple–areola complexes should be covered with an occlusive dressing so as to exteriorize them from the operative field.
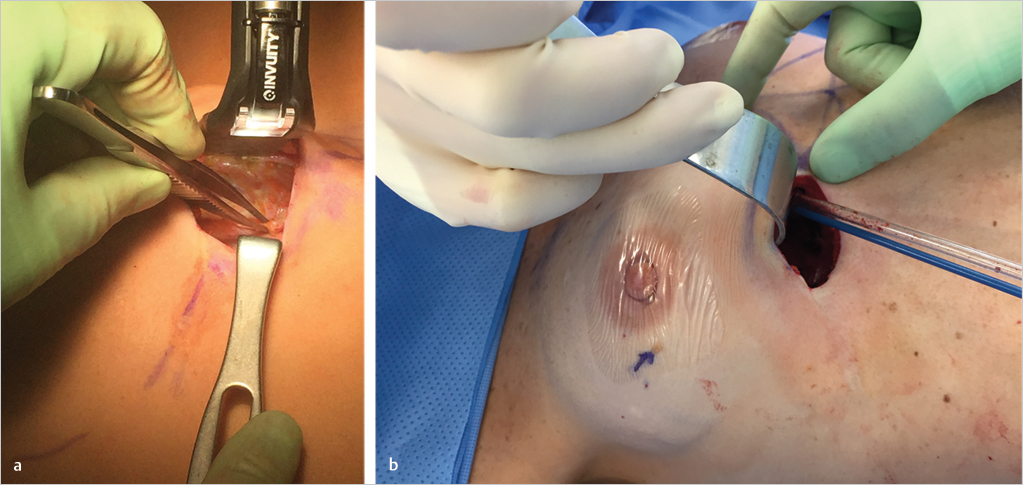
The inframammary incision is commenced between 7 and 8 cm from the midline and is extended laterally following Lange’s lines. Incision length is between 3 and 4 cm but will need to be longer if textured surface cohesive gel implants are used. Dissection is carried up obliquely through the subcutaneous tissues in a cephalad direction through Scarpa’s fascia until the inferolateral border of the pectoralis major muscle is identified (▶Fig. 15.4).
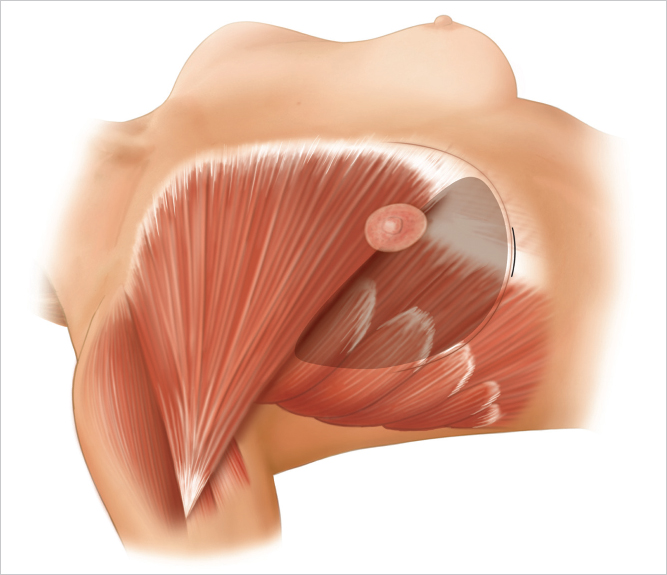
Pectoral Muscle Division
The inferolateral origin of pectoralis major is grasped with an Allis tissue forceps and the muscle is divided at its origin from the ribs. Dissection is continued superomedially dividing the muscle progressively while paying meticulous attention to hemostasis. Division should be performed from 6 to 4 o’clock position on the right side and 6 to 8 o’clock position on the left side.
Technical Pearl
Higher division tends to result in excessive window shading of the muscle with exacerbated risk of implant visibility inferomedially as well as hollowing at the lowermost portion of the remaining pectoral attachment.
Perforating branches of the internal mammary artery are typically encountered at the most medial portion of this dissection. Visibility is considerably enhanced by the use of good fiberoptic illuminated breast retraction. It is often helpful to divide the muscle a few millimeters above the rib margins; this preserves a longer stump of the cut vessel for cautery or ligation and prevents retraction of the vessel into the intercostal space (▶Fig. 15.5).
Subpectoral Pocket Development
Further, subpectoral pocket dissection is undertaken using lighted fiberoptic breast retraction.
Technical Pearl
I prefer to perform this portion of the procedure using careful cautery dissection as it allows for meticulous hemostasis throughout and allows for preservation of any lateral sensory nerve branches when developing the lateral most extent of the pocket.
Blunt dissection using an Emory dissector or Agris-Dingman dissector should be performed carefully without risking tearing of perforating blood vessels arising from the chest wall. The submuscular dissection may be extended laterally above the serratus anterior muscle, especially in patients with a reasonably thick layer of breast tissue. Anterolateral neurovascular bundles are identified with the dissecting finger and are stretched but preserved. I prefer not to use any cautery dissection laterally in an effort to preserve nipple sensation. The dissection is carried out around these nerves to obtain a pocket of the proper dimensions. The nerves are resilient, and when necessary, these can be stretched to accommodate placement of a relatively large implant. Because the fourth intercostal neurovascular bundle contains the primary sensory innervation of the nipple–areola, its preservation is particularly important. If the fifth and sixth inferolateral intercostal branch nerves are divided, the patient will experience some hypesthesia below the nipple–areolar area. If required, an Agris-Dingman dissector may be placed at this time to stretch the pocket bluntly to further delineate the subpectoral space. When larger implants are used, this lower outer dissection is important to permit correct implant positioning (▶Fig. 15.6).
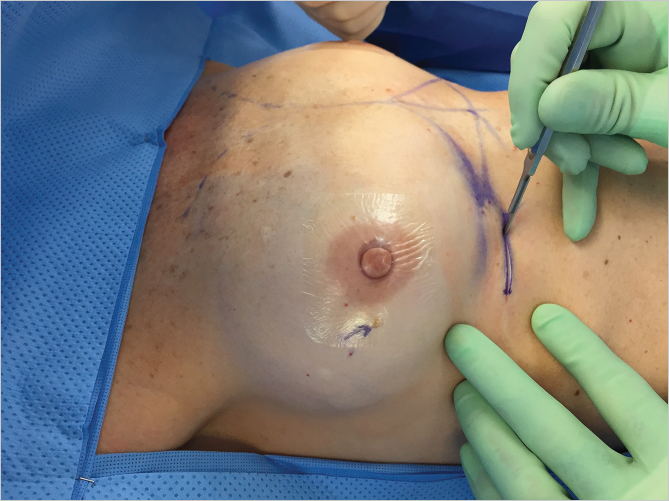
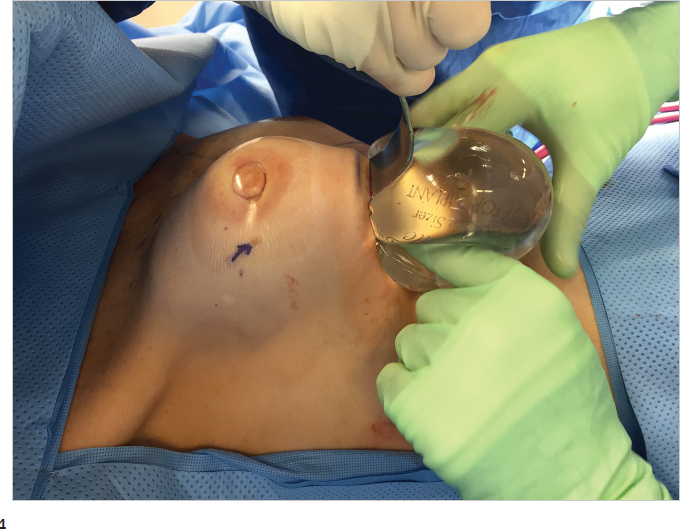
Insertion of Temporary Breast Sizers
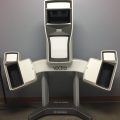
With the pocket size and position established, a temporary breast sizer can be inserted to assess final implant volume. This can be based on a preoperative evaluation of breast measurement with base diameter calculations or it can be influenced by the use of three-dimensional preoperative breast imaging. I personally find the latter approach more satisfying as it gives the patient the opportunity to see her potential breast volume in real time. The mathematical algorithms associated with current three-dimensional imaging software are so sophisticated now that they provide an extremely good estimate of breast aesthetics. Since we have been using three-dimensional imaging, we find far fewer patients expressing regret at 6 months that their breasts are too small compared with what they would have liked. Mathematical formulae associated with breast base width assessment commits a patient to a particular volume, which may be far lower than what she actually desires from an aesthetic standpoint (▶Fig. 15.7).
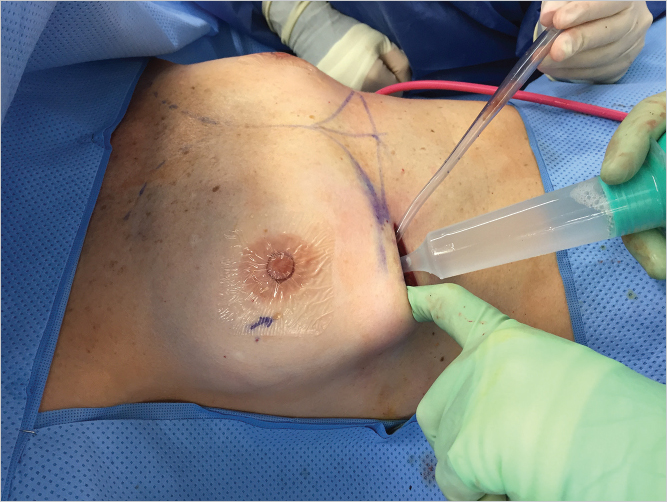
Implant Pocket Lavage
There are ample data now to prove that washing the prepared implant pocket with triple antibiotic solution and/or Betadine solution is advantageous in terms of reducing capsular contracture rates. Pocket lavage with antibacterial solutions should be considered standard of care. It is our preference to utilize the formula suggested by Adams et al. We place 1 g of cefazolin, 80 mg of gentamicin, and 50,000 units of bacitracin in 1 L of saline or lactated Ringer’s solution. We also utilize a 50% Betadine (povidone iodine) wash initially, followed by the antibiotic solutions. This is particularly important if textured surface anatomical implants are used as the emerging data on breast implant–associated anaplastic large cell lymphoma suggest that there may be a link with Ralstonia pickettii contamination, an organism which is sensitive to povidone iodine in a concentration of between 25 and 50%. Prior to insertion, the implant is rinsed in antibiotic solution to facilitate its sliding through a Keller funnel. The funnel itself is also lubricated with antibiotic solution (▶Fig. 15.8).
Related posts:

Stay updated, free articles. Join our Telegram channel

Full access? Get Clinical Tree


