Chapter 12 Hamstring Harvest Technique for Anterior Cruciate Ligament Reconstruction
Technique of Hamstring Graft Harvest
The graft harvest can be the most difficult aspect of this operation. Videotapes of this technique by Fowler, Prodromos, and Fox are available from the AAOS library.1
The anatomy of the hamstrings has been described in the literature by Ferrari and Ferrari.2 The strength of the hamstrings after harvest of the tendons was initially reported by Lipscomb et al3 to be the same as the opposite side. Since then, weakness of knee flexion above 90 degrees of knee flexion has been reported.4 Based on these reports, one should be cautious in recommending hamstring grafts for sprinters, who require full, active knee flexion strength. Yasuda et al5 have described the harvest site morbidity as minimal. Gobbi et al6 recommend preservation of the gracilis to prevent postoperative knee flexion weakness. The regeneration of the hamstring tendons after the harvest was described by Cross et al.7
Skin Incision
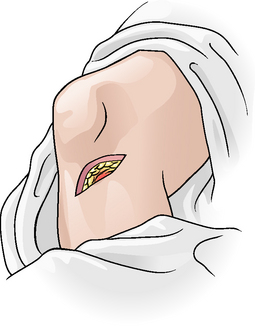
The skin incision for hamstring harvest should be made with the knee flexed in the figure-four position (Fig. 12-1). An oblique, 3-cm skin incision is made 5 cm below the joint line over the proximal edge of the pes anserine. The incision should start 1 cm medial to the tibial tubercle and then continue posteromedially. The oblique incision is preferable to the vertical incision for two reasons: It gives a greater exposure to the top of the pes anserine, and it also has less potential to injure the infrapatellar branch of the saphenous nerve. Plan to harvest the graft and drill the tibial tunnel through this incision. Incise the subcutaneous fat, and strip the fat off the pes anserine with a sponge.
Exposure of the Tendon
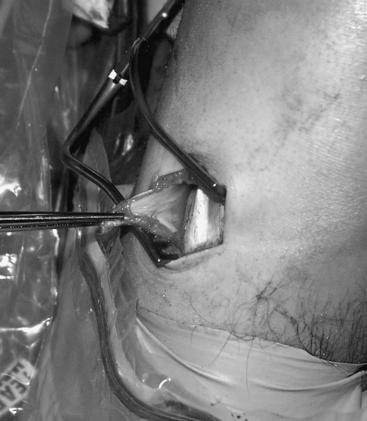
Identify the superior border of the pes by palpating the superior edge with your finger. Lift up this superior border, and incise the fascia. Identify the bursa between the pes and the medial collateral ligament by placing the tip of the scissors in the space. With the scissors, continue the incision medially down the tibia, in an L-shaped fashion, removing the tendons distally. Use a Kocher to apply traction to this top corner. Turn the pes down to look on the underside for the most inferior tendon, the semitendinosus (Fig. 12-2). Lift the tendon up with the tip of the scissors, and grasp it with a Kocher. Lift up the gracilis, and grasp it in a similar fashion with a Kocher. Divide the conjoined tendon between the semitendinosus and the gracilis.


