Buttock contouring with liposuction and fat injection

Chapter 41 Buttock contouring with liposuction and fat injection


image For additional online content visit http://www.expertconsult.com


Preoperative Preparation


Routine preoperative medical evaluation and lab tests appropriate for age are performed. The patient is instructed to stop all medications and products that affect platelets at least 4 weeks prior to treatment. Bowel preps are not routinely given. As a special note, patients who have rheumatoid arthritis and are taking immunosuppressive medications such as remicade may be more susceptible to infections and even mycobacterial infections, so these medications should be stopped at least 2 weeks before the procedure and discontinued for 1–2 months after. The patient is made aware of this increased risk of infection. A clearance from their rheumatologist is obtained.


Markings of Esthetic Units


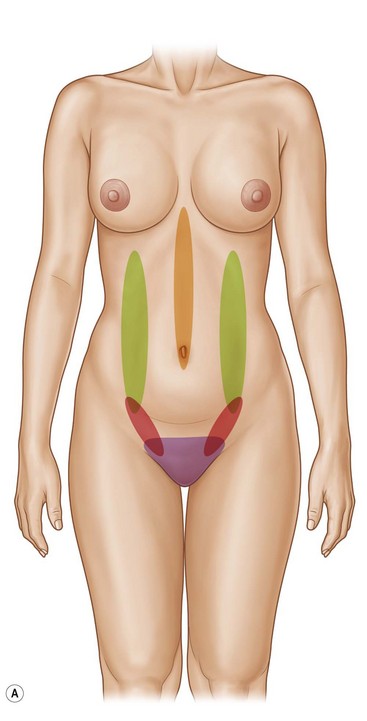
The abdomen is defined by three major muscle groups that can be appreciated on the surface anatomy; the rectus abdominus, the external oblique and the transversalis muscle (Fig. 41.1). The union between these muscles is called the raphe and it is these raphes that need to be accentuated during contouring in order to highlight and define the underlying anatomy.


The highlight points of interest are the midline raphe (linea alba), the raphe between the lateral rectus and the external oblique, and the raphe between the lower lateral rectus and the transversalis muscle. In the past I would mark the areas to be debulked but today I mark these highlighted zones.


When it comes to the posterior zones, there are 10 esthetic units found to the posterior region, with 6 that truly define the buttock frame/ shape (zones 1–5 and zone 8)1 (see Fig. 41.2A). The midlateral buttock (Zone 8) becomes of particular interest since it is the only zone out of the six that may require fat transfers to smooth the contour. This zone has no muscle, therefore fat transfers are into the less vascularized subcutaneous tissues requiring more care and precision with the fat grafting technique.


Total three-dimensional body contouring will focus on the abdomen, the waist, and the buttock. The patient is marked in the preoperative holding room the day of surgery in the standing position. The highlight points are identified in the abdomen and the areas to have liposuction in the posterior area are identified; these always include zones 1, 2, 4, and the areas over the internal/external oblique muscles. The patient is always reminded that in Florida we have a 4 liter supernatant fat limit and therefore all areas being marked may not be suctioned.


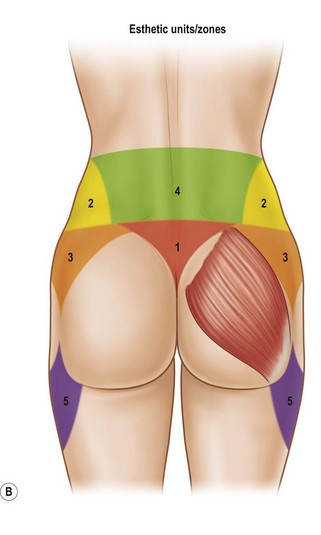
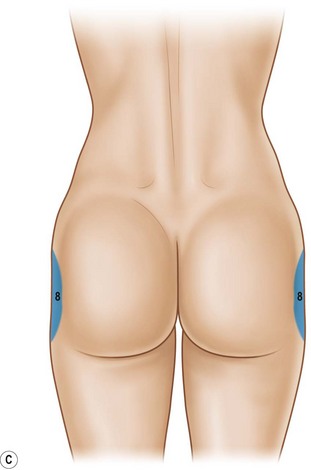
Three landmarks areas are identified in the buttock; the first is the posterior superior Iliac spine (dimples in the parasacral areas); this represents the height of the gluteal muscle I am trying to achieve. With these points marked it is easy to identify and mark the second landmark – the “V” zone, also known as zone 1. This is the space identified by the most superior point of the intergluteal fold and both posterior iliac spine dimples; the connection of these points creates an equilateral triangle. When this zone is suctioned it adds tremendous contour to the esthetic of the buttock. Third, I identify any depression in the midlateral buttock (zone 8) (see Fig. 41.2C). Sometimes these depressions extend all the way to the anterior leg; therefore, care is taken to mark the lateral extent of the deficiency, and finally any dimples or irregularities are marked. Zone 3 is evaluated and I try to mentally quantify how much fat I want to remove using the very sophisticated categories of very little, none, or a lot. Photos are taken of the markings since these become extremely helpful because often these marks are erased during surgery.


Preparation in OR


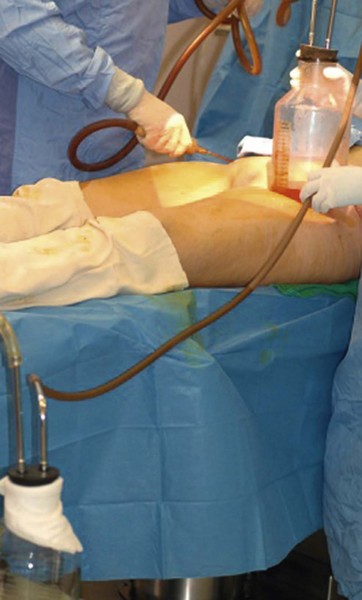
The patient is prepped circumferentially while in the standing position using room temperature Hibiclens solution (Fig. 41.3). A sterile sheet is placed on the OR table on top of a water-based warming pad (HTP-1500 Heat Therapy Pump and Pad, Adroit Medical System). The best setting is 41.6 °C (107 °F).


FIG 41.3 Appears imageONLINE ONLY


A draw sheet is also placed to help turn the patient during the procedure. All pressure points are padded; pneumatic stockings are connected. A Foley catheter is inserted for fluid status monitoring.


It is during this time that the fat collection canister is prepared since the fat needs to be collected during the suction process. There are a number of collection systems for obtaining fat cells (Fig. 41.4), all of which have pros and cons.
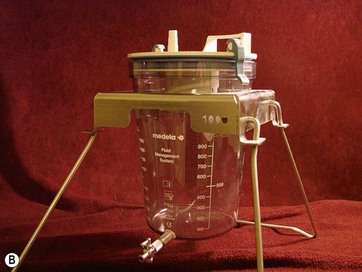


FIG 41.4 Appears imageONLINE ONLY


My current fat collection system consists of a glass bottle (Wells Johnson) or a plastic bottle collector (J-Cell).


These are very large Lukens trap devices that collect the aspirate by connecting one suction tube from the patient to the bottle and another tube that goes from the bottle to the suction machine (Fig. 41.5). Once this is all in place the procedure can begin.


Suctioning Details


The technique involves a visualization exercise whereby the surgeon visualizes the deep and superficial layers in the mind. Suctioning will then proceed in a layered and anatomic sequence, but throughout the process the physician is visualizing the position of the cannula in the respective layer (Fig. 41.6).


It is crucial to separate the deep from the superficial layer during this procedure since the entire deep layer needs to be cleared out. The superficial layer is mainly to establish the contour definition. How thin the superficial layer will become will depend on patient goals and fat characteristics. In some cases it is very easy to palpate and differentiate between these layers (the flap can then be picked up between the fingers like a rolling pinch test and the layers are appreciated through palpation), but in others the layers are so compactly associated that they are difficult to distinguish from each other. In these situations, both layers are freed and broken up with Vaser or with pre- and post-tunneling (suction OFF).


Suctioning begins in the deep layer at the highlight points (abdominal raphes) and gradually moves more superficial (remember to visualize through the entire process). The initial deep layer suctioning is performed for two reasons. The first reason is to assess the quality of the fat; is it hard, soft, fibrous, compact or is it soft, easy to extract and loosely associated (not compact)? The second reason is to assess the relationship the fat has to the dermis, a term I coined “dermolipographing” (DLG). This means the imprint the cannula, leaves on the skin surface; in some patients the cannula track marks are easily imprinted, leaving skin surface irregularities; in others, the cannula can be brought up to the subdermal layer and no marks are left (as if the cannula was never there). Because the fat to dermis ratio is extremely variable, and depending on the particular patient’s dermolipographing sensitivity, the harvesting technique can be varied.


For those individuals who have a medium to strong dermolipographing propensity, I will not be able to suction so superficially. To avoid track marks, I try to mechanically break up the strong fatty dermal association by using one of the following disruptive approaches, separately or in combination:


These methods are used until the cannula passes freely through the tissue and there is hardly any resistance (this can take about 20–30 minutes). Once the presuctioning process is completed, liposuction is continued with the method preferred but using a thinner 4 mm, or on rare occasions a 3 mm cannula. I continue with the power-assisted cannula system power x.


The degree of superficial liposuction is much less in these moderate to severe dermolipographing cases and it is therefore a conservative approach. In these cases I will leave about 2–3 cm of fat under the dermis since it is not possible to get closer to the surface.


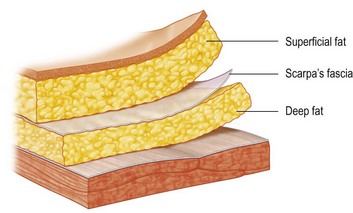
In cases of mild to no dermolipographing, technology is not needed since the skin molds extremely nicely and irregularities are extremely rare (Fig. 41.7A, B). I leave about 1 cm of fat under the dermis.
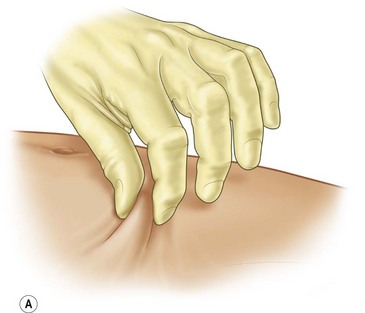
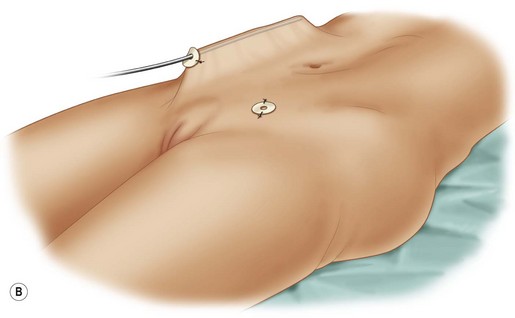


The Vaser, power-assisted machine and specialized cannula are invaluable when I run into very fibrous or dense fat or fat that has a strong dermolipographing property. It also works well for that fluffy fat that is difficult to extract (typical of the massive weight loss patient). I use the Vaser in 70% of my cases and the power-assisted machine in every case. In my experience, the use of the power-assisted and ultrasound-assisted technologies results in the destruction of about 10% more of the fat cells when compared to the standard machine suction, yet my grafting survival rates have not changed (70–80%).


This tells me that if I have the same amount of supernatant fat in the syringes (after the separation process), irrespective of technology used, it does not affect the final results. It may have required more harvesting, but in the long run survival results were the same. Interestingly enough, when I compared the body jet technology to the ultrasound and power-assisted technology I was able to obtain 20% more fat with the body jet system, and it contained very little fluid. The body jet is not used in every case since these cases do take longer to perform, but in cases of limited fat it has its advantages.


Liposuction will be performed in the supine, lateral decubitus and prone positions. Each position has a specific purpose and technical goal that has become more apparent to me as I have learned to contour the body and buttock area.


FIG 41.7B Appears imageONLINE ONLY

< div class='tao-gold-member'>

Only gold members can continue reading. Log In or Register to continue

Stay updated, free articles. Join our Telegram channel

Jul 23, 2016 | Posted by in Aesthetic plastic surgery | Comments Off on Buttock contouring with liposuction and fat injection

Full access? Get Clinical Tree

Get Clinical Tree app for offline access