Chapter 43 WasherLoc and Bone Dowel Tibial Fixation of a Soft-Tissue Graft
WasherLoc and Bone Dowel Surgical Technique
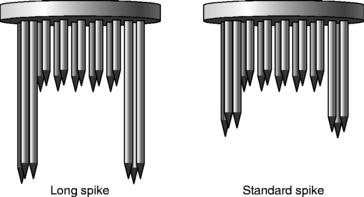
The superior clinical and biomechanical performance of the WasherLoc and bone dowel during aggressive rehabilitation and testing in the laboratory has been extensively documented since the technique was introduced in 1997.1–13 The WasherLoc is a multi-spiked washer with four long peripheral spikes that engage cortical bone and multiple shorter spikes that purchase the soft-tissue graft (Fig. 43-1). The WasherLoc comes in two lengths (long and standard) and three diameters (14, 16, and 18 mm). The preferred fixation for a 9- to 10-mm diameter soft-tissue graft is the 18-mm-long spike WasherLoc; for a 7- to 8-mm diameter graft, the 16-mm long spike WasherLoc.
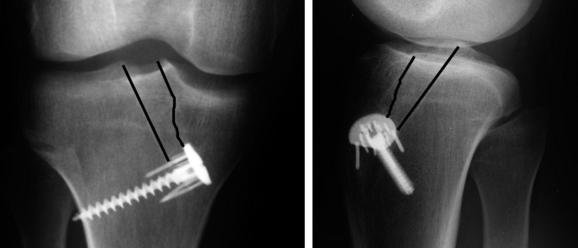
The WasherLoc is seated in a counterbore inside the distal end of the tibial tunnel. The counterbore recesses the WasherLoc below the cortical surface, which eliminates hardware irritation of the overlying skin (Fig. 43-2).9 A self-tapping, cancellous screw compresses the WasherLoc and soft-tissue graft against the back wall of the tibial tunnel. The tip of the screw engages the lateral tibial cortex, which avoids any damage to the more posterior neurovascular structures. The portion of the tunnel anterior to the soft-tissue graft is dilated, and the bone dowel is compacted into the tunnel. The following is a detailed description of the surgical technique with pertinent illustrations.
Harvest a Bone Dowel from the Tibial Tunnel
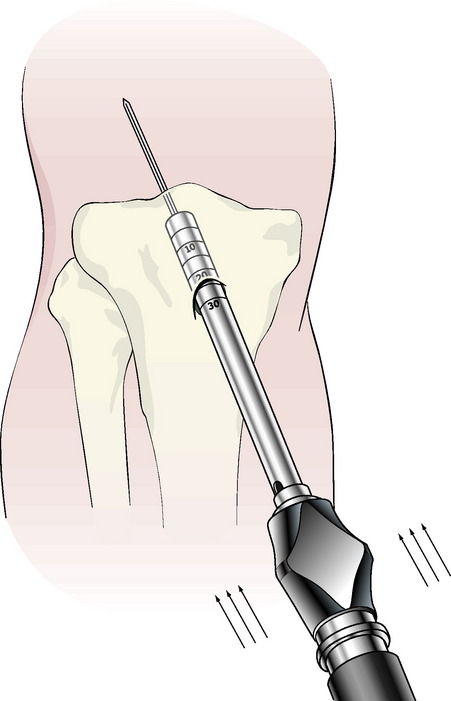
Remove the cortex overlying the distal end of the tibial tunnel. Choose a cannulated reamer that matches the diameter of the soft-tissue ACL graft, and ream over the tibial tunnel guidewire. Slide the calibrated plunger over the tibial guidewire. Impact an 8-mm bone dowel harvester over the plunger and guidewire to the subchondral bone (Fig. 43-3). Rotate the bone dowel harvester several times clockwise and counterclockwise to break off the cylindrical bone. Remove the bone dowel and harvester. If the guidewire is removed with the bone dowel, then insert an 8-mm reamer into the tibial tunnel and rethread the guidewire through the cannulation in the reamer. Finish reaming the tibial tunnel.
Drill the Counter Bore
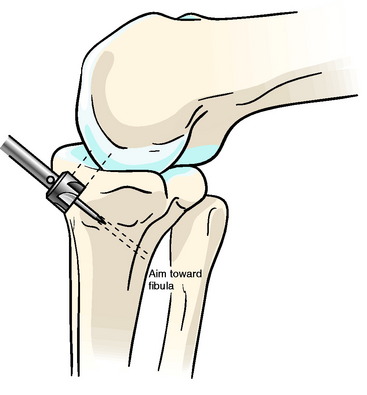
Use electrocautery and a ronguer to remove a small section of the superficial layer of the medial collateral ligament (MCL) that overlies the cortical opening of the tibial tunnel. Insert the counterbore guide into the tibial tunnel until the vertical sleeve abuts against the distal end of the anterior edge of the tibial tunnel. Point the vertical sleeve at the fibula, and impact the awl. Insert the counterbore into the awl hole, and orient the counterbore so that it is parallel to the posterior wall of the tibial tunnel and oblique to the anterior tibial cortex. Remove a small amount of bone from the anterior tibial cortex until the counterbore is flush with the back wall of the tibial tunnel (Fig. 43-4).
Impact the WasherLoc
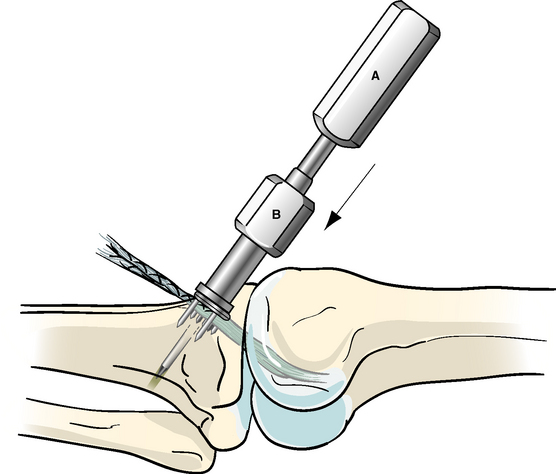
Position the knee in full extension. Thread the awl into the drill sleeve and the drill sleeve into the WasherLoc. Tension the soft-tissue graft. Rotate the flat edge of the WasherLoc distal, place half of the soft-tissue ACL graft on each side of the awl, insert the awl in the hole, and direct the tip of the awl toward the fibula. Impact the WasherLoc into the back wall of the tibial tunnel until it is fully seated (Fig. 43-5).
Dilate the Tibial Tunnel
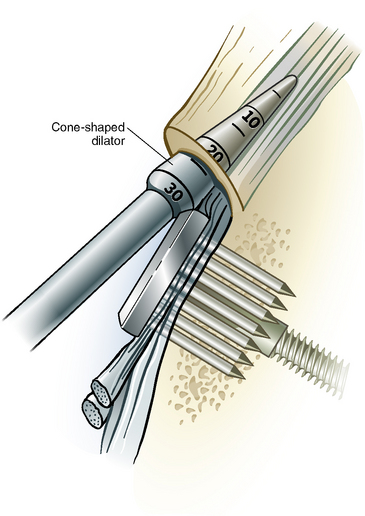
Confirm that stability has been restored to the knee and the tension in the ACL graft is correct. Place the tip of the tapered dilator between the anterior surface of the soft-tissue graft and tibial tunnel (Fig. 43-6). Gently impact the dilator to the level of the joint line, which is typically 25 mm.
Compact the Bone Dowel
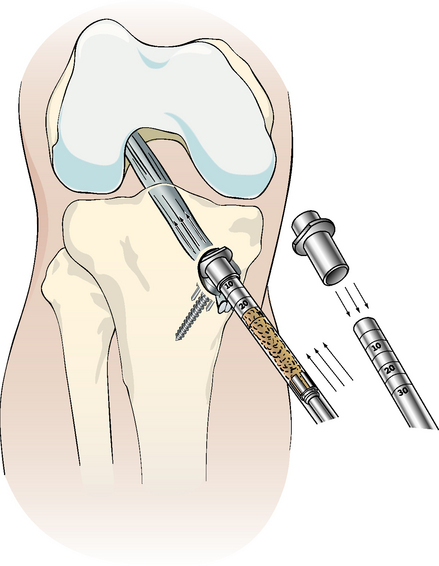
Stuff any loose bone reamings and wallplasty fragments into the tibial tunnel, and compact the bone with a 7 or 8 impingement rod. Place the plastic cover on the sharp tip of the bone dowel harvester, and drive the bone dowel into the tibial tunnel (Fig. 43-7).
