Accurate, consistent, high-quality photographs of patients before, during, and after surgery are critical for planning and performing surgical procedures, analyzing and documenting surgical outcomes, and educating patients and surgeons. Attaining the necessary high standards of photography and avoiding common pitfalls associated with nonstandardized medical photography requires stringent uniformity in equipment, lighting, room setup, patient positioning, and camera settings.
The use of high-quality photography is a critical part of any facial plastic surgery practice. Preoperative photographs serve as a reference and adjunct to the clinical examination, helping the surgeon plan and carry out surgical procedures, and should be available in the operating room for reference. Intraoperative photographs should demonstrate a dynamic series of events to document the procedure and educate the operating surgeon, colleagues, and staff. Postoperative photographs document outcomes and may be used for research, educational purposes, or legal justification. These photos can also be used to educate and counsel patients, to ensure uniformity of evaluation and treatment from patient to patient, and for marketing and advertising purposes after appropriate patient consent has been obtained.
For photography in facial plastic surgery to be useful, however, it must be accurate, consistent, and of high quality. Photos should be free of distortion, with the greatest possible depth of field. Unlike a portrait studio, the goal is not to make the patient look as good as possible, even in the postoperative setting. Instead, the goal should be to represent the patient as accurately as possible.
Poor photography, due to factors such as improper lighting, poor patient positioning, and inconsistent room setup, can misrepresent the patient’s original chief complaint and distort the patient’s perception of the outcome. In some cases, poor lighting can even simulate postoperative results; for example, it can reduce wrinkles and scars, cause hemangiomas to change color, and inaccurately portray nasal tip anatomy in rhinoplasty patients. Slight changes in patient or camera position can lessen a nasal hump, vary nose size, and alter skin tension. Small changes in neck flexion or head protrusion/retrusion can lead to noticeable changes in perception of jaw line definition and submental soft tissue.
The best way to prevent these common errors is photographic standardization with high-quality equipment. Pre- and postoperative photos should be taken by the same photographer (preferably the surgeon or someone with medical knowledge) and be obtained under identical conditions. Equipment, room setup, and camera settings should also be consistent. Patients should be positioned using standard protocols specific to their chief complaint.
Although surgeons are not professional photographers, they should be able to take technically proficient photographs by following standardized rules. An understanding of the various possible pitfalls in nonstandardized photography is necessary to interpret others’ work and improve one’s own uniformity.
Equipment
Camera
Digital single-lens-reflex (SLR) cameras have replaced film cameras for most medical photography because the photos can be viewed and evaluated immediately; many more images can be taken without additional cost; close-up views are easy to obtain by enlarging the photo; and storage and access is quick and compact. There is often much discussion regarding the number of megapixels required for medical photography. Any modern digital SLR camera should have sufficient megapixels for the purposes of the facial plastic surgeon.
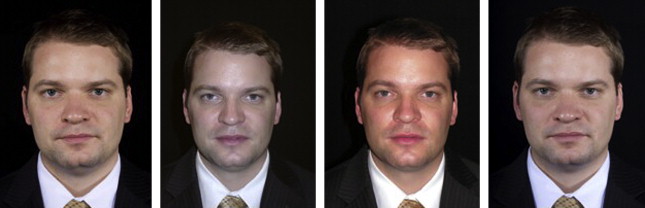
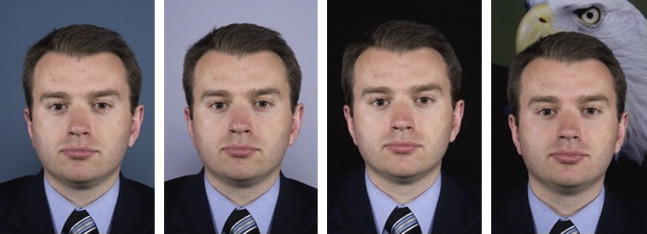
Most professional digital cameras, when used with a high-quality lens, will produce photos of sufficient quality for medical photography. However, individual cameras vary in contrast, color, and grain, just like different film types ( Fig. 1 ). Therefore, the same camera must be used before and after surgical procedures for accurate comparison.
Camera features should include manual white balance, manual exposure, and aperture priority modes, high-quality liquid-crystal display screens for image review, and the ability to connect to studio-grade flash systems. A gridded viewing screen that may be indexed for aligning anatomic points is also very beneficial.
Lens
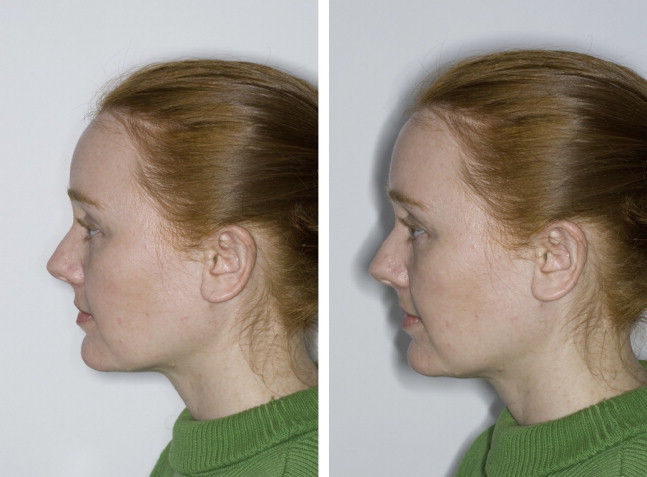
Most reports in the literature recommend using a 90- to 105-mm macro lens to achieve sufficient depth of field and enable the entire face to be in focus. Chapple and Stephenson extend the range up to 120 mm for close-up dermatology photography. Lenses with shorter focal length (eg, 50–55-mm lenses) create noticeable distortions, such as a central bulge of the face ( Fig. 2 ). A clear filter may be used to protect the lens from dirt or abrasions.
Lighting
Lighting may be the greatest source of error in clinical photography. Bad lighting can exaggerate or eliminate facial features and distort color and contrast. Especially in rhinoplasty, poor lighting can even simulate postoperative results.
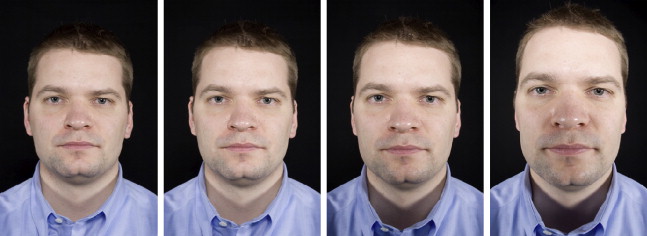
Optimal lighting conditions include more than one light source. Use of a single unit, such as the on-camera flash, results in loss of detail, flat images, profile ring-shadowing effects, and asymmetric illumination with harsh highlights and washed-out features ( Figs. 3–6 ). One exception to this rule is when obtaining photos of the nasal tip for rhinoplasty. In this case, a harsh light source for rhinoplasty, such as an on-camera flash, ring flash, or twin flash without diffusion, is used. This environment permits critical evaluation of nasal anatomy and symmetry, creating sharp lines of demarcation and the absence of shadowing. A studio flash system with diffused light can cause a loss of the subtle detail of the nasal anatomy, especially in the frontal and basal views.
Most investigators recommend using a studio-grade electronic flash system with 2 lights at 45° angles, 3 to 5 ft from the patient for most photos. Two additional backlights at 45° angles to the background or one backlight mounted 1 to 3 ft centrally in front of the background can be used to highlight facial anatomy and separate the patient from background. However, the ideal placement of the lighting may change based on the surgery that will be performed. The distance between background lights, for example, can have a significant impact on the appearance of tip rhinoplasty without surgery.
For cases in which a small or nondedicated photography room precludes studio-grade lighting, Meneghini has developed a system using one moonlight flash system (softbox) and a reflecting panel that is held by the patient. Twin flashes located on camera are another portable lighting solution and can simulate a studio flash system.
Light Meter
Once the lighting setup has been determined, a light meter is used to determine correct camera settings. After the initial light-meter reading, one should not need to repeat this if the flash system and film speed are kept the same. Light-meter readings should be at or above 1/45 second using all available light.
Room setup
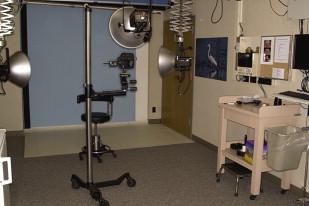
Ideally, the facial plastic surgeon should have a separate room dedicated to photography. An 8- × 12-ft room should be sufficient. The walls and ceiling should be painted off-white, and any windows should be curtained. The room light should be just a small lamp with a 100-W bulb for room light, not a fluorescent light, which would affect the light temperature ( Fig. 7 ).
Background paper should be mounted on the wall behind the subject. Most investigators recommend medium- to sky-blue background color because it is complementary to all skin tones, does not create glare, and provides contrast to hair and facial features ( Fig. 8 ). A window shade of the same material is recommended. A height-adjustable swivel stool with a back should be positioned 18 to 36 in from the background.
There is some disagreement about whether a tripod or wall mount is necessary for the camera. Several investigators suggest using a tripod with wheels to easily adjust camera focal distance and to improve standardization of camera position. However, Morello and colleagues report the use of tripods as an unnecessary hindrance, and Galdino and colleagues recommend tripod use only if shutter speed falls below 1/60 second.
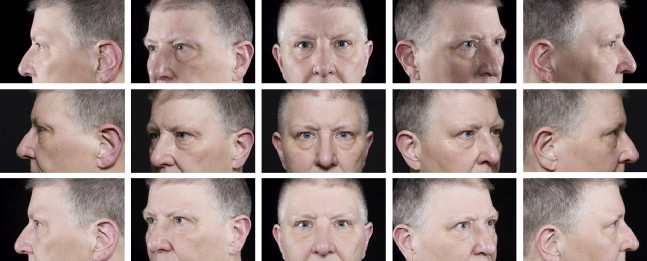
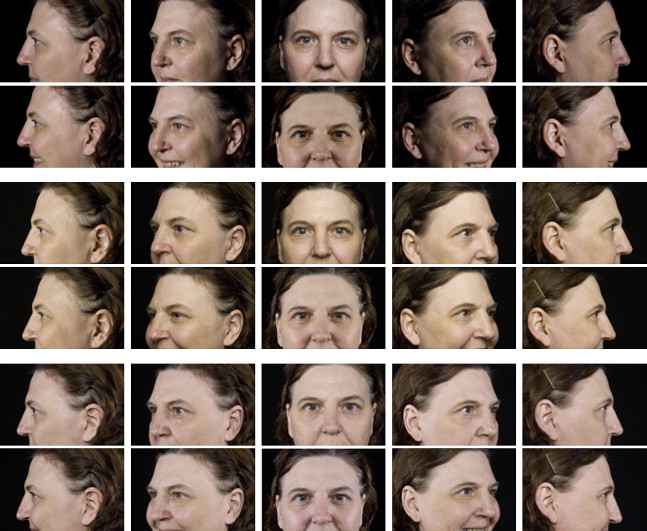
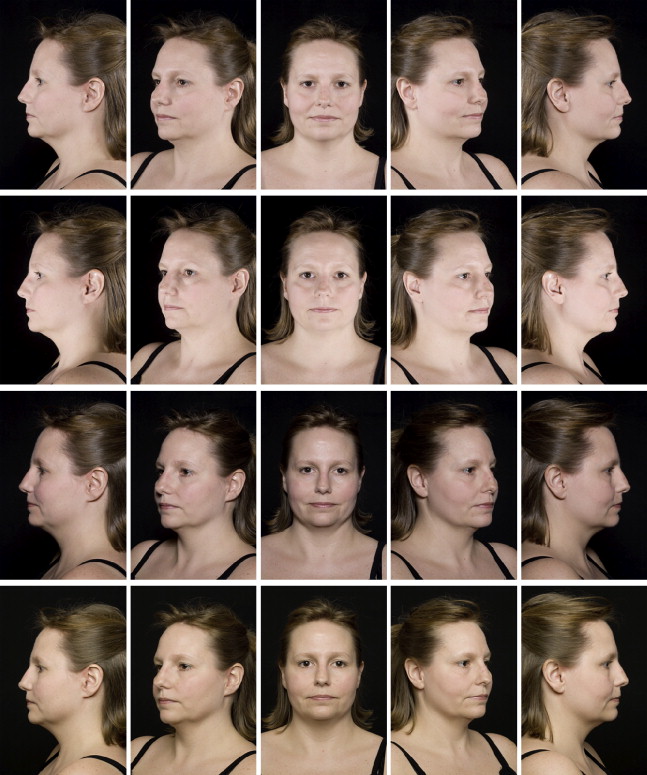
To ensure uniformity, markings on the floor should indicate the position of the patient’s stool, and foot placement for frontal, oblique, and profile pictures. Targets should be placed on the walls of the room in the correct positions for oblique and profile photos. In addition, index lines on the floor for camera position and markings on the floor for lighting equipment location can further ensure image consistency.
Room setup
Ideally, the facial plastic surgeon should have a separate room dedicated to photography. An 8- × 12-ft room should be sufficient. The walls and ceiling should be painted off-white, and any windows should be curtained. The room light should be just a small lamp with a 100-W bulb for room light, not a fluorescent light, which would affect the light temperature ( Fig. 7 ).
Background paper should be mounted on the wall behind the subject. Most investigators recommend medium- to sky-blue background color because it is complementary to all skin tones, does not create glare, and provides contrast to hair and facial features ( Fig. 8 ). A window shade of the same material is recommended. A height-adjustable swivel stool with a back should be positioned 18 to 36 in from the background.
Related posts:


Stay updated, free articles. Join our Telegram channel

Full access? Get Clinical Tree


