Morphing patient images to offer some demonstration of the intended surgical outcome can support shared expectations between patient and facial plastic surgeon. As part of the preoperative consultation, showing a patient an image that compares their face before surgery with what is planned after surgery can greatly enhance the surgical experience. This article refers to use of Photoshop CS3 for tutorial descriptions but any recent version of Photoshop is sufficiently similar. Among the topics covered are creating a before-and-after, rhinoplasty imaging, face- and brow-lift imaging, and removing wrinkles. Each section presents a step-by-step tutorial with graphic images demonstrating the computer screen and Photoshop tools.
Much of the success in facial plastic surgery comes from having a set of shared expectations with the patient. Offering some demonstration of the intended surgical outcome has long been a part of the preoperative consultation. Morphing patient images is a huge improvement over drawing on a Polaroid with a Sharpie. Many companies have developed software to make patient image manipulation simpler. Typically these programs cost several thousands of dollars and some of them store their images in proprietary data formats. They are attractive to many surgeons because they offer a prepackaged solution for what seems like a daunting task. Many facial plastic surgeons already have Adobe Photoshop (Adobe Systems Inc, San Jose, CA, USA) for image editing and are unaware that it can do everything that the proprietary systems can. With some scripting, Photoshop can effectively mimic the more task-specific alternatives at a lower price. This article refers to use of Photoshop CS3 for descriptions but any recent version of Photoshop is sufficiently similar. Video tutorials and Photoshop actions for morphing can be found at http://www.granthamilton.com/UIFPS/Morph.html .
Ethical considerations in patient imaging
Ideally, preoperative photographs should be manipulated to enhance communication with the patient and not to sell surgery. Showing a change that is surgically unlikely is not only misleading but will do nothing to create a happy patient. With that in mind, it is reasonable to leave some imperfections in the manipulated image to reinforce the expectation that the surgical goal is improvement and not perfection. It is also a good idea to do your own imaging. Some surgeons may have their fellow or a patient-care coordinator manipulate the images. Having the experience of previous surgical cases creates a more realistic and accurate prediction of the surgical result. A well-defined tip in a thick-skinned patient is easy to show with the computer but, in reality, would be an unlikely surgical outcome. There is also some controversy about whether or not the images should be printed and given to the patient. Proponents believe that providing the patient with a copy may make the psychological adjustment to the postoperative result smoother and may stimulate informed questions. Others think that giving the images to the patient may expose them to litigation if the images are misconstrued as a guarantee.
Creating a before-and-after image
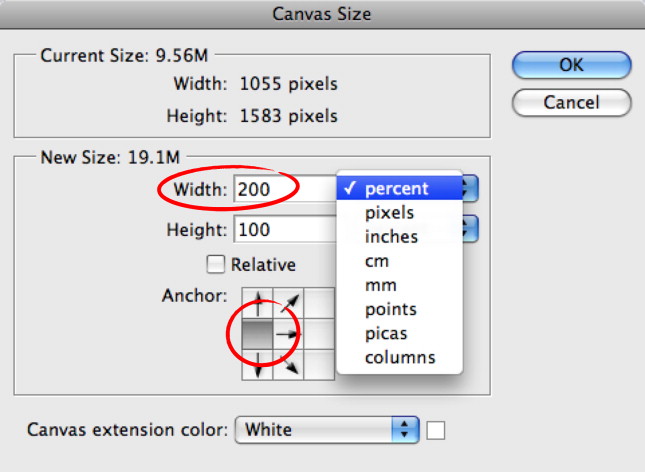
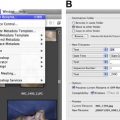
Before manipulating patient images, it is helpful to create a side-by-side before-and-after image so that the patient can easily compare the two. In practice, this involves duplicating the preoperative image and applying the changes to only one of them.
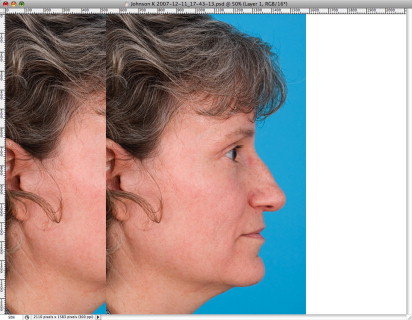
 V Windows: Ctrl-V). The pasted image is on a separate layer and is centered.
Creating a before-and-after image
Before manipulating patient images, it is helpful to create a side-by-side before-and-after image so that the patient can easily compare the two. In practice, this involves duplicating the preoperative image and applying the changes to only one of them.
Rhinoplasty imaging
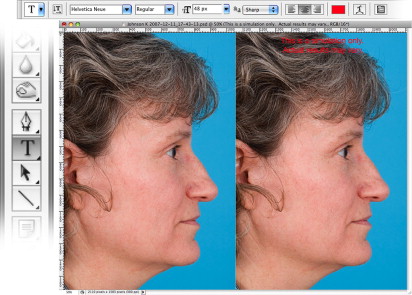
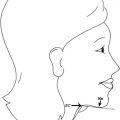
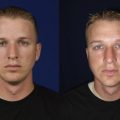
Using Photoshop to simulate a rhinoplasty result primarily uses two techniques: the T ransform tool and the Liquify tool. Typically a frontal view and a profile view are demonstrated for the patient. When manipulating the profile view, a right-handed surgeon should choose the right profile. That way, it can be mounted horizontally in the operating room, making comparisons with the patient’s face simple. The following are the steps for simulating a profile. The process for creating a frontal view is even simpler: steps 2, 3, and 5 may be skipped.
First, create a before-and-after image as described above. When imaging the profile, it is important to duplicate the After layer before manipulating the image. This is to prevent any gaps from becoming visible. If you are using the actions that accompany this article, this is already the first part of the action named Morphing.
Related posts:

Stay updated, free articles. Join our Telegram channel

Full access? Get Clinical Tree


