Fat grafting in body contouring surgery

Chapter 47 Fat grafting in body contouring surgery


Preoperative Preparation


Analysis of the defect is the most important step in structural fat grafting of the body. The surgeon must be able to appreciate the deformities that the patient sees. The problems should be clearly documented using a combination of photography and drawings. Failure to accurately recognize the specific deformities that the patient wants corrected will make the benefits of the surgery equally difficult for the patient to appreciate.


Photographs of the body from eight directions are a standard part of the preoperative process. These should be taken from across the room with the patient in front of a blue background. Topographic abnormalities, however, can be difficult to visualize on two-dimensional photographs. Photographs taken from above the patient (“birds-eye”) or with reproducible downlighting can help to highlight the contour deformities, depressions and irregularities.


Preoperative planning is done on tracings of the patient’s body using many views. A purple marker is used to delineate areas of planned fat removal for harvesting while a green marker indicates areas of planned fat grafting. A red marker serves to identify access sites. The patient is photographed in a standing position so that these markings may be referred to intraoperatively with the patient in either the supine or prone position. If necessary, the photos may be reviewed intraoperatively on a laptop.


General anesthesia, local anesthesia with sedation, and occasionally epidural anesthesia are used. A low dose epinephrine and lidocaine solution is placed in harvest sites as well as the areas to be fat grafted, especially if it is anticipated that adhesions need to be released.


Surgical Technique


Access incisions for fat harvesting are chosen based on the specific anatomic regions. Recipient site incisions are generally 2 mm long and are placed to allow fat infiltration from at least two directions. Access sites are most often marked preoperatively, but occasionally it is necessary to add an additional incision during the procedure.


The amount of infiltration solution to use depends on the amount of fat to be harvested. A solution containing 0.5% lidocaine with 1 : 200 000 epinephrine is used for smaller volumes while a tumescent solution containing 1 : 400 000 epinephrine infiltrated in about 1 ml for each ml planned to be harvested is used for moderate to large volumes. Using a tumescent technique is not recommended as this delivers a lipoaspirate that is too dilute and requires many syringes and rounds of centrifugation.


Curved or straight cannulas connected to Coleman 10 ml or 30 ml syringes are initially used to harvest lipoaspirate from the torso. The gentle slope of the cannula allows its path to follow the natural curves of the body. It is important that the architecture of the fat tissue be maintained during harvesting. The intact fat parcel must be able to pass through the lumen of a small infiltration cannula (17-gauge). This usually coincides to the lumen of a 10 ml Luer-Lock syringe. The initial lipoaspirate can range from 10–90% fat tissue, so centrifugation should be used to remove the nonliving components. Once the harvested tissue is centrifuged (3000 rpm for 2–3 minutes), it separates into three layers. The top layer consists of oil from ruptured fat cells, the bottom layer is blood and lidocaine, while the middle layer contains fat. The top and bottom layers should be removed and the fat transferred into smaller syringes for injection.


No-one has clearly shown a correlation between donor site location and viability of fat grafts.5,6 For this reason, donor sites are usually selected based on areas whose contour will improve with liposuction. The abdomen and medial thighs are the two most common donor areas.


Infiltration cannula size ranges from 16 to 18 gauge and 9 to 15 cm in length. We prefer to use shorter cannulas, but switch to a longer cannula at times to avoid making additional incisions. When using a longer cannula, thinner gauges are preferable, and we only switch to thicker gauges when significant resistance is encountered. Longer cannulas increase the chance of the tip moving into deeper planes and damaging underlying structures. We alternate between straight and curved cannulas depending on the topography.


We use two 3 ml Luer-Lock syringes to infiltrate fat in the body. Each syringe is filled with 2.5 cm3 of fat to allow easier manipulation. In contrast to the 1 ml syringes, the 3 ml syringes can be reused repeatedly without the plungers sticking. Infiltration volumes range from 1 cm3 for minor irregularities to 500–600 cm3 for volume augmentation in thighs, buttocks, or arms.


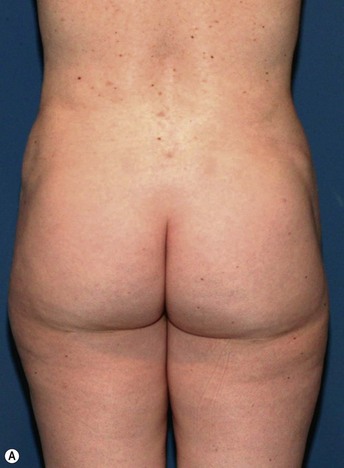
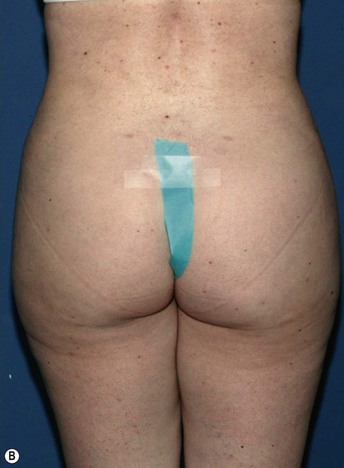
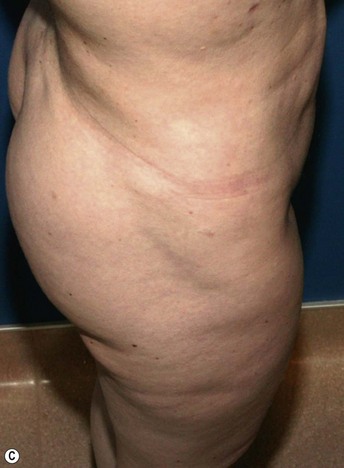
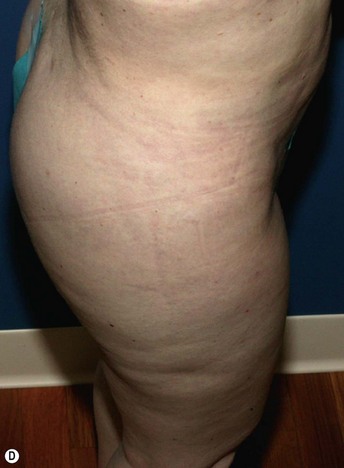
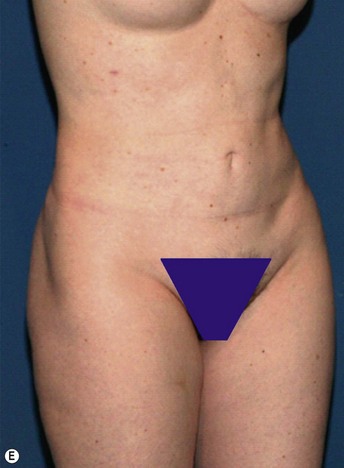
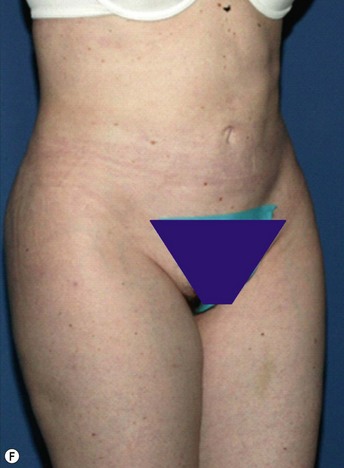
Example: Correction of Buttocks Crease Deformity


When the crease that defines the junction of the buttock and posterior thigh extends too far laterally, the legs appear shorter and the buttocks larger. Placement of fat from at least two directions can help increase the definition of these two areas. Access incisions should be placed in the medial buttock crease, lateral to the buttocks crease’s most lateral extent, and either cephalic or caudad to the crease. Fat placement begins with a blunt style I 9 cm cannula. If there is difficulty with this cannula, a Coleman style III 7 cm cannula may be used to prime the incision. Placement begins superficially and gradually progresses deeper, in a layer-by-layer fashion. Fat infiltration is performed only as the cannula is removed, not while being advanced. This allows more precision and control during the infiltration.


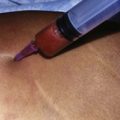
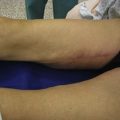
Fat placement should obviously be concentrated in the areas of greatest deficiency. However, it is equally important to feather out into surrounding areas to create an integrated correction. In this situation, placement of fat should extend from deep against the muscular fascia to an immediately subdermal plane.7 It is important to avoid linear placement in more superficial planes, as this can cause noticeable lumps.


While the 9 cm infiltration cannula will work in most cases, the 15 cm Coleman style I or III cannula can be helpful when trying to avoid making additional incisions or when there is fat leakage due to the access incision being too close to the placement site.


All areas of infiltration should be approached from at least two directions. This provides more structural integrity as the fat is laid down in a cross-hatched fashion. In this specific situation, access incisions in the buttock and thigh were chosen to allow placement perpendicular and longitudinal to the buttocks crease (Figs 47.147.4).


< div class='tao-gold-member'>

Stay updated, free articles. Join our Telegram channel

Jul 23, 2016 | Posted by in Aesthetic plastic surgery | Comments Off on Fat grafting in body contouring surgery

Full access? Get Clinical Tree

Get Clinical Tree app for offline access