The following discussion presents some of the common dermatologic procedures performed in the office setting by advanced practice clinicians. Content is provided to serve as a guideline that is incorporated into the clinical judgment. Performing these, or any, procedural skills requires the development of competency to optimize patient safety and outcomes. Therefore, it is recommended that clinicians should:
• Acquire essential knowledge of the procedure, indications, and complications. However, knowledge alone does not confer competency.
• Obtain basic instruction for the skill, including observation.
• Demonstrate the skill under the supervision of a trainer or experienced clinician until it can be performed in its entirety without any mistakes or concerns. This should be done in a variety of settings that simulate real patient care.
• Perform continuous self-assessment, with patient and peer feedback and educational updates.
• Document competency of skills, which is both valuable and required in some health care settings or by regulatory boards.
PUNCH BIOPSY
Author:
Theodore D. Scott, RN, MSN, FNP-C, DCNP
Description
Punch biopsy is a nonsterile procedure by which sampling of an endophytic skin lesion or full thickness of skin is performed for the purpose of histopathologic examination.
Indications
• Small pigmented lesions of the skin (nevi or small melanomas)
• Benign skin tumors (i.e., dermatofibroma, neurofibroma)
• Vascular disease of the skin or subcutaneous fat
• Superficial inflammatory or granulomatous diseases
• Papulosquamous disease (i.e., psoriasis)
• Connective tissue disorders (i.e., systemic lupus erythematosus, discoid lupus erythematosus)
Contraindications
• Infection at the biopsy site
• Superficial artery or nerve (i.e., Erb’s point) at biopsy site
• Pigmented lesion larger than available punches
Equipment
• Alcohol or chlorhexidine prep pads
• Examination gloves and sterile gloves
• Syringe, usually 3 mL or 5 mL
• 25G to 31G needle depending on site; 31G insulin syringes are helpful for noses and ears.
• Lidocaine 1% or 2%, with or without epinephrine, depending on site
• Sterile 4 × 4 or 2 × 2 gauge sponges
• Baker-type biopsy punch or equivalent, commercially available in sizes 2 to 12 mm
• Pickup forceps
• Iris scissors or scalpel
• Needle drivers
• Monofilament nonabsorbable suture appropriate for the thickness of skin; 4-0 black nylon on a P-12 needle is useful for most punches.
• Absorbable suture for larger punches (8 to 12 mm)
• Formalin in normal saline specimen containers of appropriate size for the specimen prelabeled with the patient’s name and medical record number—never label after the fact. A biopsy for direct immunofluorescence should be placed in a container with Michel’s transport medium.
• Hyfrecator for control of bleeding
• Petrolatum-based ointment (like Vaseline or Aquaphor)
• Adhesive dressing of appropriate size (check for allergy)
Preparation
• Procedure details, risks, and alternatives are discussed with the patient. All questions are answered and informed consent is given by the patient.
• All specimen containers to be used and histology requisitions are labeled and information is verified by patient.
• After gloving, the area to be sampled is cleaned with alcohol or chlorhexidine.
• Lidocaine is injected intradermally below the lesion to be sampled; if done correctly, the lesion will be raised on a wheal (Figure 24-1).
Procedure
• Sterile gloves are preferred for closure with sutures.
• With the nondominant hand, stretch the skin perpendicular to the relaxed skin lines. This will result in an elliptical defect when the tension is released making for a much more cosmetically acceptable closure.
• With the dominant hand, place the biopsy punch over the lesion and gently apply downward pressure while twisting the punch until you feel a slight pop and the punch goes through the dermis (Figure 24-2A and B).
• Retract the punch from the defect. Gently lift the freed skin specimen with the pickups and cut or snip the bottom attachment with the subcutaneous fat (Figure 24-2C).
• Place the specimen into a container and seal.
• Blot biopsy site with gauze square and apply direct pressure to the site. Electrocautery with a hyfrecator may be used with caution. Proceed when hemostasis is complete.
• Suture the defect closed with interrupted sutures; larger defects may also require an absorbable deep cuticular suture to prevent a dead space at the wound base (Figure 24-3).
• Apply petrolatum ointment to wound after hemostasis is achieved.
• Apply adhesive dressing.
• Give patient both verbal and printed aftercare instructions in their preferred language.
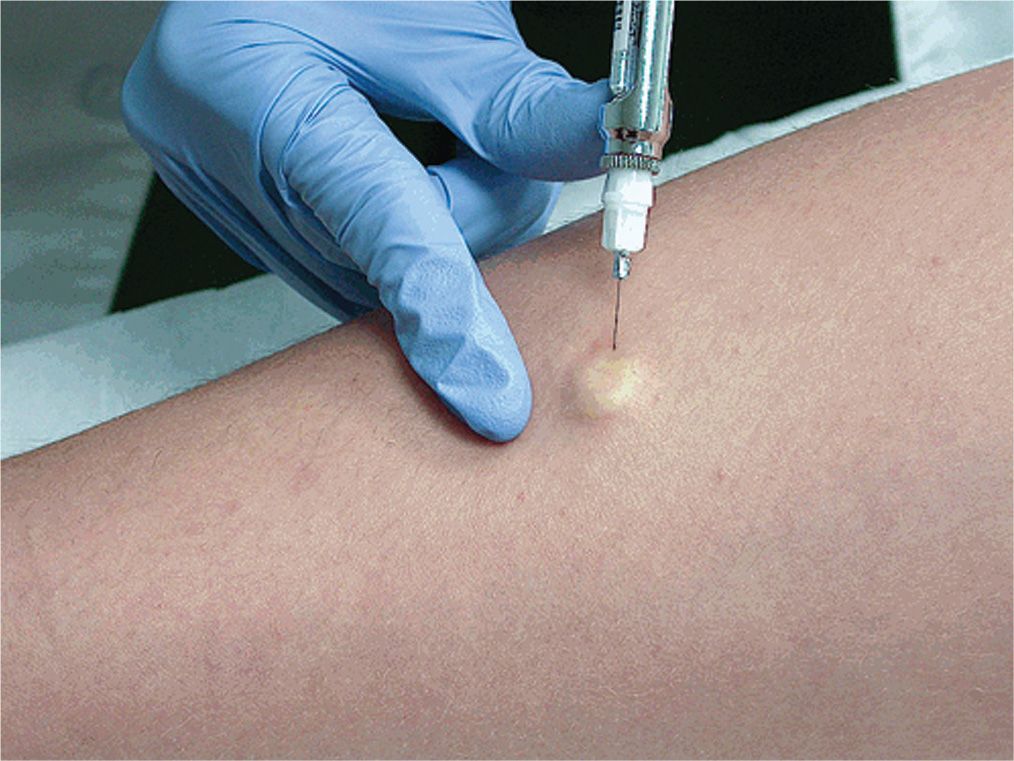
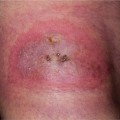
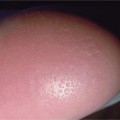
FIG. 24-1. Intradermal injection of local anesthetic using a 30G needle that produces a wheal under the lesion for biopsy. Localized blanching will occur when lidocaine with epinephrine is used as anesthetic.
Anticipated Outcomes
• Mild pain at biopsy site
• Possible infection
• Possible bleeding
• Possible separation of the wound edges of punch biopsy
• Scar at the biopsy site. Be sure to emphasize this point when you obtain informed consent.
Aftercare
• Initial bandage may be left in place for 24 hours unless saturated with blood.
• After 24 hours, bathe as normal and wash the biopsy site with gentle soap and water only.
• After drying, apply petrolatum ointment to the suture line and bandage.
• Stay out of oceans, lakes, and swimming pools until after the sutures are removed.
• Return for suture removal as indicated
• Face and neck in 3 to 7 days
• Arms in 7 to 10 days
• Trunk and legs in 10 to 14 days
• Keep wound moist with petrolatum and covered for 1 to 2 weeks for optimal healing and best cosmetic results.
• The patient should be educated about the signs and symptoms of infection, including redness, warmth, tenderness, and discharge. Contact information should be given in the event that this should occur.
• Inform patient when and how they will receive the results of their biopsy.
• Arrange for suture removal.
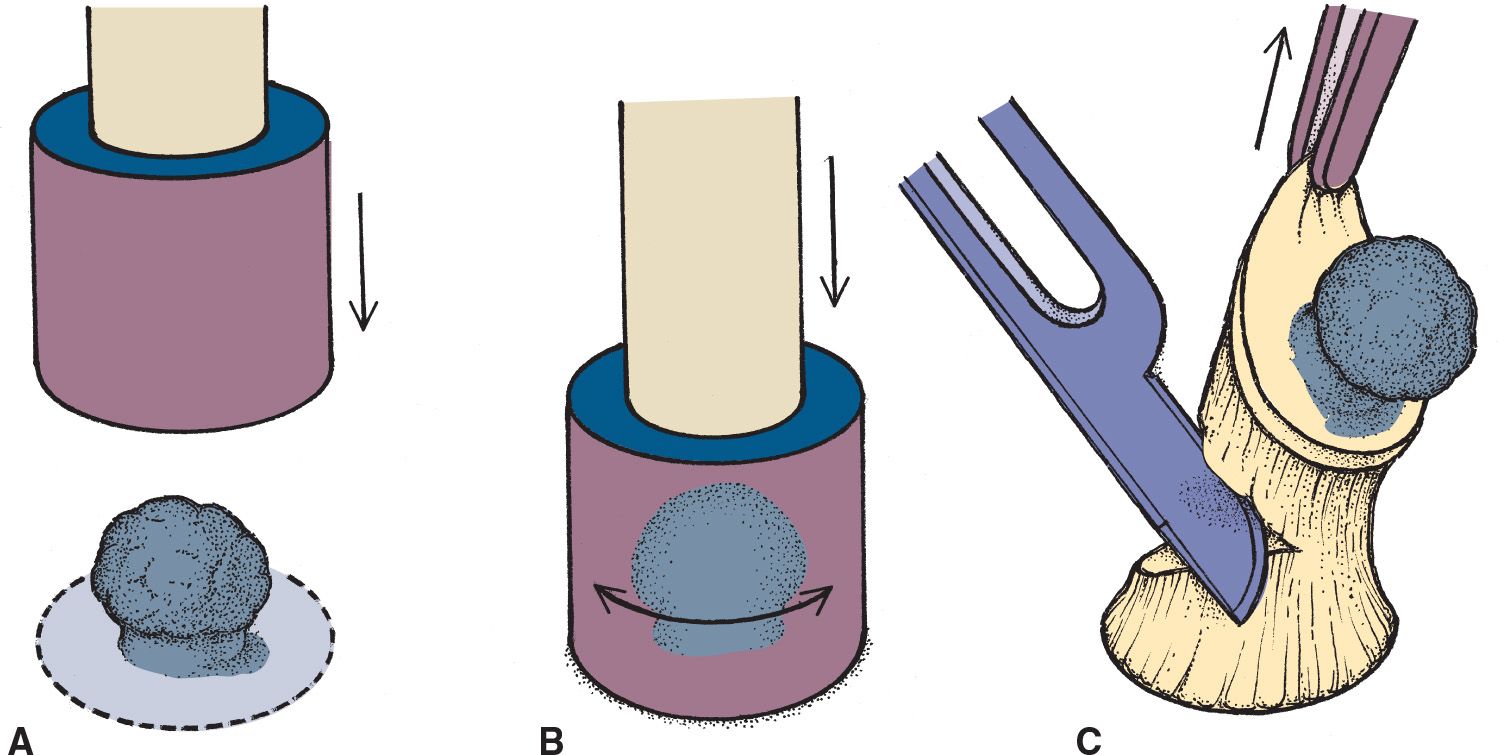
FIG. 24-2. Punch biopsy.
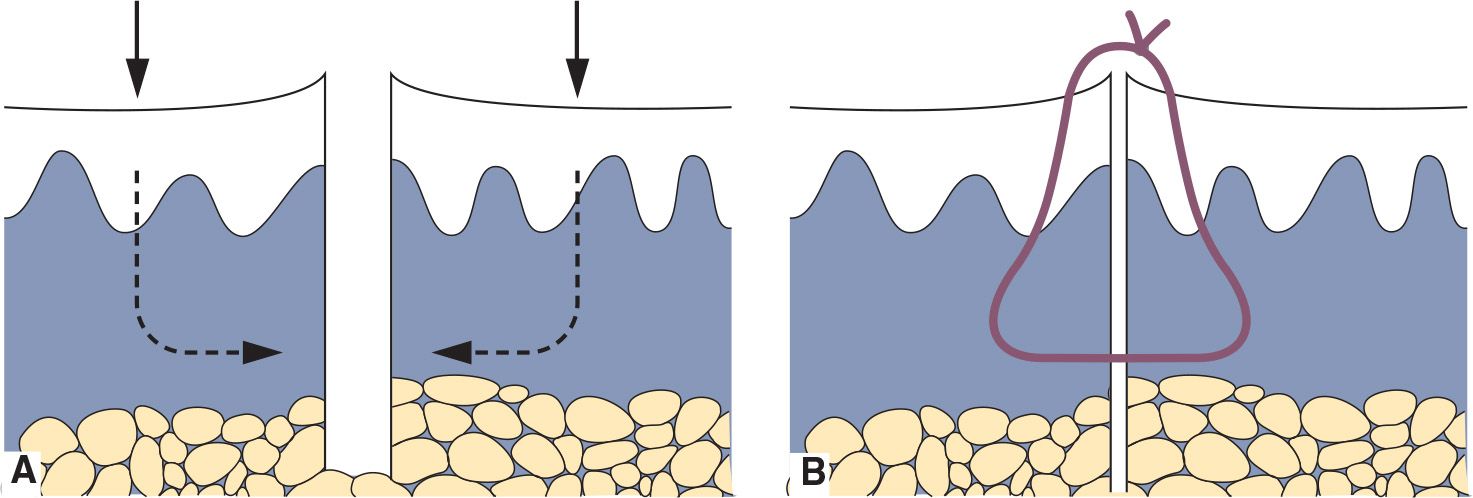
FIG. 24-3. Simple interrupted suture. A: Closure for punch biopsy with equal amounts of tissue on both sides of the defect. B: Eversion of the wound edges for optimal healing.
SHAVE BIOPSY
Author:
Theodore D. Scott, RN, MSN, FNP-C, DCNP
Description
Shave biopsy is a nonsterile procedure by which sampling of an exophytic or shallow endophytic skin lesion is performed for the purpose of histopathologic examination.
Indications
• Raised lesions
• Dome-shaped nevi and benign tumors
• Nonmelanoma skin cancers
Contraindications
• Infection at the biopsy site
• Vascular lesion of unknown extent for depth (cavernous hemangioma)
• Deep melanocytic lesions suspected for melanoma (only punch, excisional, or deep saucerization are indicated for these deep lesions).
Equipment
• Alcohol or chlorhexidine prep pads
• Examination gloves
• Syringe, size as required (usually 3 cc or 5 cc)
• 25G to 31G needle depending on site. 31G insulin syringes are helpful for noses and ears.
• Lidocaine 1% or 2%, with or without epinephrine, depending on site
• Sterile 4 × 4 or 2 × 2 gauge sponges
• DermaBlade or scalpel blade (no. 15)
• Formalin in normal saline specimen containers of appropriate size for the specimen prelabeled with the patient’s name and medical record number—never label after the fact.
• Aluminum chloride 20% solution (Drysol), Monsel’s solution, or hyfrecator
• Cotton-tipped applicators
• Petrolatum-based ointment (Vaseline or Aquaphor)
• Adhesive dressing of appropriate size
Preparation
• Same as for Punch Biopsy
Procedure
• Using the DermaBlade or scalpel blade, tangentially shave the lesion off the skin with a gentle side-to-side movement (Figure 24-4).
• Place the specimen into a container and seal.
• Blot biopsy site with gauze square and apply cotton-tip applicator saturated (not dripping) with the aluminum chloride or Monsel’s solution. Light electrocautery with a hyfrecator may be needed.
• Apply petrolatum ointment to wound after hemostasis is achieved.
• Apply adhesive dressing.
• Give patients both verbal and printed aftercare instructions in their preferred language.
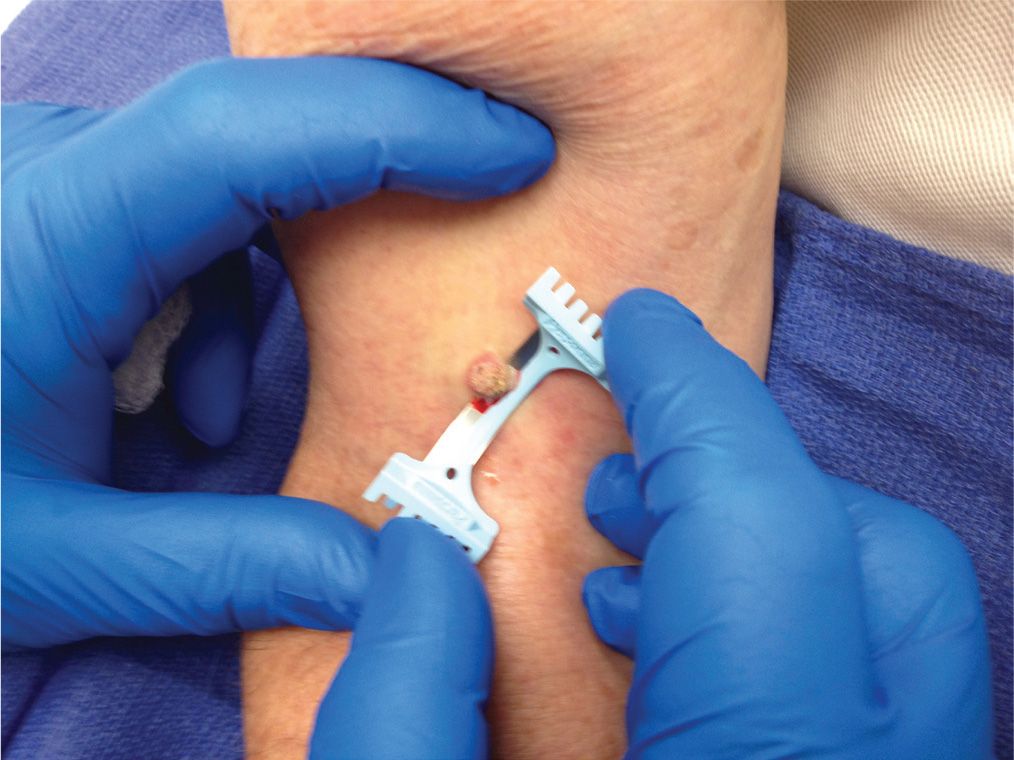
FIG. 24-4. Shave biopsy. Holding the DermaBlade tangentially to the skin surface, the blade can remove a sample of the epidermis and dermis. A deeper saucerization requires a sharper angle to the skin, allowing the blade to scoop deep into the dermis.
Anticipated Outcomes
• Same as with punch biopsy
Aftercare
• Same as for punch biopsy, except for suture removal
CLINICAL PEARLS
![]() Avoid epinephrine on fingertips and penile tip.
Avoid epinephrine on fingertips and penile tip.
![]() Punch biopsies ≤4 mm can be left open to heal by secondary intention.
Punch biopsies ≤4 mm can be left open to heal by secondary intention.
![]() Alcohol and hydrogen peroxide are no longer used for routine wound care as they are toxic to the keratinocytes.
Alcohol and hydrogen peroxide are no longer used for routine wound care as they are toxic to the keratinocytes.
![]() Neomycin, polymyxin, and bacitracin ointments (Neosporin) are not recommended as they are potential sensitizers and may provide little protection.
Neomycin, polymyxin, and bacitracin ointments (Neosporin) are not recommended as they are potential sensitizers and may provide little protection.
![]() For all skin diseases other than pigmented lesions, a 4-mm punch will give the pathologist adequate material to make a diagnosis.
For all skin diseases other than pigmented lesions, a 4-mm punch will give the pathologist adequate material to make a diagnosis.
![]() For pigmented lesions, select a punch that will completely sample the lesion and a slim margin of clear skin.
For pigmented lesions, select a punch that will completely sample the lesion and a slim margin of clear skin.
![]() Never perform a shallow shave biopsy of a pigmented skin lesion to avoid the risk of transecting the pigmented lesion. The most predictive factor in the clinical course of melanoma treatment is the depth of invasion on initial biopsy. This information would be lost.
Never perform a shallow shave biopsy of a pigmented skin lesion to avoid the risk of transecting the pigmented lesion. The most predictive factor in the clinical course of melanoma treatment is the depth of invasion on initial biopsy. This information would be lost.
![]() Never take a small punch or several small punches of a large pigmented lesion. A small punch of a large lesion will not provide the most accurate measurement of the depth.
Never take a small punch or several small punches of a large pigmented lesion. A small punch of a large lesion will not provide the most accurate measurement of the depth.
![]() If a pigmented lesion is too large to sample comfortably in your clinic, arrange expedient referral to a provider skilled in dermatology or surgery.
If a pigmented lesion is too large to sample comfortably in your clinic, arrange expedient referral to a provider skilled in dermatology or surgery.
![]() Avoid Monsel’s solution and silver nitrate in cosmetically sensitive areas as they can leave a permanent pigmentation.
Avoid Monsel’s solution and silver nitrate in cosmetically sensitive areas as they can leave a permanent pigmentation.
SKIN TAG REMOVAL
Author:
Kathleen E. Dunbar Haycraft, DNP, FNP/PNP-BC, DCNP, FAANP
Description
• Procedure to remove benign skin tags by various methods
Indications
• Symptomatic (tender, bleeding, or itching)
• Cosmetic concerns
Equipment
Depending on the method used:
• Alcohol swabs
• Gauze 4 × 4
• Lidocaine, or topical anesthetic
• Small sharp scissors (gradle)
• Forceps (optional)
• Liquid nitrogen
• Hyfrecator
Preparation
• Procedure details, risks, alternatives, and recurrence are discussed with the patient. All questions are answered and informed consent is given by the patient.
• Advise patients that this may be considered a cosmetic procedure and not covered by insurance.
• If you have any doubt as to the benign nature of the lesion, send it for biopsy.
• Cleanse the area with antiseptic preparation and allow it to dry.
• Consider anesthesia options: ice for 1 minute prior to removal; a brief spray of liquid nitrogen (LN2); topical anesthetic; lidocaine injection (more painful than the actual removal); and no anesthesia, which is very common for clipping, hyfrecation, and cryotherapy.
Procedures
Several techniques, including snip removal, shave removal, hyfrecation, and cryosurgery.
Scissor removal
• Grasp the skin tag and slightly extend it upward. Make sure to use sharp tissue scissors to assure a quick and accurate snip at the base of the lesion (Figure 24-5
Related posts:

Stay updated, free articles. Join our Telegram channel

Full access? Get Clinical Tree


