Chapter 47 Hamstring Anterior Cruciate Ligament Reconstruction with IntraFix Tibial Fastener
Introduction
The optimal initial graft fixation technique for hamstring tendon anterior cruciate ligament (ACL) grafts remains controversial.1–6 Biomechanical studies have demonstrated that cross-pin and Endobutton-CL femoral fixation techniques provide excellent initial fixation properties.7,8 However, tibial fixation of hamstring tendon ACL grafts has been more problematic. This is primarily due to the lower bone mineral density of the proximal tibia and the fact that tibial fixation devices must resist tension applied parallel to the axis of the tibial bone tunnel.2,9–11 Extratunnel tibial fixation techniques that anchor to the tibial cortex can provide secure initial fixation; however, the implants are often prominent and cause local skin irritation and pain, requiring a second operation for removal.12 Intratunnel tibial fixation using interference screws eliminates the problem of prominent hardware, but the single interference screw technique has been shown to have somewhat low initial fixation strength and increased slippage under cyclical loading.2,4,9,13
The IntraFix tibial fastener was designed with two goals in mind, one mechanical and one biological. The first goal was to achieve more rigid intratunnel fixation of soft tissue grafts and eliminate or decrease the need for supplemental tibial fixation. The second goal was to maximize bony integration of the soft tissue graft strands into the bone tunnel wall. To achieve these goals, the device was designed with an expandable, four-channel, ridged, 30-mm polyethylene sheath and a tapered Delrin expansion screw. The four channels individually capture and grip each of the four strands of the hamstring tendon graft into separate compartments and directly compress each of the graft strands against cancellous bone. We performed cyclical and single load to failure (LTF) tests comparing the plastic IntraFix and bioabsorbable interference screws in paired young to middle-aged human cadaver tibiae with human doubled gracilis and semitendinosus grafts (DGSTs) (Table 47-1). The plastic IntraFix demonstrated a mean ultimate failure load of 800N and stiffness of 200 N/mm, which was significantly higher than interference screw fixation. In an independent biomechanical study comparing commonly used hamstring tendon graft tibial fixation devices, Kousa et al14 demonstrated that the IntraFix had the highest LTF (1309N) and stiffness (267 N/mm) and the least amount of slippage (1.5 mm) after cyclical loading.
Table 47-1 Sizing Scheme for Bio-IntraFix
| Graft Diameter | Drill Tunnel | Screw Size |
|---|---|---|
| 7 mm | 8.5 mm | 6–8 mm |
| 8 mm | 9.0 mm | 6–8 mm |
| 9 mm | 10.0 mm | 7–9 mm |
| 10 mm | 11.0 mm | 8–10 mm |
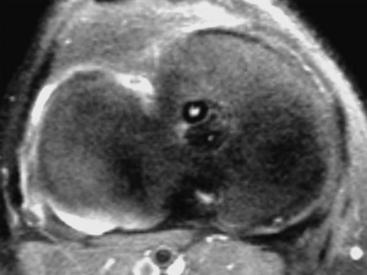
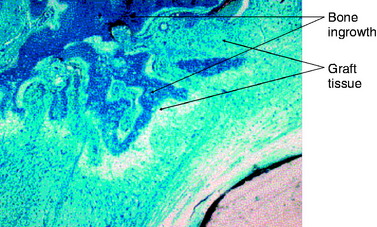
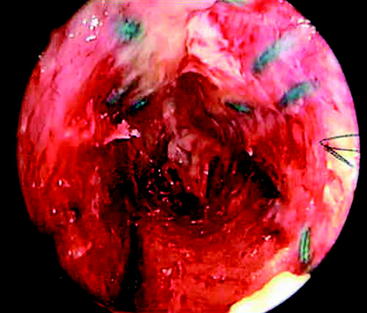
The second goal of this design was to maximize the amount of contact between graft tendons and bone. Fixation outside tunnels and from suspension devices results in a loose fibrous attachment between the tunnel wall and the graft, with little if any bony ingrowth into the graft(Fig. 47-1). In contrast, direct compression of tendon to bone by interference screws within the tunnel leads to bony ingrowth including Sharpey fiber formation.15 However, a single interference screw inserted next to a bundled four-stranded graft definitely leaves a considerable portion of the tunnel filled by the screw and some of the tendons without bony contact. In contrast, the IntraFix has the potential for more extensive bone–graft integration because each strand is pressed against bone and the entire tunnel wall is in contact with graft. A limited histological study performed on the IntraFix in sheep demonstrated early bony integration (Fig. 47-2). Thus extrapolation of the interference screw data to this device seems justified. Further evidence of extensive bony integration when using the IntraFix and Bio-IntraFix comes from direct examination of the tibial tunnel many months after reconstruction. Fig. 47-3 shows an example of the appearance of the tibial tunnel 1 year after ACL reconstruction; it was obtained during a revision case after the sheath had been removed and the arthroscope inserted into the tibial tunnel. It shows a firm surface, apparent integration of the sutured tendons into the bone tunnel wall, capillary ingrowth, and no loose fibrous tissue.
Surgical Technique
Tibial Tunnel
The tibial tunnel must be carefully oriented in both the sagittal and coronal planes for several reasons. Due to the large cross-sectional area of four-strand hamstring tendon grafts, sagittal placement of the tibial tunnel is especially critical.16 The tibial tunnel position in the sagittal plane determines whether the ACL graft impinges against the roof of the intercondylar notch in full knee extension.2,16–19 Roof impingement is associated with effusions, loss of extension, anterior knee pain, quadriceps weakness, and increased anterior laxity. Coronal plane orientation is the primary determinant of placement of the femoral tunnel along the side wall of the intercondylar notch and, to some degree, of the length of the femoral tunnel. A more medial starting position on the tibia allows the femoral tunnel to be drilled closer to the 10- or 2-o’clock position along the sidewall. A femoral tunnel at the 10-o’clock (right knee) or 2-o’clock position (left knee) is important because a single-bundle ACL graft positioned at these locations in the intercondylar notch is more effective at resisting combined rotatory loads than one placed at the 11-o’clock position. Biomechanical studies have demonstrated little difference in coupled anterior tibial translation between this graft and a double-bundle hamstring ACL reconstruction at low degrees of flexion.20
In our surgical technique, a tibial tunnel length of 35 to 45 mm is optimal because this will accommodate the entire 30-mm IntraFix or Bio-IntraFix with no chance of the device protruding into the joint. In general, setting the variable angle tibial aimer between 45 and 55 degrees will allow these tibial tunnel lengths to be achieved. The guidelines of Jackson and Gasser,21 Howell,15 and Simmons et al22 are used for intraarticular placement of the tibial guide pin. If necessary, the tibial guide pin position can be checked by intraoperative radiographs or fluoroscopy with the knee in maximum extension.
Femoral Tunnel and Graft Fixation
Because the IntraFix tibial fastener can be used with any femoral fixation technique, the choice of the femoral fixation is based on the surgeon’s preference. However, we prefer cross-pins or the Endobutton-CL because these fixation techniques have been shown to be strong and stiff and to have the least amount of elongation under cyclical loading.7,8 More importantly, these two femoral fixation techniques permit equal tensioning of all four graft strands. This is an important goal because, as shown by Hamner et al,23 it is necessary to equally tension all four strands of a DGST graft to maximize initial graft strength and stiffness. An equally tensioned DGST graft was stronger and stiffer than a 10-mm, central-third patellar tendon autograft. However, when no attempt was made to equally tension all four graft strands, the ultimate failure load and stiffness of the DGST graft were not statistically different from that of a doubled semitendinosus tendon graft alone. Thus failure to equally tension all four graft strands of a DGST graft negated any contribution from the doubled gracilis tendon graft.
Graft Passage, Graft Tensioning, and Tibial Fixation
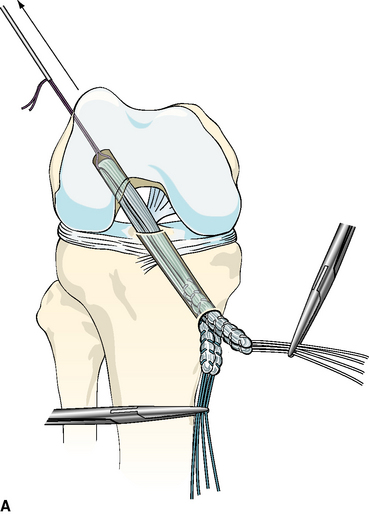
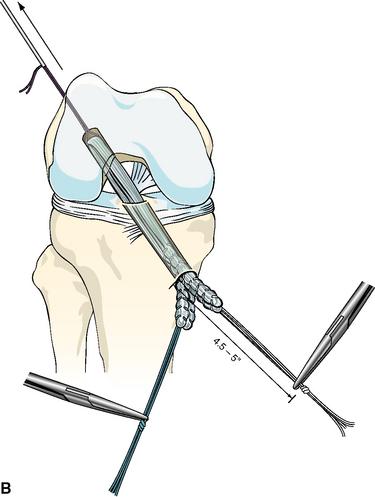
After the femoral side of the DGST or tibialis tendon allograft has been securely fixed in the lateral femoral condyle, the whipstitches from the gracilis tendon or corresponding opposite ends of the tibialis tendon allograft are tied together to create a loop approximately 4.5 to 5 inches from the end of the tibial tunnel. This step is repeated for the semitendinosus tendon and the corresponding opposite ends of the tibialis tendon allograft (Fig. 47-4, A and B).

