Fig. 5.1
The typical instrumentation required for endoscopic subfascial breast augmentation. On the left is pictured the 30°, 10-mm endoscope with retractor
Endoscopic instruments include a 10-mm, 30° angled endoscope, endoscopic cautery and suction, Deaver retractor, strong curved Mayo scissors, and several blunt dissectors. An endoscopic tower with high-resolution video monitor and adequate operating room space are required. The patient is under general anesthesia, positioned supine with her arms out at 90°. The endoscopic tower is set up at the foot of the operating table for ease of viewing when dissecting on the left and right sides. Prep and drape are done in the usual fashion, with the axillary area fully exposed.
5.1.2 Patient Markings
The patient is marked in a standing position. The anterior border of the axillary fold is marked (Fig. 5.2), ensuring that the incision is placed posterior to this point. The incision is marked in an AP direction, in the apex of the axilla (Figs. 5.3 and 5.4). The anterior end of the incision must be 1–2 cm from the axillary fold to prevent visibility. The midline is marked with a vertical line, and the inframammary fold and the outline of the planned dissection are then marked (Fig. 5.5).


Fig. 5.2
First, the anterior border of the axillary fold is marked with the patient standing with her arms at rest. The incision should never extend anterior to this line
Fig. 5.3
The axillary apex is marked in the highest part of the armpit. This is done with the patient placing her hand on her hip and flexing her pectoralis major muscle
Fig. 5.4
The planned incision is shown. It is 1–2 cm posterior to the anterior axillary fold to ensure invisibility with the arms in repose. An incision 4–5 cm in length is designed
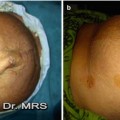
Fig. 5.5
The planned outline of dissection. This patient’s inframammary fold will be lowered. The incisions are invisible in this position
5.1.3 Procedure
A 2-0 nylon figure-of-eight suture is placed at the anterior end of the marked incision. This prevents skin tearing and inadvertent extension of the incision anteriorly during retraction and implant placement. The incision is made and the subcutaneous space is opened (Figs. 5.6, 5.7, and 5.8).
Fig. 5.6
The patient is positioned supine with the arms out at 90°. The endoscopic tower is set up at the patient’s feet for ease of viewing during dissection on each side. Care is taken to ensure that all equipment is properly secured and can be operated while standing on the right or left side
Fig. 5.7
The patient is positioned on the operating table with the arms out at 90°. The planned incision and area of dissection are shown
Fig. 5.8
The incision is made and the subcutaneous layer is opened with electrocautery
Curved Mayo scissors are used to spread the soft tissues until the pectoralis major fascia is visualized (Fig. 5.9).
Fig. 5.9
Spreading with a curved Mayo scissors is done to identify the fascia of the pectoralis major muscle
Spreading in this portion while exposing the muscle helps to preserve sensory nerves such as the intercostobrachial nerve [9]. For this reason, it is important to avoid posterior dissection within the axillary fat [10]. Once the pectoralis major fascia is exposed, the fascia is opened the muscle fibers are exposed. The endoscope is introduced (Fig. 5.10
 Endoscopic Harvest of the Fascia Lata for Facial Reanimation
 Video-Assisted Thoracoscopic Sympathicotomies for the Treatment of Palmar and Axillary Hyperhidrosis
 Endoscopic Diastasis Recti Repair
 Endoscope-Assisted Brow Lift
 Endoscopic Flap Design and Harvesting
 Breast Reconstruction Using Laparoscopically Harvested Omental Flap


Related posts:
Endoscopic Harvest of the Fascia Lata for Facial Reanimation
Video-Assisted Thoracoscopic Sympathicotomies for the Treatment of Palmar and Axillary Hyperhidrosis
Endoscopic Diastasis Recti Repair
Endoscope-Assisted Brow Lift
Endoscopic Flap Design and Harvesting
Breast Reconstruction Using Laparoscopically Harvested Omental Flap
Stay updated, free articles. Join our Telegram channel
Full access? Get Clinical Tree
