Photographic documentation is an essential part of facial plastic surgery practice. Standardization of photographic technique is critical to achieve accurate and consistent images to be used for medicolegal, surgical planning, outcome review, research, and teaching purposes. Standardized, high-quality images can be achieved by using proper equipment, lighting, and patient positioning. Standardized photography is especially important for facial resurfacing procedures when fine details, such as pore size, skin texture, pigmentation, and rhytids, need to be captured and accurately assessed. The purpose of this review is to discuss how to obtain standardized, high-quality images of skin surface.
High-quality photography is an essential part of any facial plastic surgery practice. Photographic documentation has a wide variety of clinical, research, and teaching applications and is also important for medicolegal purposes. Preoperative photographs assist in surgical planning and allow for effective communication of patients’ perceptions and wishes. Comparison of preoperative and postoperative photographs allows surgeons and patients to accurately evaluate the outcome of the procedure. Review of photographic outcomes provides a surgeon with an opportunity for self-assessment and modification of surgical technique. In addition, photographs play an important role in advertising and marketing.
The prominent role of photography in facial cosmetic and reconstructive surgery places significant importance on using precisely defined standards during photodocumentation to achieve consistent and reproducible results. Standardized photography is especially important in facial resurfacing procedures where the changes are often subtle and variation in technique may demonstrate a clinical difference where none exists. In dermatologic photography, fine details, such as changes in skin texture, pigmentation, rhytids, and pore size, are evaluated to determine the efficacy of facial resurfacing procedures. The purpose of this review is to discuss how to obtain standardized, high-quality images of skin surface. Photographic variables, such as lighting, camera, exposure, focal length, white balance, and patient positioning, and their resultant effects on skin photography are discussed.
Photography equipment
Camera
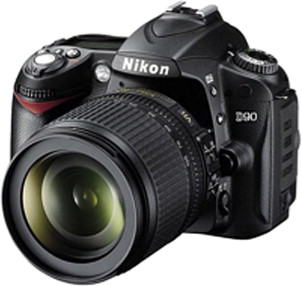
Digital single-lens-reflex (DSLR) cameras have replaced conventional 35-mm film cameras for most medical photography. The digital system is convenient to use because it allows for immediate viewing and evaluation of the images, many images can be taken without additional costs, and storage of images is quick and compact ( Fig. 1 ).
Camera features should include a high-quality liquid crystal display screen for image review and an accessory shoe to connect with an external flash device. A gridded viewing screen is beneficial for consistent subject positioning. In terms of resolution, cameras with 5 megapixels or higher are sufficient for the purposes of medical photography.
Lens
Lens selection is important for taking high-quality photographs and minimizing the amount of distortion. Lenses are classified by focal length. This measurement, defined in millimeters, is the distance between the optical center of the lens and the digital sensor when the lens is focused on infinity. This distance relates to the distance that the camera must be from the subject for the subject to be in focus.
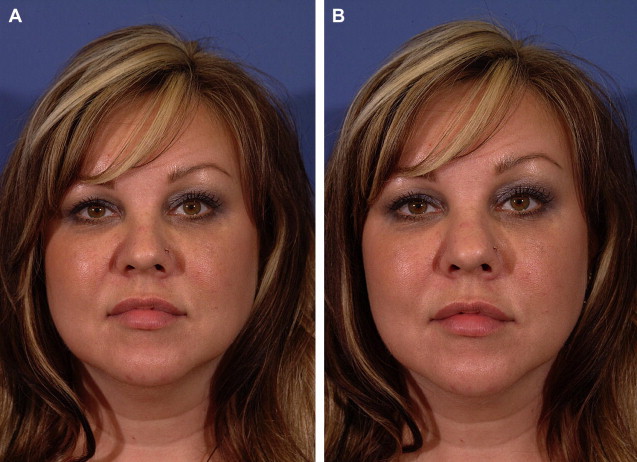
Most DSLR cameras come equipped with a zoom lens, which allows the photographer to change the focal length without changing lenses. If working with a zoom lens, it is imperative to use the same focal length for preoperative and postoperative documentation to avoid inconsistencies. Fixed focal length lenses are also available and some authors recommend using a fixed focal length lens to ensure image consistency. Macro lenses are designed for nearfocusing and allow capture of facial details. For medical portraiture, a macro lens with a focal length of 90 to 105 mm is recommended to capture relevant details of facial anatomy. The range is extended to 120 mm for close-up dermatologic photography. Lenses with shorter focal lengths, such as 50 to 55 mm, create a noticeable midface distortion ( Fig. 2 ).
Exposure
Exposure control plays a fundamental role in creating a high-quality image. To obtain consistent exposure, automatic exposure settings should be avoided. The camera mode should be set to manual and 3 camera variables that determine exposure must be set by the photographer: f-stop setting, shutter speed, and ISO.
The amount of light that strikes the image sensor depends on aperture setting, also referred to as f-stop, and shutter speed. The aperture, much like the pupil of the eye, controls the amount of light that passes through the lens. Shutter speed, much like a blink, determines the length of time the light is allowed to hit the sensor. Proper aperture and shutter speed selection is critical for achieving accurate reproduction of the subject matter.
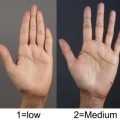
F-stop number represents the ratio of the focal length of the lens to the diameter of the lens diaphragm opening. The larger the f-stop number, the smaller the diameter of the lens opening, the less light is allowed to strike the camera sensor. Each f-stop setting lets in half as much light as the next lower setting. The aperture of the camera also affects the depth of field, or the distance over which objects in the picture appear sharply focused. The larger the f-stop, the greater the depth of field. Typically, f/16 is desirable to ensure that all facial features are in focus. Patients with darker pigmentation may require f-stop to be lowered by half to 1 setting to brighten the image. To select an appropriate f-stop for a given studio setup, a series of test shots should be taken at varied f-stops. These images can then be examined to select the appropriate setting.
Shutter speed affects the amount of light that enters the camera and controls the amount of movement seen in the photograph. For most photography in the office studio, shutter speed should be set to 1/60 seconds, a standard flash sync speed.
ISO setting controls sensitivity of the camera sensor to light. The higher the ISO, the more sensitive the sensor is to light. In medical portraiture, an ISO of 200 is ideal to produce high-quality images.
Background
The purpose of the background is to eliminate distractions and to place full focus on patients. For medical photography, a medium to light blue background is ideal. Blue background is visually pleasing in black and white or in color photography, provides sufficient patient-background separation, complements all skin tones, does not overwhelm patients, and allows for a greater depth of field. Having the same blue background in all preprocedure and postprocedure photographs guarantees that changes in skin color are not reflective of the change in the lighting. A white background produces harsh shadows, whereas black background diminishes 3-dimensional quality of the image. The background should be without folds or creases and made of nonreflective material, such as matt paint, wallpaper, or cloth.
Related posts:
 Versatility of Erbium YAG Laser: From Fractional Skin Rejuvenation to Full-Field Skin Resurfacing
 Radiofrequency: Thermage
 Laser Therapy in Latino Skin
 Standardized Photography for Skin Surface
 Laser Treatment of Skin Texture and Fine Line Etching
SmartLifting Fiber Laser–assisted Facial Rejuvenation Techniques
Laser Treatment of Skin Texture and Fine Line Etching
SmartLifting Fiber Laser–assisted Facial Rejuvenation Techniques
Stay updated, free articles. Join our Telegram channel

Full access? Get Clinical Tree


