Fig. 5.1
Shaving towards a finger
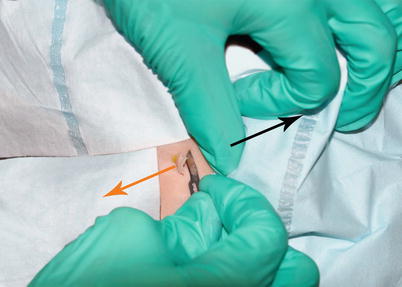
Fig. 5.2
Traction (black arrow) placed 180° opposite to and from behind the blade’s trajectory (orange arrow)
Accidents Happen When
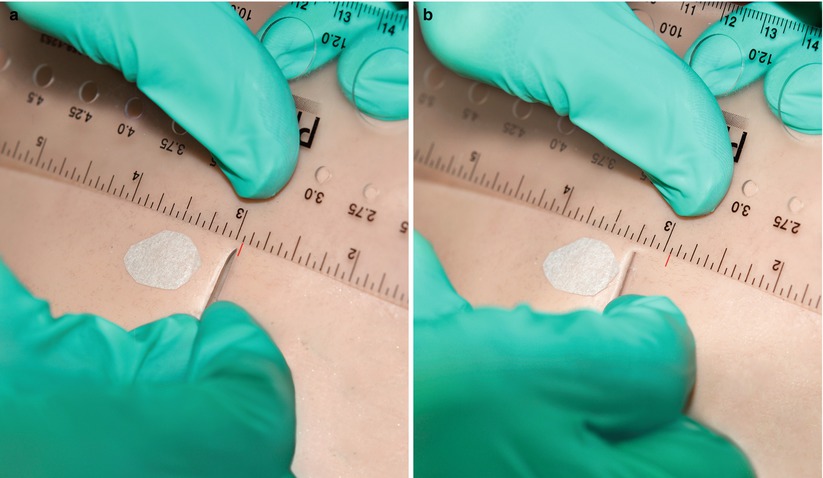
Fig. 5.3
Failure to place traction results in pushing of slack skin, preventing controlled cutting. (a) Baseline. (b) Slack skin bunches up. When and how it gives is not under the control of the surgeon
Solution 1
Place traction behind the blade and cut opposite the direction of traction away from the retracting finger (Fig. 5.4).


Fig. 5.4
Correct application of traction for shave biopsy. (a) Finger applies traction in opposite direction of and from behind the blade. Hand will move toward the surgeon’s body as the shave progresses. (b) Angle blade for entry at 30–60°, making a superficial slit. (Not doing so results in bunching of the skin at the blade’s edge (Fig. 5.3b) and a sloppy, uncontrolled incision once the skin gives.). (c) Nestle the blade in the slit. Be sure to visualize the tip. (d) As it advances, turn blade parallel to the wound once desired depth is achieved
Solution 2
To address lax skin, pinch the skin under the target lesion so it rests at the apex of a taught bulge (Fig. 5.5).
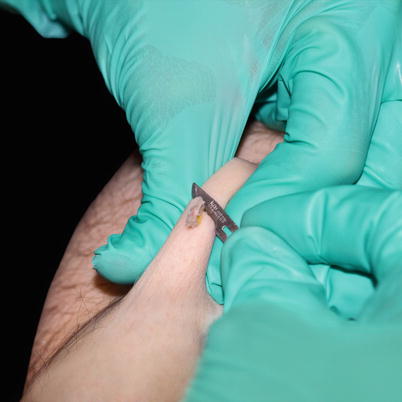
Fig. 5.5
Pinching lax skin keeps fingers safe while providing traction. Biopsy depth will be deeper in the center of the lesion than at the periphery, and the resulting defect is often a divot (take care on the face). In some instances, the pinch technique can be used merely to make the initial, superficial incision, allowing conversion to the conventional traction technique (Fig. 5.4)
Solution 3
For facial skin or genital skin, place a finger under the lesion to tent the skin (Fig. 5.6).
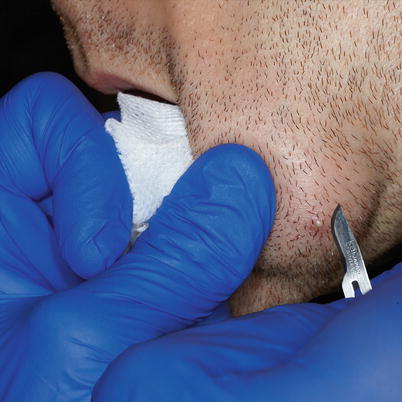
Fig. 5.6
Tenting the skin by pushing from inside the cheek. Note use of gauze between finger and cheek to allow for traction on slippery oral mucosa
Accidents Happen When
A bendy blade creates jagged wound edges or takes inappropriately wide or deep margins (Fig. 5.7).
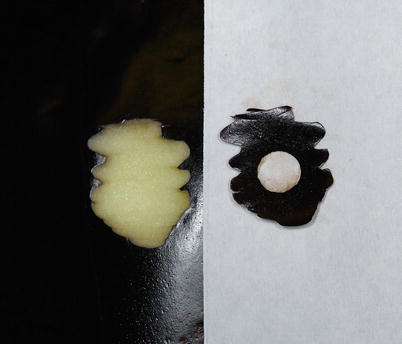
Fig. 5.7
Jagged edges and inappropriately wide margins using a bendy blade
Solution 1
Manipulate bendy blade angle and contour to control depth and margin of the shave (Fig. 5.8).
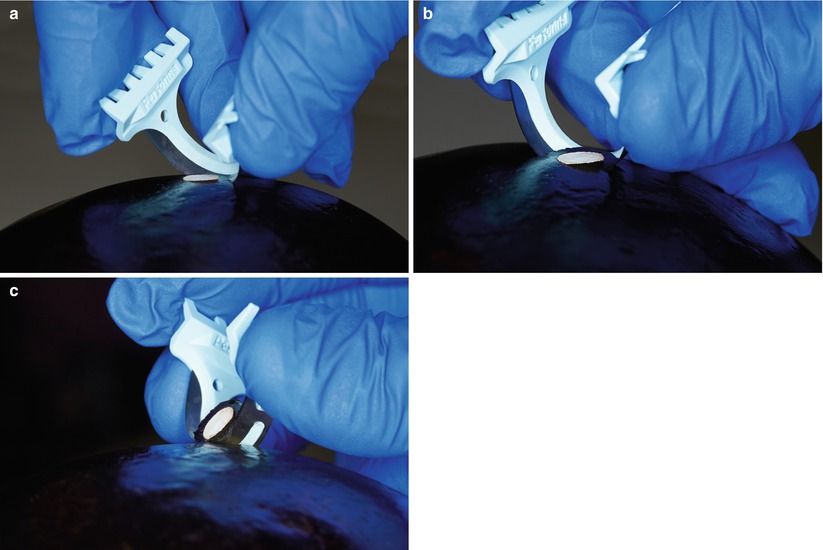
Fig. 5.8
Using a bendy blade. (a) Hold the blade in the shape of a “U”. Initially, angle downward to achieve desired depth. (b


Stay updated, free articles. Join our Telegram channel

Full access? Get Clinical Tree


