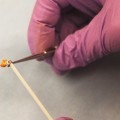
Fig. 6.1
Movement of unstabilized skin upon rotation of punch trephine. If skin does not cut due to lack of skin traction, the blade can slip off center and miss the intended target (here demonstrated with the blunt end of the trephine to avoid cutting the volunteer)
Solution 1
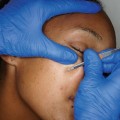
Place traction with three fingers spaced at 120° from each other and each pulling away from the central target lesion (Fig. 6.2).
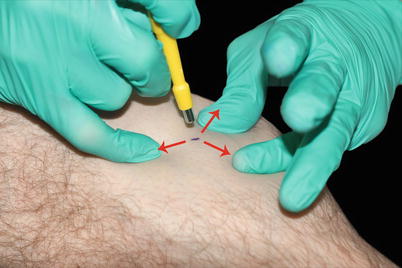
Fig. 6.2
Three-way traction prevents slippage
Solution 2
Place traction perpendicular to skin tension lines prior to the punch biopsy. The defect will deform into an ellipse, rather than a circle, along the tension line (Fig. 6.3).
Fig. 6.3
Two-way traction perpendicular to skin tension lines
Solution 3
Rarely, for large lesions, one can push the “retracting” fingers toward, rather than away, from the lesion sometimes allowing for complete excision with a punch trephine (Fig. 6.4).
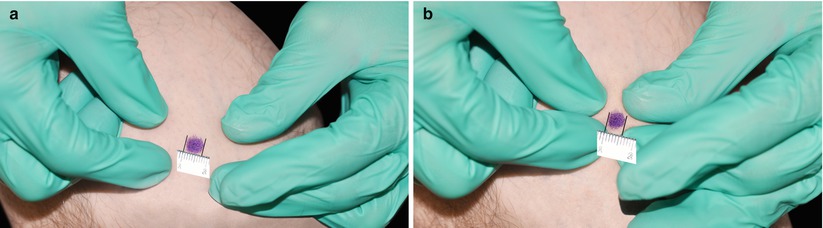
Fig. 6.4
Tight compression of a lesion from four directions. (a) Larger lesion (7.5 mm). (b) Compressed lesion (6 mm)
Accidents Happen When
The trephine is pressed too hard onto the skin resulting in a gross indentation and deep injury to the patient once the dermis gives way (Fig. 6.5).

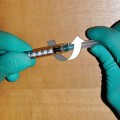
Fig. 6.5
Skin indentation prior to punch penetration from excessive downward pressure (cap was left on to protect the volunteer)
Solution
Spin the trephine rapidly with gentle downward pressure. The trephine advances due to its cutting from twisting more than from forceful downward pressure. A sudden ‘give’ of the instrument is experienced upon entering the subcutis.
Accidents Happen When
The hand rotating the trephine is not in contact with the patient resulting in punching too deeply (Fig. 6.6).
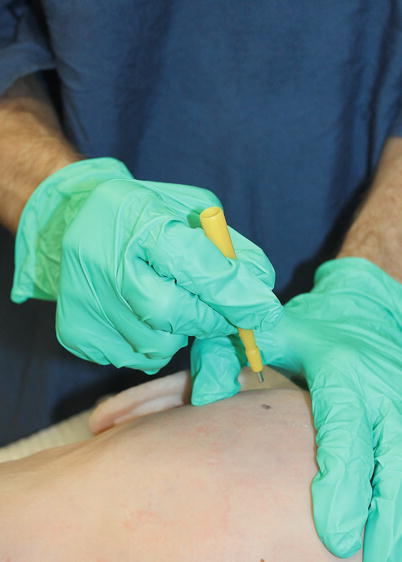
Fig. 6.6
The hand rotating the trephine does not contact the patient, obscuring depth perception by engaging large rather than fine muscle groups
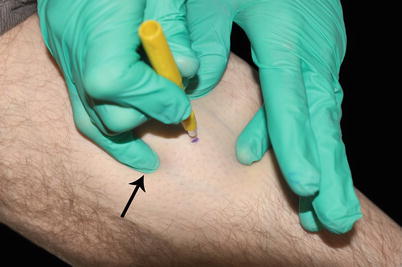
Fig. 6.7
Pinky of the hand twisting the trephine touches the skin
Accidents Happen When
The trephine is not centered on a target lesion (Fig. 6.8). This may result in the need for a second procedure.
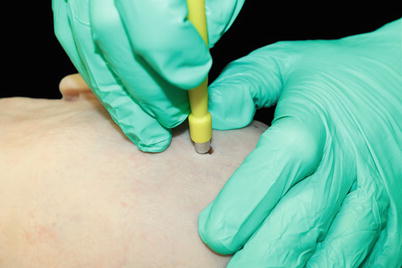
Fig. 6.8
Poor positioning results in an incisional biopsy where excision might have been possible
Solution
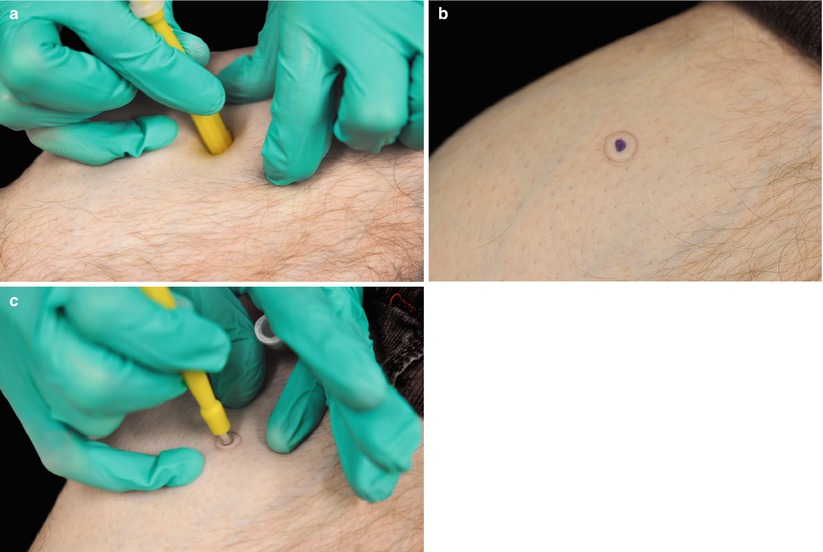
Fig. 6.9
Marking the target lesion prior to biopsy. (a) Make a circle using the backside of the trephine. (b) Resulting impression. (c) The trephine is now positioned between the lesion and the circumscription. The lesion, hidden under the trephine, is fully excised
Accidents Happen When
Forceps are not put on the tray, or serrated, rather than toothed, forceps are put on the tray. Attempts to improvise by grabbing the specimen with a needle or fingers can result in injury. Serrated forceps often crush the specimen.
Solution
Always set up with a toothed forceps.
Accidents Happen When
The biopsy specimen gets stuck in a small punch instrument (Fig. 6.10). Various futile attempts at retrieval destroy the specimen.
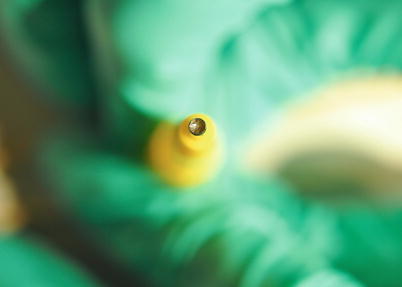
Fig. 6.10
Specimen is lodged in the 2 mm trephine
Solution 1
Related posts:

Stay updated, free articles. Join our Telegram channel

Full access? Get Clinical Tree


