Fig. 15.1
Hand’s Vein plexus is shown. Reproduction of a lithograph plate from Gray’s anatomy (Henry Gray, Anatomy: Descriptive and Surgical)
15.2 Pitfalls
While filling hand’s dorsum, it is important to insert the needle superficially into the dorsal fascia, in order to obtain a satisfying esthetical result. The use of a blunt needle is recommended to minimize the chances of damaging the superficial vein network. Safe and reliable points of injection can be obtained in the gap between each tendon distal to the wrist.
Irregularities and overcorrection can be particularly evident in this area, involving significant discomfort to the patients as hands are needed for daily activities. For this reason, injection technique is critical to avoid noble structures’ injuries. It is mandatory not to inject too much product at once and to recommend the patient to massage the treated areas.
15.3 Hand Filling with Calcium Hydroxylapatite and Blunt-tip Cannula
15.3.1 Indications
Hands that have lost volume and roundness appearing bony and thin with prominent veins on the back. Calcium Hydroxylapatite is a filler that can successfully be employed in oldest hands. The product is long lasting, more than a year.
15.3.2 Contraindications
The filler should not be injected in areas that lack sufficient blood supply or that have an infection or inflammation.
No injection should be done if the hand has been previously treated with liquid silicone or other permanent fillers because new injection could lead to inflammation or infection of the implants.
Any hypersensitivity to any components of the filler obviously constitutes a contraindication for the treatment.
15.3.3 Materials
1.5 cc of Radiesse (Fig. 15.2).
Cannule 27 G, 37 mm length.
Needle 26 G, 13 mm length.
0.2 cc of Local anesthetic (2% lidocaine or 2% mepivacaine) with epinephrine 1:100 000.
Bandages and antiseptic solution.
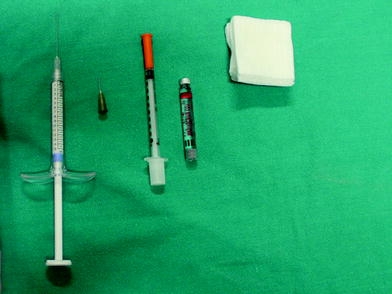
Fig. 15.2
Materials
15.3.4 Material Choice
In Europe, Asia and America Radiesse can be used.
15.3.5 Operating Time
The procedure takes about 20 min.
15.3.6 Method
The procedure is described in Figs. 15.3, 15.4, 15.5, 15.6a, b, 15.7, 15.8, 15.9, 15.10a, b, 15.11a, b, c, 15.12a, b, c.

Get Clinical Tree app for offline access

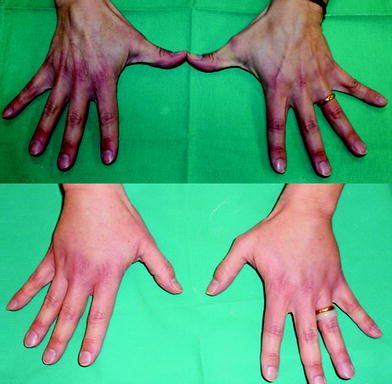
Fig. 15.3
Pictures of patient’s hands before (up) and after (down) the treatment

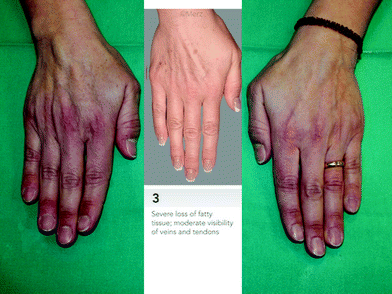
Fig. 15.4
Comparison of patient’s hands before the treatment with Merz scale (grade 3, severe loss of fatty tissue)

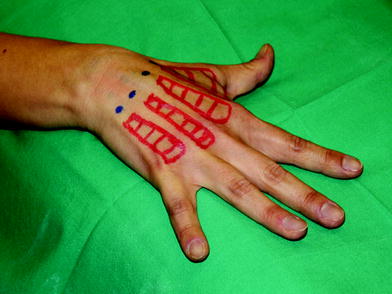
Fig. 15.5
The entrance points and pattern of the cannula are drawn on patient’s hand. Safe and reliable points of injection can be obtained in the gap between each tendon distal to the wrist

Fig. 15.6
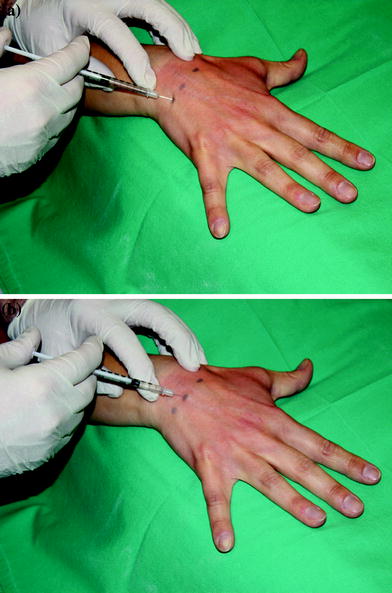
a, b 0.05 cc of anesthesia is injected in each of the entrance points 5 min before the treatment

Fig. 15.7
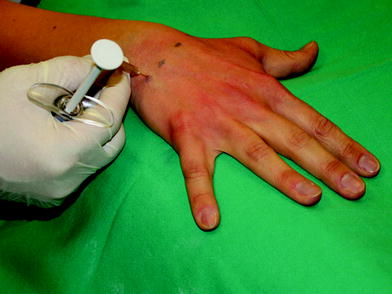
An hole is done with a 26 G needle; the needle should penetrate only superficially into dorsal fascia

Fig. 15.8
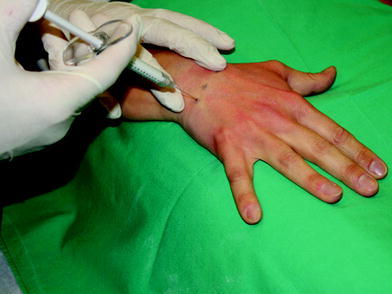
A blunt-tip cannula 27 G is inserted through the hole; to make the procedure easier, it is better to stretch the skin with the free hand and to insert the cannula keeping it perpendicularly to the skin surface

Fig. 15.9
After entering the skin, the cannula is suddenly turned to slide parallel to the skin surface in a superficial plane. Touching the cannula’s tip is a good way to know exactly the position reached

Fig. 15.10
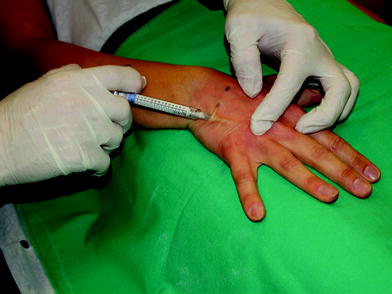
a, b, c A fan-shaped technique is used to spread the filler, injecting the material as the cannula is withdrawn from the skin (retrograde injection). The procedure is performed again using all the four entrance points chosen allowing the product to be spread on the whole dorsum’s surface


