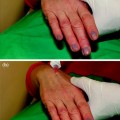
Fig. 10.1
Facial artery and vein are indicated by the arrow
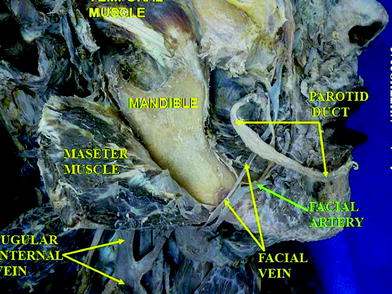
Fig. 10.2
In the anatomic dissection, facial vein and artery are evident
10.2 Marginal Mandibular Branch of the Facial Nerve
The marginal mandibular branch of the facial nerve passes forward beneath the platysma and triangularis, supplying the muscles of the lower lip and chin, and communicating with the mental branch of the inferior alveolar nerve (yellow arrow in Fig. 10.3 and 10.4). The marginalis branch innervates mentalis muscle, depressor labii inferioris muscle and depressor anguli oris muscle. Injuries to marginalis branch of facial nerve can result in asymmetry of oral rim, more evident during facial expressions. Anteriorly to masseter muscle the nerve remains some millimeters over the periostal plane, crossing over the facial vessels. The nerve is surrounded by a quite fibrous connective layer.
Fig. 10.3
Marginal mandibular branch of the facial nerve is indicated by the yellow arrow
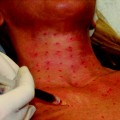
Fig. 10.4
Marginal branch of facial nerve is individuated by yellow arrow and facial vessels are individuated by blue arrow on the patient’s face
10.3 Pitfalls
When approaching the lower cheek with filler injections, the use of a blunt-tip needle can help avoiding bruising and injuries to any structure as an undesired damage to the anterior facial vein can hesitate in noticeable hematomas.
Placing an implant in the mandibular border area is important to use a blunt-tip needle and to avoid to push the head of the needle directly to the fibrous plane surrounding the periosteum.
10.4 Marionette Line Correction with Hydroxylapatite and Blunt-tip Cannula
10.4.1 Indications
Correction of marionette lines obtained by strengthening the support provided by the cheek. The use of the blunt-tip cannula allows for an atraumatic dissection of the tissue with the placement of the implant superficially to buccinator muscle, and permits to obtain fewer needle entry marks and significantly less pain and bruising.
10.4.2 Contraindications
The filler should not be injected in areas that lack sufficient blood supply or have an infection or inflammation.
No injection should be done if the hand has been previously treated with liquid silicone or other permanent fillers because a new injection could lead to inflammation or infection of the implants.
Hypersensitivity to any component of the filler obviously constitutes a contraindication for the treatment.
10.4.3 Operating Time
The procedure usually takes from 10 to 15 min.
10.4.4 Materials
0.8 cc of Radiesse
Cannule 27 G, 37 mm length
Needle 26 G,13 mm length
0.2 cc of Local anesthetic (2 % Lidocaine, 2 % mepivacaine) with epinephrine 1:100 000
Bandages and antiseptic solution (Fig. 10.5).
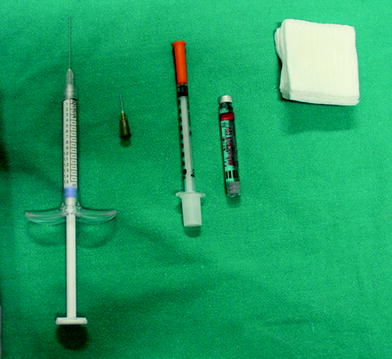
Fig. 10.5
Materials
10.4.5 Material Choice
In Europe, Asia, and America Radiesse can be used.
10.4.6 Methods
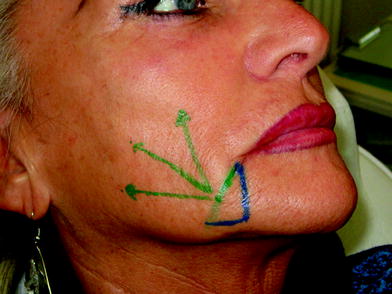
Fig. 10.6
The area of injection is designed on patient’s face (green arrows)
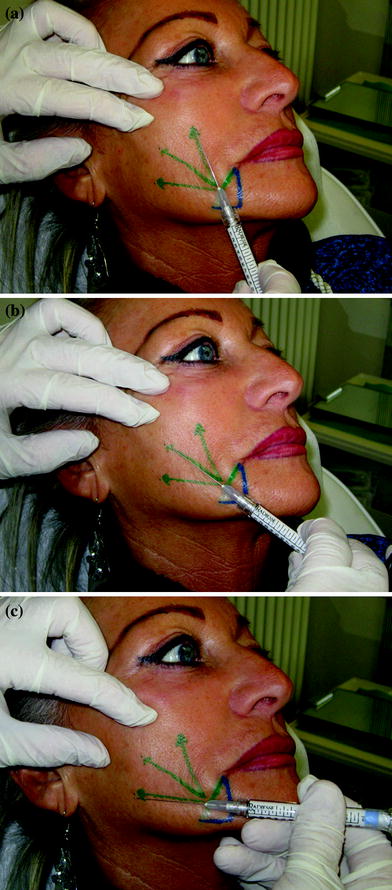
Fig. 10.7
a–c The calcium hydroxylapatite is injected with a blunt-tip cannula along into the subcutaneous tissue with a fan-shaped technique using a single entrance point. The point of introduction of the cannula and its pattern during the treatment is shown
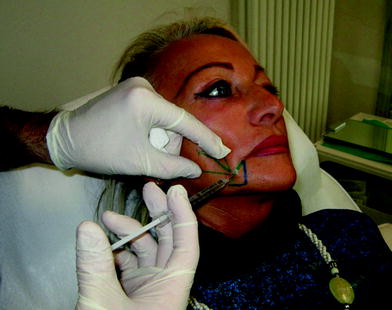
Fig. 10.8
Anesthesia is injected subdermally with an insulin syringe and microfine needle to numb the insertion point of the cannula. 0.2 cc of mepivacaine with Adrenaline solution can be used
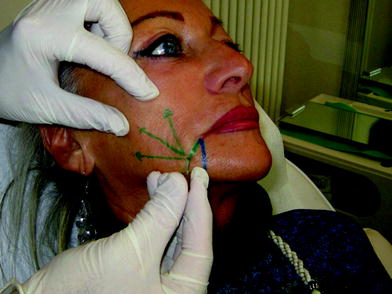
Fig. 10.9
An insertion point for the introduction of the blunt-tip cannula is made with a small and thin needle of 26 G; the entrance point is located 1 cm laterally and 2 cm below the oral rim
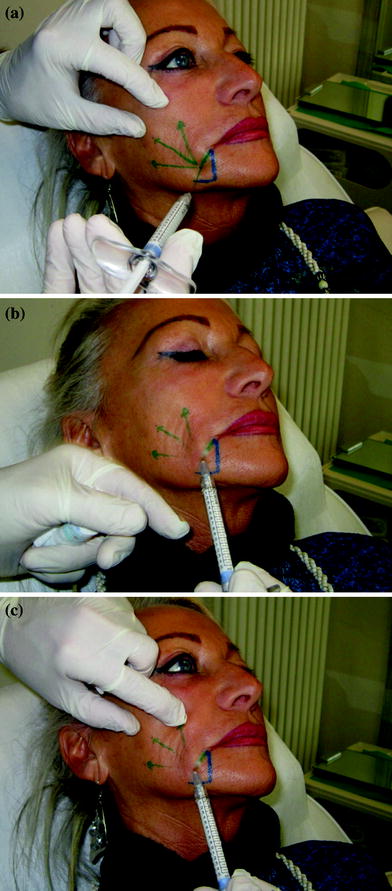
Fig. 10.10
a A 27-G cannula 40 mm length is introduced perpendicularly to the skin plane through the hole created with the needle; b The cannula will then slide in the subcutaneous tissue; c The cannula is inserted in order to be almost parallel to the skin plane and slowly introduced under the skin proceeding from the medial entering overture in a upper lateral direction reaching the furthest point
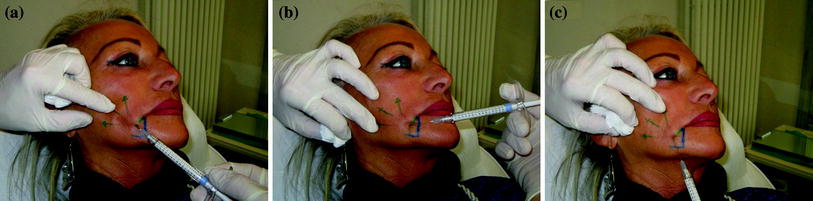
Fig. 10.11
a The cannula slides in a natural plane so no hard resistance should be perceived by the practitioner. It is useful to mind where the tip of the cannula is located touching it with the finger through the skin in order to check the position reached. b


Related posts:

Stay updated, free articles. Join our Telegram channel
Full access? Get Clinical Tree
