CHAPTER 34 Forearm Implant
Summary
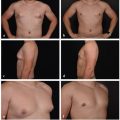
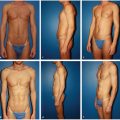
With more men now seeking aesthetic surgery, muscle enhancement has become an increasingly popular request. There is a paucity of literature on the subject, especially regarding upper extremity augmentation. To date, the majority of surgical knowledge has been from small case reports of congenital or acquired muscle atrophy. The goal of this chapter is to describe the process of forearm augmentation in the male aesthetic patient.
Introduction
Muscular enhancement in men is an increasingly popular request. There have been case series and case reports that have described male body augmentation with silicone implants to enhance chest, buttock, and calves. With the exception of pectoral implants, upper extremity augmentation is not commonly performed. In addition, there is a paucity of literature describing techniques and outcomes.
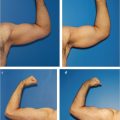
The majority of surgical knowledge we have on contour restoration of the upper extremity is based on reconstruction of congenital deformity or acquired neuropathic or traumatic muscular atrophy. Further, most reports describe larger muscle groups proximal to the elbow including the deltoid, biceps, and triceps; much less is available for augmentation of the forearm. Thus, surgical expertise in this field is difficult to obtain.
The goal of this chapter is to describe the process of forearm augmentation including the preoperative evaluation, relative anatomy, operative technique, postoperative care, and possible complications.
Physical Evaluation
It is important to consider the following when evaluating a patient for forearm implants:
History
Age.
Sex.
Hand dominance.
Occupation.
Other medical problems including coagulopathies or connective tissue disorders.
Complete Hand/Forearm Examination
Any obvious deformities or injuries of the hand.
Complete extremity neurovascular examination including Allen’s test.
Any previous scars.
Anatomy
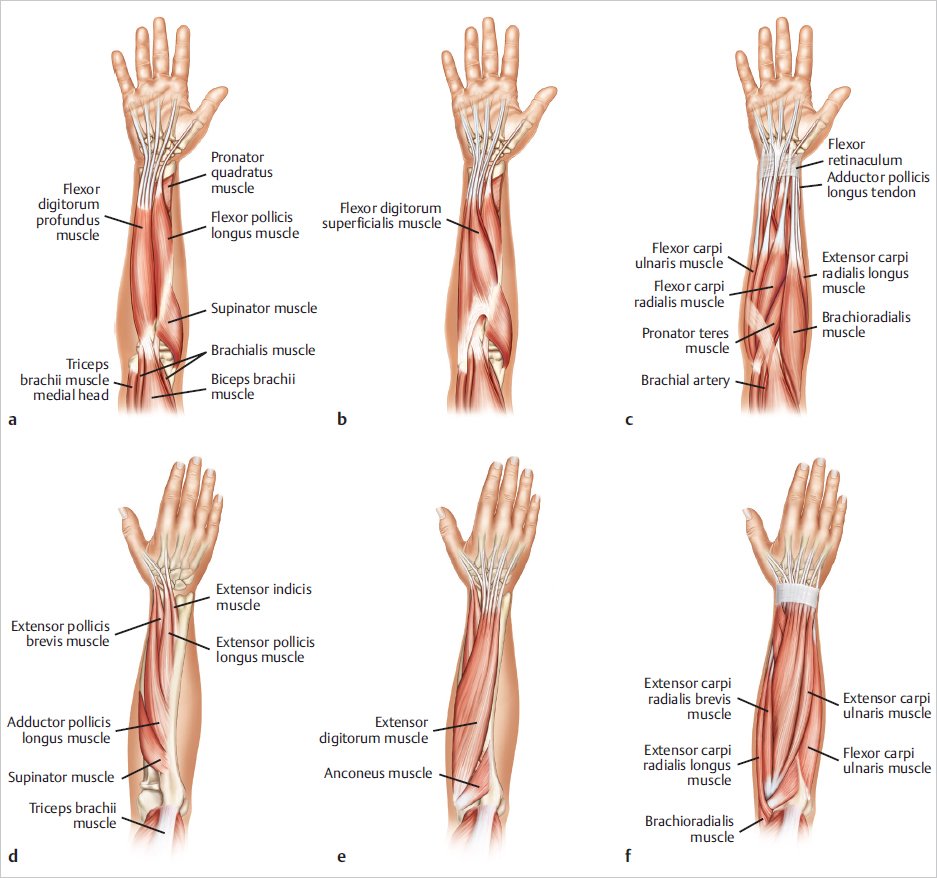
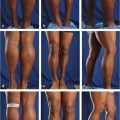
The anatomy of the anterior forearm consists of muscles that are split between three levels: (1) superficial, (2) intermediate, and (3) deep ( Fig. 34.1 ). In general, these muscles are responsible for hand and finger flexion and pronation. Most of the topography of the anterior forearm is based on the superficial muscles. Specifically, these muscles include the pronator teres, the flexor carpi radialis, palmaris longus, and flexor carpi ulnaris. For medial forearm augmentation, this is the muscle group that is generally dissected. In addition, the brachioradialis is a superficial muscle on the radial side of the forearm that acts as a flexor of the elbow. The brachioradialis gives definition to radial aspect of the anterior forearm.
Analogous to the anterior forearm, the anatomy of the posterior forearm consists of muscles that are split between superficial, middle, and deep layers. Again, the topography is based on the muscles of the superficial layer including the digitorum communis, the extensor carpi ulnaris, and the extensor digiti minimi. For lateral forearm augmentation, this is the muscle group that is generally dissected.
Depending on the amount of subcutaneous tissue, you may be able to appreciate the cephalic vein, basilic vein, medial cubital veins, and others. With the exception of superficial veins and sensory nerves, the major neurovascular structures are found deep to the aforementioned superficial layer of the anterior and posterior muscle groups.
Steps for Forearm Augmentation
The patient is brought to the operating room, and a standing prep with arms extended is performed. Sterile stockinettes are placed to the wrists. Patient then lays down on the sterile drapes. Based on surgeon and anesthesia preference, either general or local anesthesia with or without sedation is administered.
Once prepped and draped in the usual sterile fashion, 2% lidocaine with 1:100,000 epinephrine is used as a field block for the antebrachial incision and to the area of planned pocket space. Next, an antebrachial incision is made through the skin into the subcutaneous tissue. Care is taken to attain hemostasis ( Fig. 34.2 ).
Gentle spreading with the scissors and hemostasis with the Bovey is used to travel medially toward the flexor or laterally toward the extensor muscle groups. For medial (ventral) augmentation, identify the glistening fascia of the superficial flexor group (pronator teres, flexor carpi radialis, palmaris longus, and flexor carpi ulnaris) by wiping away the areolar interfascial tissue with a peanut. For lateral (dorsal) augmentation, the glistening fascia of the superficial extensor group (digitorum, communis, extensor carpi ulnaris, and the extensor digiti minimi) is identified, and the interfascial tissue is wiped away with a peanut.
Next, a 3-cm interfascial incision is planned ( Fig. 34.2 ).
The fascia is then elevated, and a 3–0 Vicryl stay suture is placed for later closure. A tonsil forceps is then used to develop a submuscular pocket deep to the aforementioned muscle groups. Once submuscular, progressive expansion is performed using urethral sounds ( Fig. 34.3 ).
A curved 1-cm-wide retractor is used to continue the dissection distally with care not to overdissect the pocket.
Next, triple antibiotic and Marcaine solution is used to irrigate the pocket. Gloves are changed in the standard “no-touch” technique. The custom-carved MuscleGel implant (Alpha Aesthetics, AART, Carson City, NV) is folded like a taco (with the point of the tapered teardrop distally and the fat belly portion proximally) and inserted carefully to avoid implant fracture ( Fig. 34.4 ).
Once the implant is in its pocket, manually flex the arm at that wrist to ensure good implant position. Once content with the placement, reapproximate the intermuscular pocket with 3–0 Vicryl “marionette sutures” to allow the muscles to glide side by side ( Fig. 34.5 ).
Finally, the deep subcutaneous layer is closed with a 3–0 Vicryl suture, and the skin is reapproximated with a 3–0 Monocryl subcuticular suture.
Related posts:

Stay updated, free articles. Join our Telegram channel

Full access? Get Clinical Tree


