30 Pre- and post-treatment photography
Summary and Key Features
• Photography is an essential part of the care of the aesthetic patient
• To be credible in the eyes of patients, and of maximum utility for follow-up, photographs should be of consistent quality, with reproducible lighting, standard poses, camera angles, and color rendition
• Pre-treatment photographs contribute to patient satisfaction and retention by helping patients to appreciate the benefits of treatment when they return for follow-up
• Pre-treatment photographs are of great value in the efficient and satisfactory management and resolution of disappointments, misunderstandings, and complications
• The efficient, consistent use of photography during the pre-treatment consultation, and at follow-up visits as the years go on, saves time and makes money
• The only photographs I have ever regretted are the ones I did not get!
Technical considerations
 Lighting
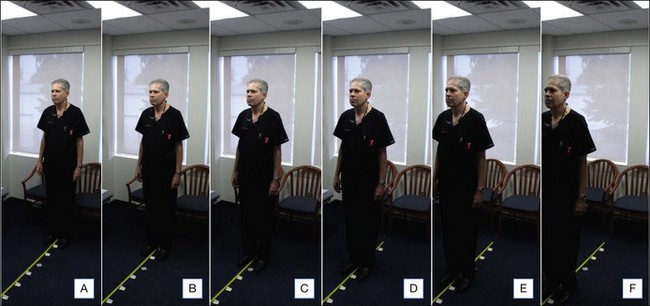
Consistent, symmetrical overhead lighting is vital for credible pre- and post-treatment photography of both the filler patient and the patient being treated with botulinum neuromodulator type A (BoNT-A). This can be done in many offices by finding a point in each examination room where the patient will be standing equidistant between two overhead fluorescent lights (Fig. 30.1 and Video 1), and in a position where the lines and contours of the face will be properly lit. If the overhead lights in your office are not suitable, an electrician can install a couple of light-emitting diode (LED) panels on a single light switch to provide symmetrical illumination for patients standing in a predetermined location in each examination room and / or treatment room (search for the key words ‘led panels ephoto photography’ on www.amazon.com to see a selection of such panels). LED panels have the advantages of very long life (thousands of hours of use), low energy consumption, stable color temperature immediately after being switched on, diffuse light output, and small size.
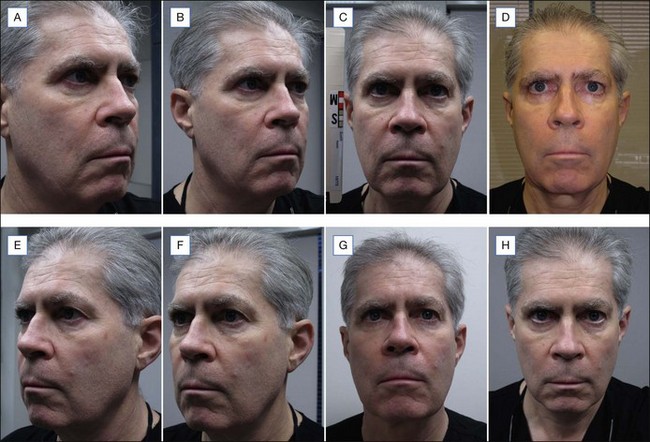
It is important not to use a camera-mounted flash when photographing patients before or after fillers or BoNT-A, because the flash will fill in and obscure facial lines, creases, and contours (Fig. 30.2, compare C versus D; Table 30.1). Flash photography is excellent for the assessment of skin color and telangiectasia, and so is essential in that aspect of the management of the aesthetic patient.
Table 30.1 Flash versus no flash
| Characteristic of photograph | Camera-mounted flash | No flash, symmetrical overhead lighting |
|---|---|---|
| Color rendition | Best | Good |
| Fine detail | Best | Good |
| Contour | Poor – filled in by flash | Good when properly lit |
| Lines and creases | Poor – filled in by flash | Good when properly lit |
Color
To ensure consistent color rendition, the settings I use are detailed in Table 30.2. You will note that a relatively high ASA of 400 is used, in order that the shutter speed will be at least  second during handheld non-flash shots, thus minimizing the effect of motion. I have found it useful to apply Scotch-Tape® over the ASA and exposure adjustment dials on the camera body, to reduce the chance that the settings will be accidentally changed over the course of thousands of photographs.
| Example of custom settings for Canon G12 | C1: flash | C2: no flash |
|---|---|---|
| Exposure adjustment* | 0 | 0 |


