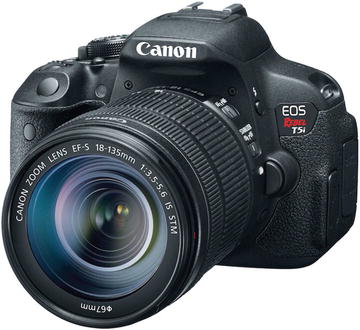
DSLR cameras (Fig. 11.2) are “professional-grade,” large, more complex, and offer the best image quality. The image sensors are typically larger than those in PAS cameras, which allow for greater image resolution. DSLR cameras allow lens interchangeability, offer a wide breadth of pre-capture settings, and provide the photographer with full depth-of-field control (Fig. 11.3). There are also special lenses for close-up and distant images, such as macro lenses and telephoto lenses, respectively. Other settings such as aperture, shutter speed, and zoom are easily modifiable with DSLR cameras. Due to their greater versatility and image quality, they are usually more expensive than PAS cameras.


Fig. 11.3
Example of depth-of-field control with DSLR camera, creating blurring of the background scene and focus of the foreground scene [29]
11.2.2 Digital Epiluminescence Microscopy
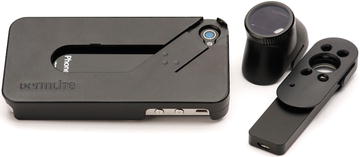
Dermatoscopy, also known as dermoscopy, surface microscopy or epiluminescent microscopy, allows for the visualization of subepidermal morphological features that cannot be seen with the naked eye. It has become almost ubiquitous among dermatologists. In a 2010 survey of US fellows from the American Academy of Dermatology, 46 % of respondents confirmed using a dermatoscope in their practice [2]; in France 94 % of private practice dermatologists use one [3]; and in Australia that number is 98 % [4]. The rise in popularity can be attributed to new research that showed a diagnostic benefit in detecting both pigmented and non-pigmented skin disorders [5–8]. Digital epiluminescence microscopy refers to the digital capture and/or processing of dermatoscopic images via attachment of specialized cameras to a traditional dermatoscope, or directly capturing images onto a specialized digital dermoscopy camera (Fig. 11.4).
11.3 Clinical Photographs
11.3.1 Consent
For standard clinical practice, verbal consent is a minimum prior to photography; and should be documented in the electronic or paper record. Furthermore, written consent is a must if images will be published. Most journals have additional waiver requirements if images include identifiable information. Some clinics include a photography consent document with initial patient registration forms or as part of the initial permission forms of a research study. In these cases, it is best to include authorization of the physician to use and disclose identifiable images, name of intended publication, purpose for publication, description of images, and patient information [9]. If the patient is an infant, child, minor, or an adult unable to make his or her own medical decisions, then a parent or guardian is required to provide verbal consent or sign forms. Photography in the hospital setting should follow the same consent protocol.
11.3.2 Framing and Site Selection
Careful attention and planning is necessary for patient positioning, draping, and image capture. Isolated lesions, such as an atypical nevus, require at least two photographs: one that captures body location (medium view), and one that captures lesion details (close-up). Generalized skin disorders will require more images, with at least one that is “head to toe” [10]. Attention should be given to minimize surrounding structures such as clothing. For facial photographs, removal of makeup is often overlooked, but an important step to remember [11].
11.3.3 Layout and Background
The best background is a solid color that creates contrast such as black in phototype I–III individuals, or lighter pastel colors in phototype IV–VI individuals. Distracting objects should be eliminated. Some accessories are useful such as tapes and skin markers to illustrate size and highlight areas of focus, respectively. Other acceptable background colors are light blue or green, with minimal light reflection [12]. If space is not limited and serial photographs are expected, constructing a room dedicated to taking photographs is ideal. The background can be permanently installed, instead of reconstructed for each patient, allowing consistency among photographs of different subjects or serial photographs of the same subject illustrating before and after pictures [11].
11.3.4 Distance
The camera to subject distance will depend on the type of lesion being captured. It is usually best to take several photographs with varying distances. For example, a generalized skin disorder will require at least three photographs—a complete patient view for full extent and distribution, medium distance view for arrangement and configuration, and a close-up image to define morphology of a representative lesion [12].
11.3.5 Zoom
Digital cameras are capable of two types of zoom—optical zoom and digital zoom. Optical zoom refers to the focal length of the lens, which allows similar magnification as physically moving the camera closer to the object. All DSLR cameras are capable of optical zoom, and it depends on dimensions of the lens attached (Fig. 11.5). PAS cameras on the other hand have limited optical zoom. Digital zoom does not increase the size of the real image but stretches out pixels. For example, a camera with 3× digital zoom will stretch each pixel three times its size. This distorts the image and results in poor quality. For this reason, digital zoom should be avoided unless the camera has high resolution.
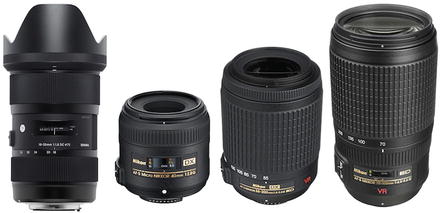

Fig. 11.5
DSLR lenses with varying ability for optical zoom (largest size allows for greatest zoom) [31]
11.3.6 Macrophotography
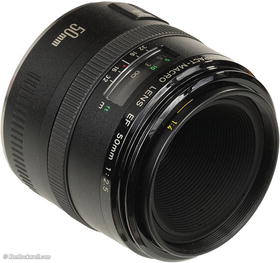
Macrophotography allows digital cameras to capture life size images of small objects on digital sensors at a close distance while retaining intricate detail. PAS cameras with autofocus enabled are optimized for long and medium distance stationary pictures, though images captured at a distance of less than 5 cm require the macro mode function for optimal outcome (Fig. 11.6). DSLR cameras are also equipped with the macro mode. Additionally, DSLR cameras can use specialized macro lenses for incredibly high-quality macrophotographs (Figs. 11.7 and 11.8). These lenses are expensive, and adequate detail can be captured using either the macro mode on a PAS camera or the standard DSLR lens in macro mode. It should be noted that many smart-phone based cameras do not have macro mode functionality, and in effect close-up images may be more difficult to capture.
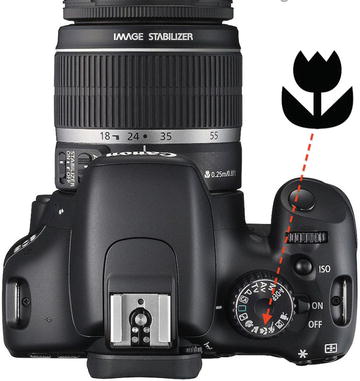


Fig. 11.6
Camera mode dial. Red arrow is pointing to the universal Macro flower icon. Can be used for close-up photos for small lesions such as a single nevus [32]

Fig. 11.8
Example of a macro photograph using a macro lens with a DSLR camera
11.3.7 Lighting/Flash
Lighting, including flash and ambient light, is one of the greatest, if not the greatest, influences on the final photograph. This is also an area that is commonly overlooked. For example, using a camera’s flash too close to the subject can hide characteristic features, due to over exposure. Flash from PAS cameras should be used if there are no other options in a poorly lit room. Natural daylight is the ideal lighting, though this is commonly not practical; a naturally lit room is the next best option. For close-up photographs, ensure the camera is on the macro mode, create ample ambient lighting, do not use flash, and place an appropriate contrasting background [12].
11.3.8 Angles
Similar to lighting, picking the optimal angle will improve photograph quality. Ideally, the image should be taken with the camera’s line of sight perpendicular to the skin surface to minimize distortion of the lesions’ size and shape [13]. One exception is for short distance shots. In these cases, an oblique angle can capture a clearer image [12]. Also, images taken at an angle to the subject may accentuate the skin contour better than a perpendicular shot, however; this may be problematic if the flash is used [11]. In either case, the patient should not acknowledge the camera or photographer. For anterior images of the subject, it is best to ensure eyesight is directed into the camera. If the view is oblique or lateral, the patient should look at a set item in front of them [14].
11.3.9 Camera Settings
Most digital cameras, especially DSLR cameras, make it easy for users to manually choose camera settings. There are several key settings that clinicians should use and understand to ensure high-quality images: exposure, resolution, focus, white balance, orientation, and macro mode (as mentioned earlier). Exposure is the amount of light to reach the image sensor; it is a factor of the lens aperture and shutter speed. Exposure determines the image depth of field, brightness, and sharpness. The lens aperture controls the size of the lens opening, which determines how far objects in the image remain in focus (Fig. 11.3). Shutter speed controls the amount of time that light is allowed to pass to the image sensor, and determines motion blur. Since most photographs of patients are stationary, optimal settings would include a high aperture and slow shutter speed [11].
Resolution also affects the clarity and detail of an image. A digital image does not always appear the same on a computer screen or in print as it does on the small camera display. The best approach is to capture as much resolution as possible on the camera, and adjust, as needed, in the editing phase. Resolution is sometimes denoted as image size or quality in some camera menus [11]. The highest possible resolution should be used at all times.
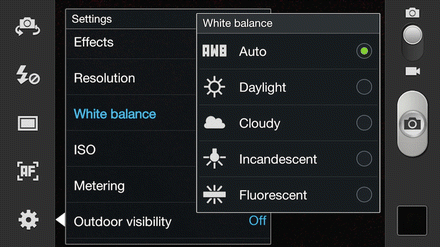
Another important feature is focus. Most cameras’ autofocus function is suitable for the purpose of taking medical photographs. One useful strategy is to make sure the object is in the focus box; press the shutter-release button midway and wait until the camera confirms the picture is in focus [11]. DSLR cameras allow significant ability to manually focus, and with practice this can add value to image quality. The white balance setting is adjusted based on the type of ambient lighting such as daylight, fluorescent, tungsten, cloudy, and of course auto is always an option (Fig. 11.9). Typically for photographs taken in patient rooms this setting should be set to fluorescent or tungsten. With practice, a custom preset option can be determined and saved [11].
11.3.10 Microscopes and Slides
Digital cameras can be effectively used with microscopes, and with old kodachrome slides. Microscopic analysis is commonly performed in daily dermatologic care for analysis of hair, Potassium Hydroxide preparations, Tzanck smears, and scabies smears. To capture digital photographs of these highly magnified images, PAS cameras must be used. The camera lens can be placed against the ocular lens of a microscope, and pictures can be taken using the same process described previously. It is best to disable the flash and use the camera’s autofocus [15]. A similar technique can be used to digitize old slides. Place the slides on a slide viewbox with background fluorescent lighting and take the pictures without flash. After transferring the images to editing software, crop the image so none of the slide mounts are visible [16].
11.4 Storing Photographs
11.4.1 Image File Types
Choosing an image file type is one of the first decisions when storing pictures. This decision should be made before the photograph is taken as some cameras allow the user to specify initial file type. The three main file types are Joint Photographic Expert Group (JPEG), Raw, and Tagged Image File Format (TIFF). JPEG is usually the default file type on all digital cameras. It is universal across different camera manufacturers but is a “lossy” file type, which means that information is compressed or lost each time the file is edited and saved. Similar pixels are grouped and saved as identical, which decreases the amount of necessary memory [9]. However, most cameras allow JPEG quality to be set prior to taking the photograph. Using the highest quality setting will yield a larger file size and more image information. The JPEG file type is adequate for storage, printing, though not universally accepted among publications.
RAW (or Raw) is not an acronym, and rather it is a noncompressed, or “lossless,” format taken directly from the digital sensor with no loss of image information. It is commonly available on DSLR cameras, though uncommon among PAS cameras [12


Stay updated, free articles. Join our Telegram channel

Full access? Get Clinical Tree


