(1)
Yotsuya Medical Cube, Chiyoda-ku, Tokyo, Japan
Basic Principles
- 1.
Clinical Principles of Thumb Reconstruction
Nail bed level amputation (nail matrix intact)
Volar flap + nail bed graft
Distal phalanx amputation (Including IP joint amputation)
Wrap-around flap (+ volar flap)
Basal phalanx amputation (distal to MP joint) Refer to Chap. 9
Great toe transfer
Twisted wrap-around flap (TWA) flap
Metacarpal level amputation (loss of MP joint)
Second toe transfer
Pollicization
Degloving injury
Twisted wrap-around flap (+ dorsal pedis flap)
Refer to Chap. 4
- 2.
Clinical Principles of Finger Reconstruction
Nail bed level amputation (nail matrix intact)
Split-thickness nail bed graft and digital artery flap (distal phalanx bone graft from second toe)
Vascularized nail bed graft (with bone)
Nail matrix graft
Wrap-around flap (+ volar flap)
Twisted wrap-around flap
Second toe transfer
Selectable Flaps and Surgical Procedures
Spilt-thickness nail bed graft and digital arterial flapVascularized nail bed graftWrap-around flapDigital arterial flap + partial toe transferTwisted wrap-around flapVenous nail graftToe transferThe difficulty level of each surgical procedure is shown subsequent to the procedure title (e.g., Level of Difficulty: 2). The levels range from 1 to 5, with level 1 indicating a preliminary level and level 5 indicating a very advanced level.
10.1 Split-Thickness Nail Bed Graft (Level of Difficulty: 1)
Information
Caution Start harvest from great toe, harvesting from center to the surrounding area so that a normal nail bed is retained. To avoid nail deformity, it is necessary to harvest from the toe tip. Harvest a thick split-thickness skin graft, making sure that it doesn’t become too thin. In the case that a full-thickness nail bed is required, harvest from the paronychium in accordance with the surgery method for ingrown toenails.
10.1.1 Operation Procedures
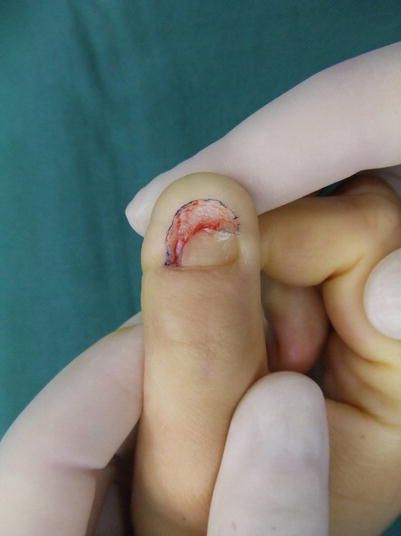
Fig. 10.1
Procedure 1: Thumb with nail bed defect
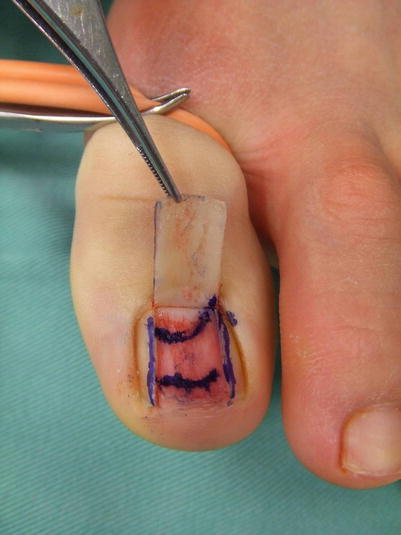
Fig. 10.2
Procedure 2: Leaving the bilateral paronychium intact, the center of the nail is cut and reflected. The required size nail bed is designed from the center of the donor nail bed
Note
Harvesting of the nail bed must be conducted from the center. If harvested from the toe tip the nail will not regenerate, causing it to become deformed.
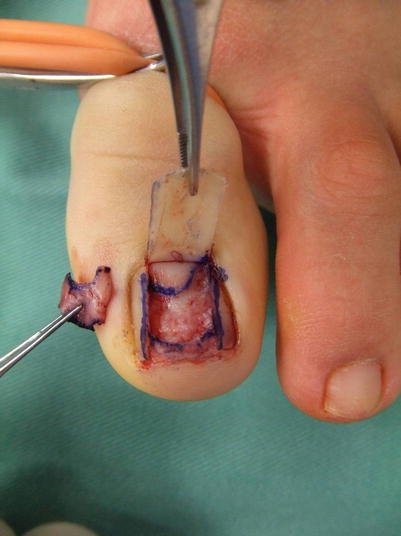
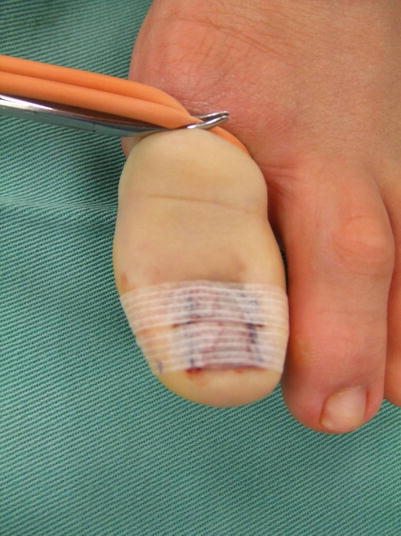
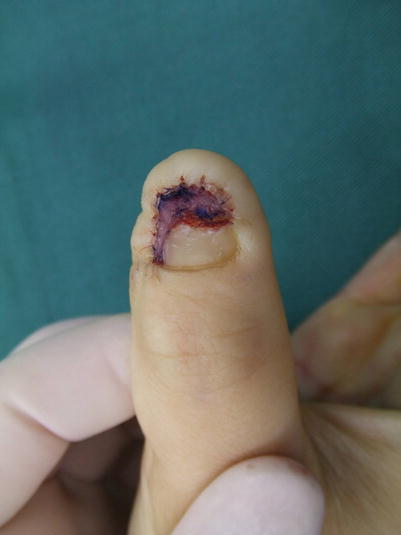
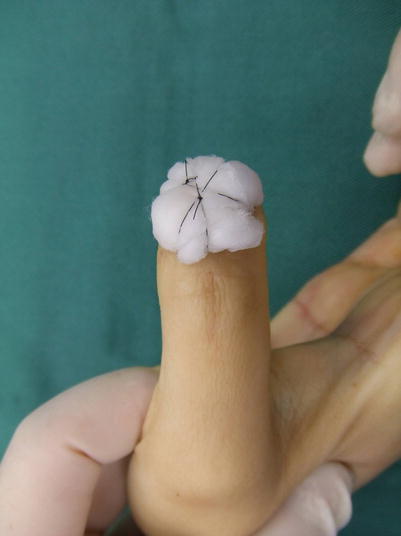
Fig. 10.3
Procedure 3: The nail bed is split using a No. 11 blade scalpel. It is possible to harvest a slightly thick section if the nail bed of the donor site is intact on all sides, and as long as the periosteum is not exposed
Fig. 10.4
Procedure 4: The reflected nail is returned to its original position and bandaged. This can be left as it is for 1 week. Shoes may be worn from the following day
Fig. 10.5
Procedure 5: Nail bed is sutured to surrounding area using fine absorbable suture thread
Fig. 10.6
Procedure 6: A tie-over bolster dressing is applied using a cotton ball
Tips
Once the nail bed takes, a dry crust gradually forms, which is replaced by a normal nail
The transplanted nail bed forms a dry crust as the nail grows, that eventually peels off and is replaced by a normal nail.
10.2 Split-Thickness Nail Bed Graft and Digital Arterial Flap (Graft-on Flap Method) (Level of Difficulty: 3)
Information
The most effective finger flap for combining with a nail bed graft in the case of a thumb, is a volar advancement flap, and in the case of a finger is either an oblique triangular flap or a reverse vascular pedicled digital arterial flap
10.2.1 Operation Procedures
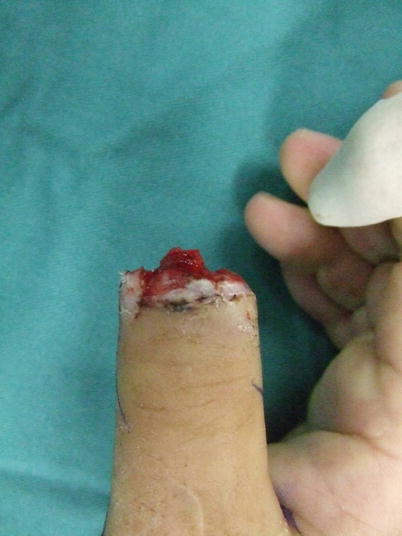
Fig. 10.7
Procedure 1: Amputated at base of nail bed of thumb. Nail matrix is intact. Loss of 1/3 of distal end of distal phalanx
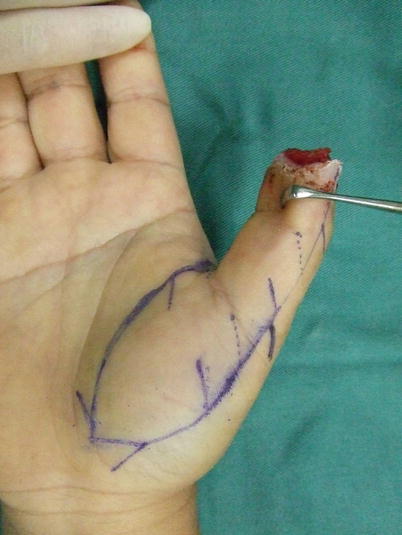
Fig. 10.8
Procedure 2: An extended volar advancement flap is designed all the way to the thenar region. A multiple Z plasty is added that cuts across the joint crease area
Note
The solid line in the photo represents the incision line, the dotted line represents the expected position after advancement of the flap, with Z plasty conducted based on these. Another Z plasty is added on the proximal end of the flap.
Refer to Section of10.1007/978-4-431-56045-6_8
“Reconstruction of distal finger area/Extended palmar flap advancement with V-Y and Z plasty” in Chap. 8
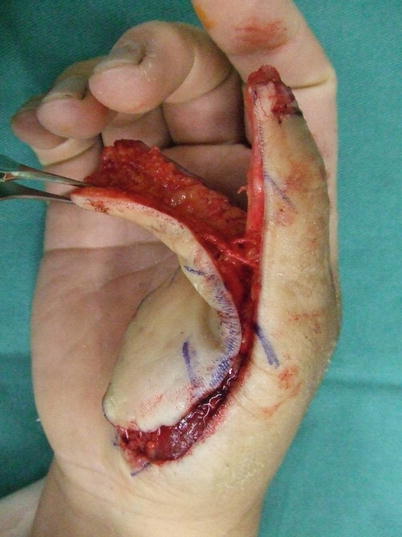
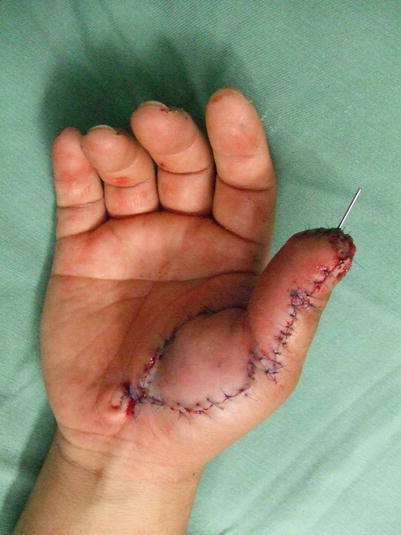
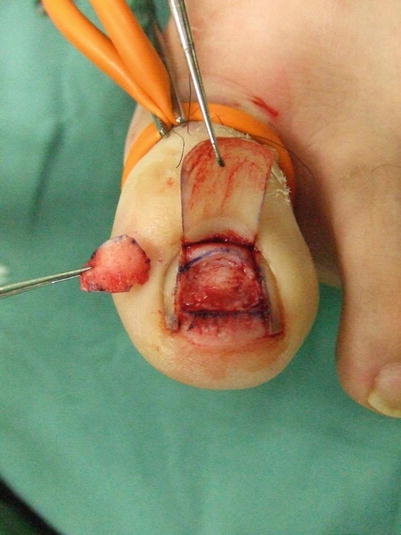
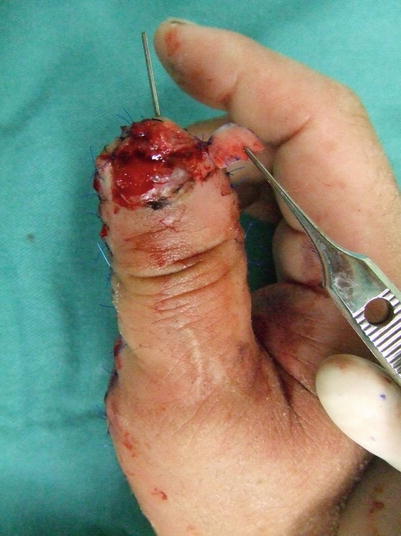
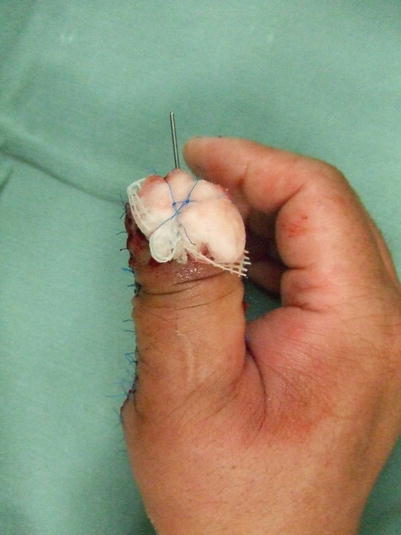
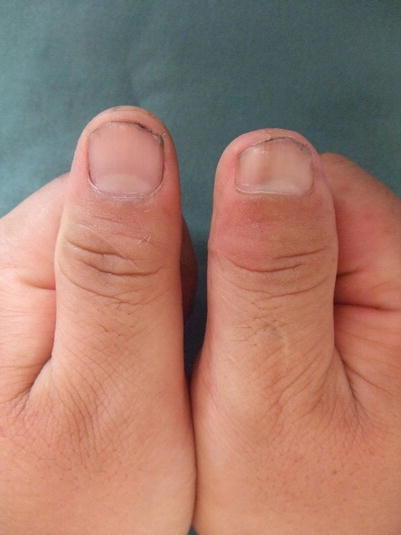
Fig. 10.9
Procedure 3: The flap margin is cut and dissected above the tendon sheath. Although not essential for the thumb, if it is possible to remain the dorsal branch from the digital artery, it should be retained
Fig. 10.10
Procedure 4: The flap is advanced and Z plasty conducted along the margin, with wire inserted from the fingertip, fixing the flap in place. At the tip of the flap, a suture is made with both sides rotated, creating a bulge at the finger tip from the resultant dog ear
Fig. 10.11
Procedure 5: The nail bed is harvested from the great toe
Fig. 10.12
Procedure 6: The harvested nail bed is transplanted onto the defect nail bed on the transferred flap and sutured using an absorbable suture thread
Fig. 10.13
Procedure 7: A tie-over bolster dressing is applied to the nail bed
Fig. 10.14
Procedure 8: Regeneration of the nail is observed over a 6 month period. The nail bed forms a dry crust and eventually peels off due to the formation of a normal nail. (Some photos reproduced from “Injuries to distal finger area and nail/Trauma Cosmetic Surgery” by Yuichi Hirase, edited by Masaki Ando, p.115–119, Kokuseido Publishing, Tokyo, 2007; “Injuries to distal finger area (6) Treatment Using Tissue Flaps” by Yuichi Hirase, MB Orthop 20: 81–87, 2007; “Reconstruction of distal finger area using Graft-on flap method” by Yuichi Hirase; The Japanese Journal of Plastic Surgery 50: 743–748, 2007)
Tips
Why is extended volar advancement flap the first choice for volar reconstruction of the thumb?
For advancement flap of other fingers, the vascular pedicle runs parallel with the movement direction of the flap and expansion of the blood vessel is limited. In the case of an extended volar advancement flap, the vascular pedicle enters from the lateral ulnar side of the flap, so there is little expansion of the vascular pedicle due to advancement of the flap. Therefore, the larger the flap, the greater the range of coverage from the stretching of the flap, and if a VY plasty is conducted on the base flap, the flap movement distance as an island flap increases considerably. If a VY plasty is conducted on an extended volar advancement flap, it is possible for the flap to move 3 cm.
Related posts:


Stay updated, free articles. Join our Telegram channel

Full access? Get Clinical Tree


